background image

146

Back Panel

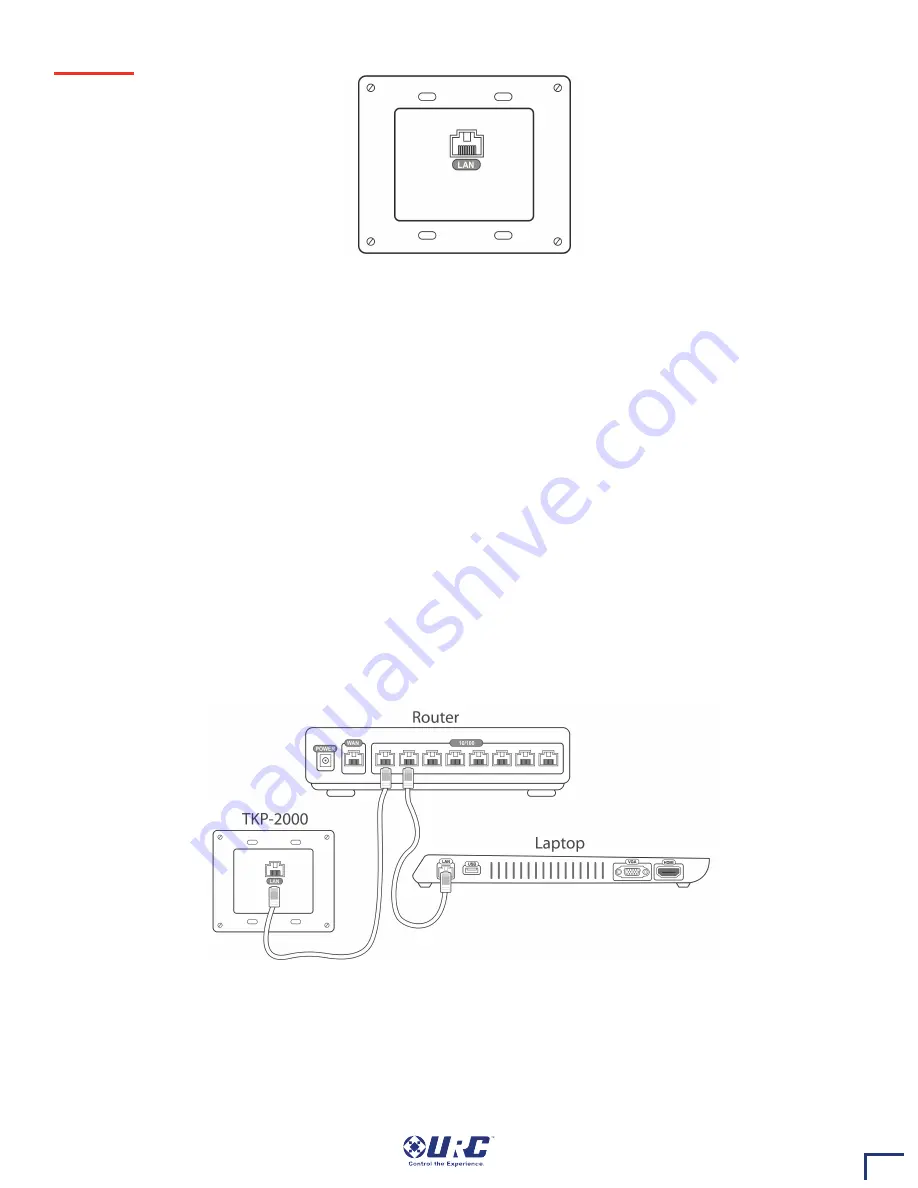
The rear of the TKP-2000 simply houses the RJ-45 Ethernet jack.

Ethernet Port:

Allows connection to the network. Requires 24V via PoE.

Physical Installation of the TKP-2000 and Accessories

The TKP-2000 In-Wall Touch-Screen is connected to the network using a single Cat5 Ethernet wire with POE. It

is installed into a standard two-gang box or low voltage ring using the included 6/32 mounting screws. The

button caps are installed under the bracket by first removing the bracket screws, placing the caps on the

buttons, and then replacing the bracket. Finally, the cover simply snaps over the top using magnets in the

cover.

Network Installation

1.

Connect an Ethernet cable (RJ45) from the network to the rear of the TKP-2000.

2. 

Connect your laptop into the same network router as the TKP-2000.

3. 

In the Accelerator software, use the Discover feature to locate the TKP-2000 on the Network.

Summary of Contents for TKP-2000

Page 1: ... pathway the TKP 2000 allows System Zone and Device control by issuing commands to a URC MRX 10 This then sends the control codes to the proper equipment These commands can be relayed to the equipment using IR RS 232 or IP signals Lighting control can be provided by adding an RFTX 1 at the RFTX 1 port on the MRX 10 or else in IR port 6 on an MRX 1 Two way control modules programmed in the system w...

Page 2: ...ressed Mounting Holes Four standard Double gang spaced mounting holes Color Touch screen 2 5 color touch screen Laser etched Buttons 6 Three buttons on each side of the touch screen Standard button caps use the default configuration but can be exchanged for custom buttons The file needs to be custom programmed to reflect any change of button labels Button Bracket Bracket holds the button caps in plac...

Page 3: ...ang box or low voltage ring using the included 6 32 mounting screws The button caps are installed under the bracket by first removing the bracket screws placing the caps on the buttons and then replacing the bracket Finally the cover simply snaps over the top using magnets in the cover Network Installation 1 Connect an Ethernet cable RJ45 from the network to the rear of the TKP 2000 2 Connect your ...

Page 4: ...the cover plate Installing the TKP 2000 Connect the Ethernet wire to the RJ 45 port on the back of the TKP 2000 Feed the wire into the box or wall until the touchscreen is flush with the wall Using the included 6 32 mounting screws in the mount ing holes attach the touchscreen to the box making sure that it is level If the button caps are being changed unscrew the button cap bracket and remove it ...

Page 5: ...ou do the screen will change to the SETTINGS screen This provides access to the Onscreen configuration Menu and allows control over the Sleep Settings Button Light on timing setting or adjusting the Date and Time loudness of any Sounds programmed Brightness of the screen System parameters Network settings and resetting the unit back to its Factory Default settings If you do not press any button on ...

Page 6: ...y the date or time on the touch screen If you need to you can adjust the time displayed by changing the settings on this screen If you live in a part of the country that uses daylight savings time check the box next to Automatically adjust clock for Daylight Saving Time Sound Your TKP 2000 may have been programmed to make sounds This is optional and some professional installers may prefer to keep ...

Page 7: ...tc Network The Network screen displays network information about your TKP 2000 and the network it is connected to Factory Default WARNING Only use this button when instructed to by Technical Support It resets the memory of the TKP 2000 to the factory condition All your programming will be lost Exit When you have finished adjusting Settings simply tap the EXIT button to return to normal operation ...

Reviews: