Chapter 2: Using your System
13
Initial View (Room Monitoring)
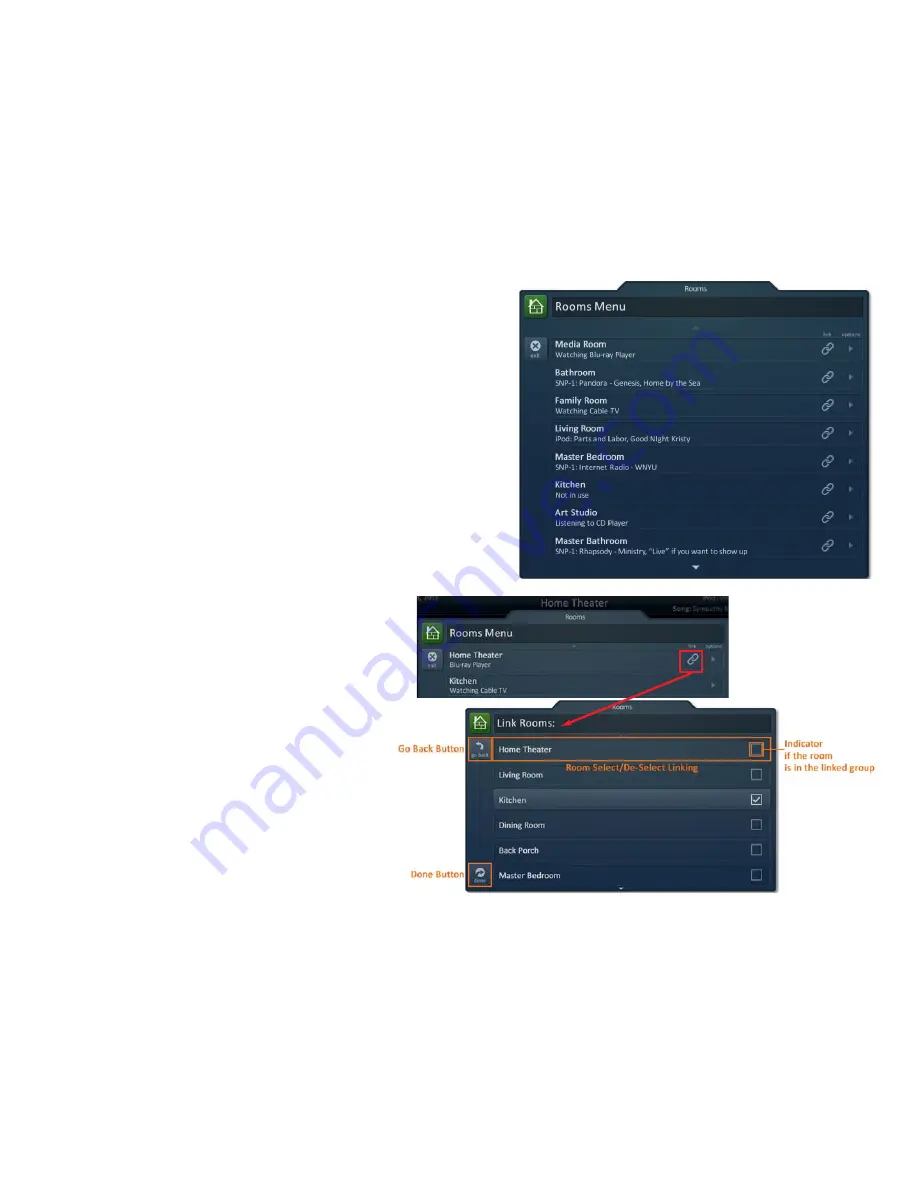
When the
Rooms Menu
opens up, the room list populates with all of the
rooms in the Total Control project. Each room displays its status so the user
can visually see what is “going on” in a specific location.
Selecting a Room (Room Control)
Selecting any room from the room list will allow the MRX-20
to control that room, as if it were physically in that location.
Returning the MRX-20 to control the room where it is physically located
requires accessing the Rooms Menu and selecting the appropriate room.
Linking Rooms (DMS Audio only)
Selecting the
Link Rooms
button will open up the Link
Rooms screen with the current room already selected. Only
rooms/areas that are part of the DMS family of products will
appear.
• Select, using the
check boxes
, the rooms that you
would like to LINK. Pressing the check box will
alternately “check” and“uncheck” it.
• The
Go Back
button will cause the screen to revert
to the
Room Menu
without making any changes.
• The
Done
button will temporarily save the checked
rooms as a
linked group
that can be controlled
from any of the linked rooms.
Linked rooms are saved until the power is turned OFF, or
the user manually unlinks the room(s).


