9/1/2013
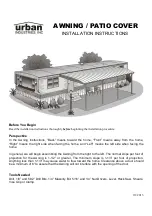
AWNING / PATIO COVER
INSTALLATION INSTRUCTIONS
Before You Begin
Read the installation instructions thoroughly before beginning the installation procedure.
Perspective
In the Awning Instructions, “Back” means toward the home, “Front” means away from the home,
“Right” means the right side when facing the home, and “Left” means the left side when facing the
home.
In general, we will begin assembling the Awning from the right to the left. The normal slope per foot of
projection for the Awning is 1-1/2” or greater. The minimum slope is 1-1/3” per foot of projection.
Anything less than 1-1/3” may cause water to flow toward the home. Clearance above a door should
be a minimum of 6” to assure that the Awning will not interfere with the opening of the door.
Tools Needed
Drill, 1/8” and 5/32” Drill Bits, 1/4” Masonry Bit, 5/16” and 1/4” Nut Drivers, Level, Hack Saw, Shears,
Vise Grip or Clamp.


