


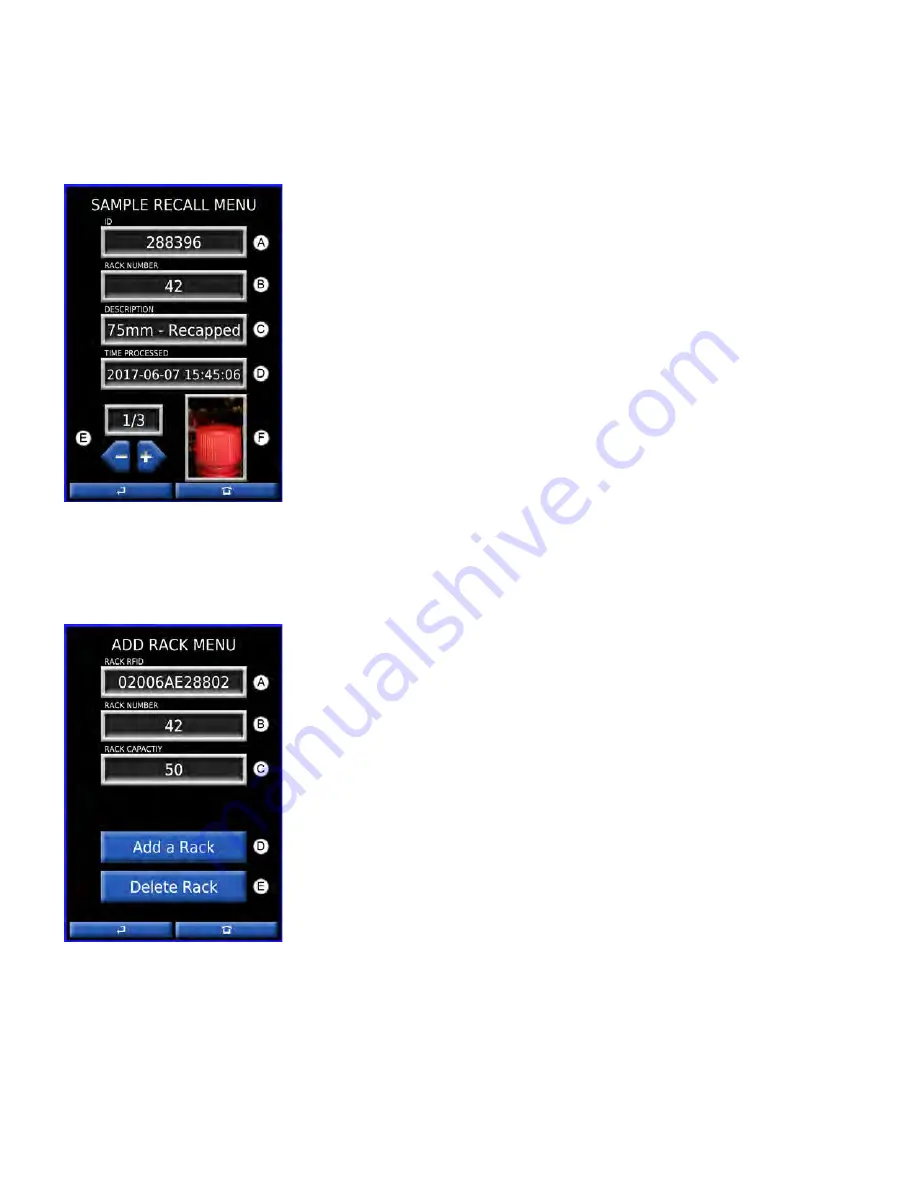
Sample Recall
To locate a sample after processing, press ‘DATABASE” followed by “Sample Recall”. This will take you into
the sample recall screen where you can enter the sample’s barcode.
A
: The barcode ID of the sample you wish to locate is
entered here. Tap the text box to open a keyboard.
B
: The Rack’s identification number will appear in this box
once the sample has been found in the system’s database.
C
: The sample’s size in millimeters will appear in this box, as
well as whether or not the Cap Track had recapped this
sample.
D
: The time that the sample was processed by the cap track
will appear in this box.
E
: This box displays how many samples are found in the
database with the same barcode ID. The arrows below allow
you to cycle through the different samples.
F
: An image of the sample’s cap will appear in this box.
Adding Racks
The “Add a Rack” screen can be found under “DATABASE”, and is used to add new racks to the system.
A
: The Rack’s RFID tag code for the rack will go here.
Tapping the box will prompt you to push up a rack just like
you were running the machine, and then automatically enter
the tag code.
B
: The Rack’s identification number is entered here.
C
: The number of samples a rack can hold is entered here.
The system will use this to know when to ask for a new rack
while running.
D
: Pressing this will add the rack to the system once all fields
are filled.
E
: If a rack with the same RFID or number already exists, the
system will reveal this button after “Add a Rack” has been
pressed. This requires a manager password, and will
permanently and irretrievably remove all data relevant to
both the RFID and the rack number. Once removed, you will
be free to add the rack as expected.
6


