Uniss SR601 Operation Instructions Manual Download Page 7

Operation manual of solar water controller SR601 

-------------------------------------------------------------------------------------------------- 


~ 6 ~ 

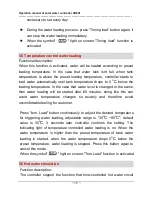
2.3 Terminal connection  


Before to open the terminal, please be sure to switch-off the 
power supplier and pay attention to the local electricity supply 
rules.  


Terminal Layout. 


Power Connection 
1.  Please note the 

type of power 
supply required 
from the type 
plate on the 
case of the 
device 

2.  The protective 

conductor

GND

which 

two colors must 
be connected 
also. 


Inputs:  
T, 1&2&3 
 
1.Port T: 
Temperature sensor 
for heating 
cable(NTC10K) 
 
2.Water level and 
temperature sensor 
input: 
1)If silicon-
sensor(B01 or B02) 
was connected on 
Port1:  
connect red wire 
Port2:  
connect white wire 
Port3:  
connect black wire 
2)If ion-sensor(B03) 
was connected on 
Port1:  

Outputs: 
 
P1,P2, R1 
 
1.Output P1: 
Electromagnetic relay, for 
pressure increasing 
pump, max. switching 
current: 5A 
2.Output P2: 
electromagnetic relay, 
maximal switching 
current: 5A , P2 is used 
for electrical heating cable 
3.Output R1: for 
electromagnetic vale of 
loading water ,  
outlet voltage:DC12V  


Summary of Contents for SR601

Page 1: ...Contents Contents 1 1 Safety information 3 1 1 Installation and commissioning 3...

Page 2: ...omagnetic valve 7 2 4 1 Faults checking of electromagnetic valve 8 2 5 Installation of water level and temperature sensor 9 2 5 1Installation of Silico Sensor 9 2 5 2 Installation of underside positio...

Page 3: ...oading 15 5 6 Hot water circulation 15 5 7 Insulation by Tem controlled 16 5 8 Insulation by time controlled 17 6 Protection Function 18 6 1 Collector high temperature protection 18 6 2 Low water pres...

Page 4: ...tor the compliance with these instructions or the circumstances and methods used for installation operation utilization and maintenance of this controller Improper installation can cause damages to ma...

Page 5: ...2 Installation 2 1 Installing the controller Note the controller can only be installed in an area having an adequate level of protection Fixing the hang panel of controller Choose a suitable site Mark...

Page 6: ...pending on the type of installation the cables may enter the device through the rear hole of the case or the lower side hole of the case Cable come from the rear remove the plastic flaps from the rear...

Page 7: ...must be connected also Inputs T 1 2 3 1 Port T Temperature sensor for heating cable NTC10K 2 Water level and temperature sensor input 1 If silicon sensor B01 or B02 was connected on Port1 connect red...

Page 8: ...arked on the body of electromagnetic valve Electromagnetic should be installed in the place where is easy to maintain and does not bring other lose please take measures for anti freezing anti sunburn...

Page 9: ...Whether wire coil of electromagnetic valve has power Measure the resistance with Ohmmeter Change wire coil or change valve if necessary Operation voltage is unstable Measure voltage Change input powe...

Page 10: ...water level and temperature sensor 2 5 1 Installation of Silico Sensor Insert silicon sensor into overflow outlet of solar tank Tighten the sensor screw Temperature sensor wires connection Red wire co...

Page 11: ...ide positioned sensor has 2 ways of installation one is upward installed at the collector pipe hole one is upward installed at the bottom of water tank see picture diameter of 47mm and 57mm installed...

Page 12: ...ration manual of solar water controller SR601 11 3 Introduction of solar system Description this system is water and collector integrated solar water system it is easy for mounting and efficiency is h...

Page 13: ...ction of display illustration 4 1 Screen display instruction 4 2 Code instruction Code Code explanation E0 Connection cable between controller and sensor fault E4 Collector pipe high temperature prote...

Page 14: ...or at 50 or 80 position 10 minutes later it starts to load water but in the case when man is using water water level is changing it starts to load water 60 minutes later When water temperature is lowe...

Page 15: ...ding Functional description Timing load button is used to set the time for triggering the water loading Press Timing load button continuously to set the desired time for triggering water loading adjus...

Page 16: ...same then water loading will be started after 60 minutes doing like this can avoid water temperature changes so acutely and therefore avoid uncomfortable feeling for customer Press tem Load button co...

Page 17: ...1o C activate the accompany electrical heating cable P2 When test the temperature T on the pipeline more than turning on temperature 5o C deactivate the accompany electrical heating cable P2 For examp...

Page 18: ...ot adjustable and then stops for 30minutes can adjustable this process repeats Doing like this can save electricity prolong the lifetime of heating wire and avoid fire accident which caused by aging e...

Page 19: ...breaking collector pipe which caused by large temperature difference 6 2 Low water pressure protection Functional description During the water loading mode because of low water pressure or no water f...

Page 20: ...re measuring 0 99 o C Range of temperature display 0 99 o C Can connect loading pump 1pc 600W Can connect electrical heating cable 1pc 800W Ambient temperature 10o C 50o C Water proof grade IP41 Socke...

Page 21: ...r will exclude the failure caused by production and material selection A correct installation will not lead to failure When a user takes incorrect handling way incorrect installation improper or crud...

Reviews: