23
HANDWHEEL (CONT.)
1.
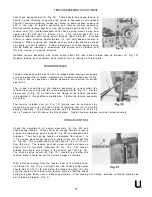
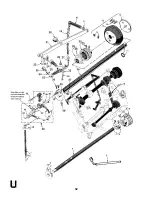
Using the upper main shaft as a mandrel, assemble the pulley thrust face down so that at least 1 1/2
inches of the shaft protrudes above it. Tighten the two set screws.
2.
Place the rubber isolator ring on the pulley face and align holes.
3.
Carefully slide handwheel down the shaft to contact the isolator and align the three holes.
4.
Three plastic "O" rings are now inserted into their respective holes in the handwheel.
5.
The outer isolator rings and cap are assembled.
6.
Insert the three screws that are run through the complete assembly and tighten lightly.
7.
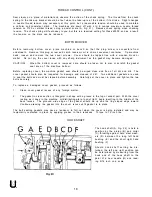
Loosen the two pulley screws and slowly revolve the whole assembly several times for good alignment.
Now, gradually tighten the three screws, moving from one to the other until all are snug.
8.
The assembly should run true as it revolves freely on the shaft. If any sidewise run-out is noted, it can
be corrected by slight changes of screw pressure in the three isolator screws.
CAUTION! When replacing the handwheel assembly on the main shaft, care must be taken not to
damage the oil seal located near the end of the shaft. The surface of the ring should be lightly oiled
and the handwheel worked over the seal gently.
ATTACHMENTS
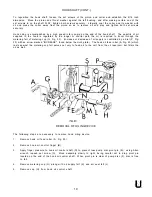
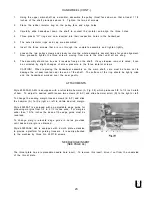
Style 63900AM, AML is equipped with a retractable hemmer (A, Fig. 28) which produces 3/8 to 1/2 inch width
of hem. To adjust to desired width loosen two screws (B & C) and slide hemmer scroll (D) to the right or left.
To change the sewing margin loosen screws (E & F) and slide
the hemmer (A) to the right or left to obtain desired margin.
Style 63900AT is equipped with an adjustable edge guide for
producing margins from 1/2 to 2 1/2 inches wide. For margins
wider than 1 5/16 inches the base of the edge guide must be
reversed.
To change margin relocate edge guide in holes provided
until desired margin is obtained.
Style 63900AAE, AW is equipped with a cloth plate extension
to provide a platform for guiding trousers. It is easily attached
to the machine by three No. 22517B screws.
NEEDLE HOLE INSERT
(SEE PAGE 44)
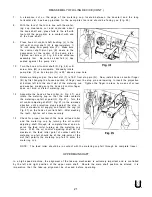
The throat plate has a replaceable needle hole insert. To remove this insert, drive it out from the underside
of the throat plate.


