14
TIMING THE NEEDLE FEED WITH THE CONTINUOUS TURNING ROLLER FEED
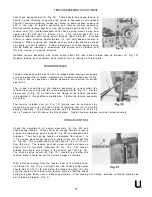
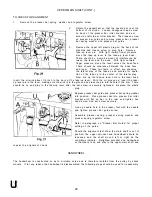
Open top cover (A, Fig. 12) in the head of the machine and loosen needle
frame drive segment locking nut (B). Set connection stud (C) to point of
maximum number of stitches per inch of needle feed. This would locate the
connecting arm at letter "S".
Loosen two set screws on the needle frame drive eccentric (D). Rotate the
handwheel until the needle bar is at the bottom of its stroke. Rotate the
eccentric only, until the timing line (2) on the connecting arm and the
eccentric hub coincide. Tighten all screws, on every thick seams that
cause thread breakage advance needle feed timing slightly.
Rotate handwheel until the needle bar is at bottom of its stroke. The needle
bar should be vertical. If it is not, loosen clamp screw (F) and move needle
bar frame forward and backward until bar is vertical. Tighten screw,
making sure allside play is removed from between the needle bar frame
and the segment.
To set needle feed with roller feed loosen needle frame drive segment
locking nut. Set connection toward higher designated letter on segment
for approximate setting. Vary the needle travel so as to obtain the least
amount of needle deflection when the needle enters or leaves the thickest
section to be sewn.
PRESSURE ON MATERIAL
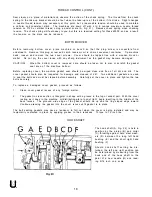
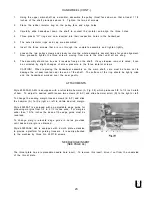
The presser spring (A, Fig. 17) should exert only enough pressure on the feed
rollers to make the work feed uniformly. To increase the pressure on the
preser foot, turn presser spring regulator (B, Fig. 17) in a clockwise direction.
Turning the regulator counterclockwise decreases the pressure.
SETTING THE NEEDLE BAR TO HEIGHT
The three lines engraved on the needle bar are used in setting needle
bar to height, and are referred to as TIMING LINES.
Th middle and lower lines are used for Styles 63900M, T, and W. For
63900AM, AML, AAE, AT and AW the upper and middle lines are used.
When the needle bar is at its lowest position the upper timing line (B, Fig.
13) should be EVEN with the lower edge of the lower needle bar frame
( A ) .
To change the position of the needle bar, turn handwheel until the bar
is at its lowest position. Then, loosen the clamp screw (C) and move the
bar to the proper timing line. Keeping the needle bar line at its lowest
position, tighten the screw securely.


