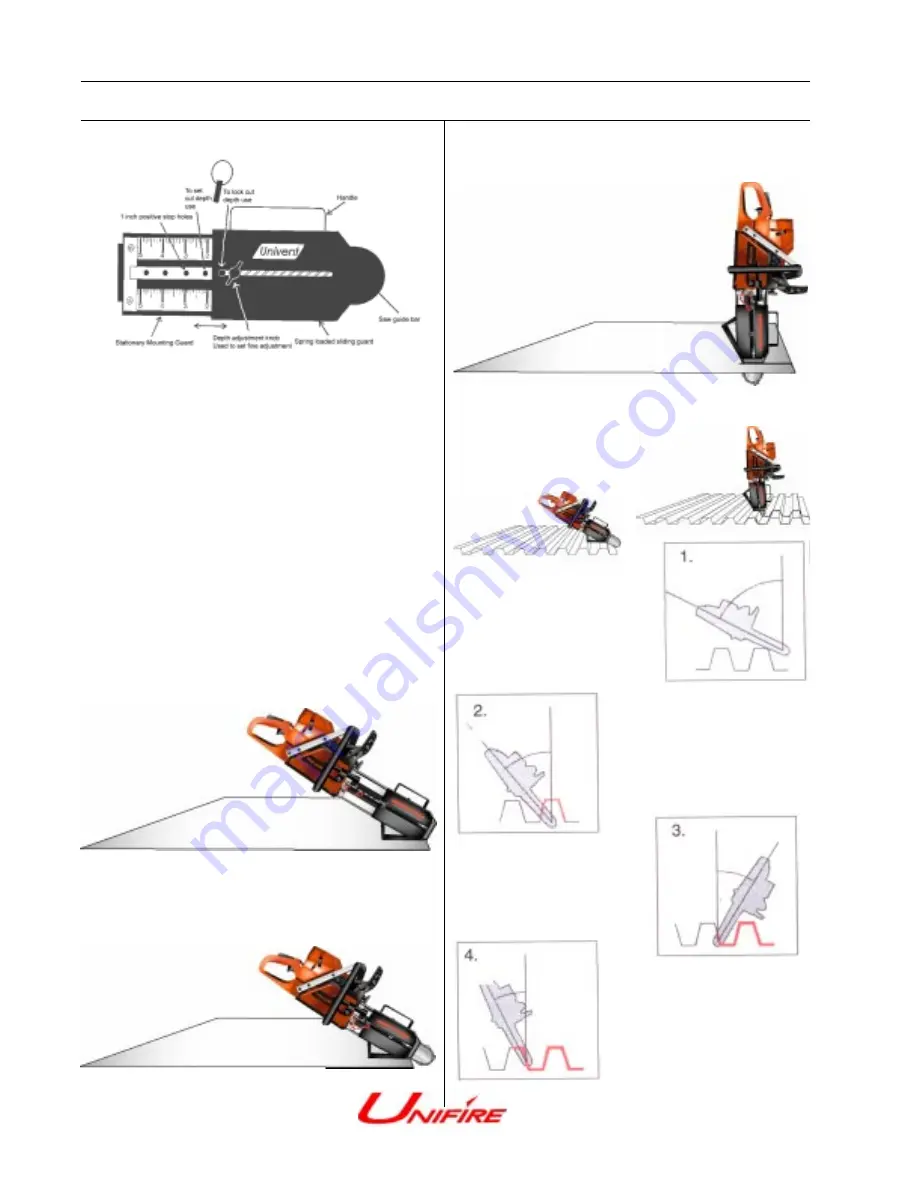
Depth Guage Instructions
Depth Guage Instructions
1. Using the positive stop pin set your cut depth and
lock into position.
2. Position saw at a 30 degree angle. (This angle is
preset on your depth guage.)
3. For a standard cut push saw bar and chain into
cut area, the guage will automatically slide back to
your predetermined cut depth.
4. Once the cut has been started move saw to a 90
degree angle to achieve a precise cut at desired
depth.
The depth guage is spring loaded. For a standard
cut, simply push saw bar and chain into cut area, the
guage will automatically slide back. When the saw is
pulled out of the cut then the depth guage automati-
cally springs forward to cover the bar and chain.
The pin can be positioned in a hole to set a plunge
depth or can be set in a locked position to hold a
specified cutting depth.
Application
1. Position saw at a 30 degree
angle, at the highest point.
2.Continue following the line of
the roof, maintaining the same
pattern.
Corrugated Roofs
3.Tilt saw to maintain the
angle in relation to the saw
and cutting surface.
3.Always maintain the angle
which is determined by the
surface angle.
Page 9


