background image

Main Unit

Four Telephone
Line Cords

AC Adaptor

User’s Manual

The following are the components included when you purchase Uniden’s UPBX416.

Should any of the above items be missing, please contact the sales office where it was
purchased.

Included in your UPBX416 Package

Standard extras include:

- Diskette
- 9 Pin Serial Cable
- Consumer support card

3

MANUAL

USER’S

Powerful, Automated

Telecommunications

Command System

for Small Office / Home Office

416

UPBX

Summary of Contents for UPBX 416

Page 1: ...MANUAL USER S Powerful Automated Telecommunications Command System for Small Office Home Office 416 UPBX...

Page 2: ......

Page 3: ...Time and Week Recording System OGMs Auto Attendant Managing Own Voice Mail Box Recording System OGMs Out Going Messages 10 Checking System OGMs Out Going Messages Setting Number of Rings Music On Hold...

Page 4: ...ls Adjusting the Maximum Recording Length of ICM and OGM Selecting Printout for SMDR Extension Message Detail Recording Emergency Code Free Station Maximum Digit Restriction Dial Restriction Assigning...

Page 5: ...ration Tab Under the Dial restriction Free Tab Under the Exchanger Setting Tab Initialising the System Downloading the Firmware Code Checking the Firmware Version Managing the SMDR Station Message Det...

Page 6: ...shock do not disassemble this unit but take it to a qualified service person when service or repair work is required Opening or removing the cover may expose you to dangerous voltages or other risks I...

Page 7: ...to another both internally and externally make an intercom call conference call call forward to both inside and outside call restriction call pick up anywhere as well as many more features The voice m...

Page 8: ...den s UPBX416 Should any of the above items be missing please contact the sales office where it was purchased Included in your UPBX416 Package Standard extras include Diskette 9 Pin Serial Cable Consu...

Page 9: ...o change System OGMs Do you want to assign all 4 C O Lines for telephone call Set Time and Date see Page 8 FINISH YES NO NO YES See page7 Disable Unused C O Lines See page 9 Recording System OGMs Chec...

Page 10: ...phone line cords into line sockets on the back of the unit and connect the other end of the telephone line cord into the wall jack Connecting Telephone Lines to Extensions Connect telephone line cords...

Page 11: ...cal exchange telephone service for a given geographical area Central office line is the telephone line that is connected to the telephone company s central office 2 C O Lines C O 1 C O 4 are the incom...

Page 12: ...when disabled 7...

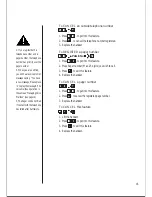
Page 13: ...8 1 Lift the handset the dial tone is heard in the receiver 2 Press to check the time and week 5 9 3 Listen to the message 4 Replace the handset To Check Time and Week Operation 5 9 Listening...

Page 14: ...ges and information about the station numbers exchange service messages Default messages are already recorded in the unit Record these again if you want to change the messages System OGMs are changed...

Page 15: ...ng System OGM mode 4 Press to select OGM number means OGM number i e 1 OGM 1 5 OGM 5 5 Record your new message after listening to the system announcement Please record your message after the beep and...

Page 16: ...instead of to select your recorded message again 7 1 to N S 7 1 to 3 7 N Checking S 3 7 1 7 Setting Number of Rings You can set the number of times an incoming call will ring before the answerphone ta...

Page 17: ...r private 2 digit number 5 Replace the handset Recording Station OGM This system can record up to 40 minutes of incoming messages ICMs and outgoing messages OGMs At each station ICMs and OGMs can be r...

Page 18: ...ephone You can check your own station ICMs from a local telephone when you come back to your office When there are messages in your voice mailbox you can check through LED on off as well as a differen...

Page 19: ...e listening to the current ICM Press to skip the current ICM and to play the next ICM while listening the the current ICM Press to stop ICM or to exit from mailbox Press to erase the current message w...

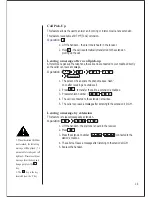
Page 20: ...eiver 2 Press to enable this feature 3 Press to exit this feature two short dial tones confirm 4 Replace the handset Call Notification Call Paging If you set your station in the unattended mode you wi...

Page 21: ...pts To CANCEL an outside telephone number 1 Press to get into this feature 2 Press to cancel the telephone number registered 3 Replace the handset To REGISTER a pager number 1 Press to get into this f...

Page 22: ...e receiver 2 Press dial tone stops 3 Press to choose line 1 4 C O 1 C O 4 for an out going call 4 Press the telephone number you wish to call Call Transfer You can transfer an outside call or an inter...

Page 23: ...ension s mailbox 3 Press extension number 4 The call is connected to the extension s mailbox 5 The caller can leave a message after listening to the extension s OGM Leaving a message by extension This...

Page 24: ...andset the remaining two parties can still talk Extension C O Line Callback When a busy extension or a C O line becomes available the system notifies your extension Operation 1 Lift the handset 2 Pres...

Page 25: ...call needs to be transferred to another extension follow the step described in Call Transfer page 17 5 1 or 2 seconds later a ring will be heard from the on hold caller Lift the handset to connect if...

Page 26: ...minutes At the end of 3 minutes you will hear a voice prompt Please press the pound key to extend your call If you wish to extend the call for more than 3 minutes press the key after the voice announ...

Page 27: ...To CANCEL this feature 1 Lift the handset 2 Press to get into this feature 3 Press to exit this feature 4 Replace the handset 6 6 6 6 22...

Page 28: ...ss to exit this feature 5 Replace the handset System Memory Dial Input Out This feature allows you fast and convenient dialling of telephone numbers stored in the system All extensions have access to...

Page 29: ...et into this feature 3 Press Memory Dial No e g To CANCEL 1 Lift the handset 2 Press to input memory dial 3 Press Memory Dial No e g 4 Press to exit this feature 5 Replace the handset 6 1 4 9 1 0 6 1...

Page 30: ...e receiver 2 Press to enable this feature 3 Press to exit this feature a long dial tone confirms 4 Replace the handset To CANCEL Business Hour setting 1 Lift the handset connected to extension 200 the...

Page 31: ...Press telephone number to be called If you want to leave the extension number press for PAUSE plus the extension number after entering the telephone number 5 Press to exit this feature 6 Replace the h...

Page 32: ...t the handset connected to Ext 200 the dial tone is heard in the receiver 3 Press to enter the Attendant mode 4 Press to set the Auto Attendant mode you will hear one long dial tone 5 Replace the hand...

Page 33: ...Mode 2 Press on the corresponding extension long tone confirms To CANCEL the Attendant Telephone 1 Press on the corresponding extension two short tones confirm N S Hook On and Off 3 6 3 6 8 6 8 6 N 8...

Page 34: ...eiver 3 Press to enter the feature 4 Press to enter the code number max 3 codes 5 Press max 4 digits eg 1626 or 0118 etc 6 Press to set 7 Replace the handset 8 Set the MODE Switch on the right side of...

Page 35: ...e code number 6 Press to set 7 Replace the handset 8 Set the MODE Switch on the right side of the unit to Business Hour Mode To DISABLE station COS code restriction 1 Set the MODE Switch on the right...

Page 36: ...to enter the max digit number max 99 digits 6 Replace the handset 7 Set the MODE Switch on the right side of the unit to Business Hour Mode To FREE station max digit restriction 1 Set the MODE Switch...

Reviews: