background image

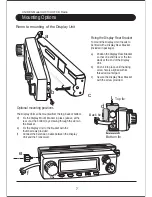
Fixing the Display Rear Bracket

To mount the Display Unit it needs to

be fitted with a Display Rear Bracket

(included in package).

a) 

Position the Display Rear Bracket
so that one end fits over the two 

studs at the end of the Display 

Unit.

b) 

Push it into place until the fixing 

screw hole is aligned with its 

threaded counterpart.

c) 

Secure the Display Rear Bracket

with the screw provided.

Optional mounting positions

The Display Unit can be mounted from the top, back or bottom.
d)

Fix the Display Mount Bracket in place (above, at the 

rear or at the bottom) by screwing through the slots in 

the bracket.

e)

Fix the Display Unit to the bracket with the 

thumb screws provided.

f)

Connect the Extension Cable between the Display 

Unit and the Transceiver.

d

Top fix

Back fix

Bottom fix

7

Remote mounting of the Display Unit

UNIDEN Model UH013 UHF CB Radio

Mounting Options

a

b

c

VOL

SRCH

TSQ

SCAN

OS/GS

MEM

INST

SET/SKIP

DUP

CTCSS

SLCT

STORE

UH013

SQT

e

f

Summary of Contents for UH013

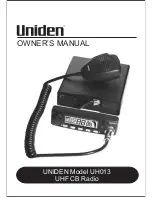
Page 1: ...OWNER S MANUAL UNIDEN Model UH013 UHF CB Radio...

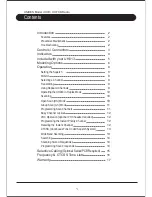
Page 2: ...10 Open Scan OS Mode 10 Group Scan GS Mode 11 Programming Scan Channels 11 Busy Channel Lockout 12 VOX Operation optional VOX headset required 12 Programming the Instant Priority Channel 12 Recalling...

Page 3: ...Built in CTCSS codes Volume Control with Power On Off Switch VOX Voice Activated Function optional VOX headset required 9 Step VOX Mic sensitivity adjustment Memory backup if power fails Optional Ton...

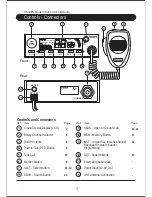
Page 4: ...en or Group Scan MEM Memory Button INST Instant Set Instant Channel Recall and Instant Channel Programming SQT Squelch Mode External Speaker Jack Power Input 13 8V DC UHF Antenna Connection Controls a...

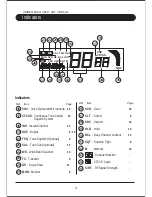
Page 5: ...oded Squelch System INS Instant Channel DUP Duplex TSQ Tone Squelch Optional CAL Tone Call Optional WS Wide Band Scanner TX Transmit GS Group Scan MON Monitor Indicators 16 17 18 19 20 21 26 27 28 29...

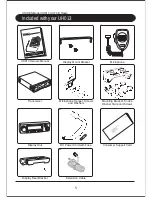
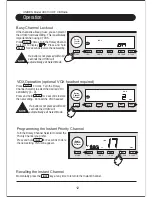
Page 6: ...hone Consumer Support Card Unid en Australia Pty Lim ited Attn Service Division 345 Princes Highway Rockdale NSW 2216 AUSTRALIA AFFIX STAMP HERE Mounting Bracket Knobs Washer Stars and Screws Transcei...

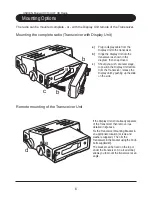
Page 7: ...hen snap closed c Should you wish at a later stage to position the Display Unit remote from the Transceiver release the Display Unit by pushing up the slide on the side If the Display Unit is not alre...

Page 8: ...screw provided Optional mounting positions The Display Unit can be mounted from the top back or bottom d Fix the Display Mount Bracket in place above at the rear or at the bottom by screwing through t...

Page 9: ...weak medium and strong signals and noise By setting the squelch to threshold it blocks out all weak signals and noise and allows only the required medium and stronger signals to pass through Strong n...

Page 10: ...ect caused by solid obstructions In normal Simplex operation your radio transmits on one particular frequency and receives on that same frequency If there is a barrier that partially blocks your trans...

Page 11: ...el is found scanning will stop on that channel This example shows CH40 active If the received signal ceases the unit will wait 3 seconds for the signal to return otherwise scanning resumes To skip the...

Page 12: ...channel you want to store Press to store M icon appears and a short tone beep is heard To remove the channel from Memory press once more The M icon disappears MEM MEM S RF Rotary Channel Selector SCAN...

Page 13: ...ity 1 9 Press and hold for 2 seconds to store the new setting Connect the VOX headset SLCT SLCT VOX Operation optional VOX headset required Rotary Channel Selector S RF Turn the Rotary Channel Selecto...

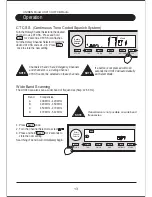
Page 14: ...NST CTCSS SET SKIP SCAN MEM SRCH DUP OS GS TSQ CTCSS SQT MHz SQT SQT Wide Band Scanning The UH013 can also scan a wider band of frequencies Step 12 5 KHz Band Frequencies A 400 MHz 420 MHz B 420 MHz 4...

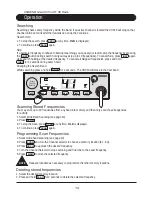
Page 15: ...urn the Channel selector to choose a memory location 41 80 3 Press to approach the desired frequency 4 Turn the Channel Selector to stop searching and fine tune to the exact frequency 5 Press to store...

Page 16: ...ne Squelch When activated it automatically mutes the receiver audio circuit of the radio It will stay in this Quiet mode as long as the SELCALL tone code SELCALL ID required to open the muting circuit...

Page 17: ...09 10 11 12 13 14 15 16 17 18 19 20 NOTE Channel 05 and 35 are Emergency Channels and channel 11 is a Calling Channel 21 22 24 25 26 27 28 29 30 31 32 33 34 35 36 37 38 39 40 23 476 925 476 950 476 9...

Page 18: ...y available in the original country of sale PARTS COVERED This warranty covers for one 1 year the UH013 tranceiver only All accessories Mounting bracket Microphone etc are covered for 90 days only STA...

Page 19: ...C 2002 Uniden Australia Pty Limited Uniden New Zealand Limited Printed in the Philippines PPC UTZZ01887ZZ...

Reviews: