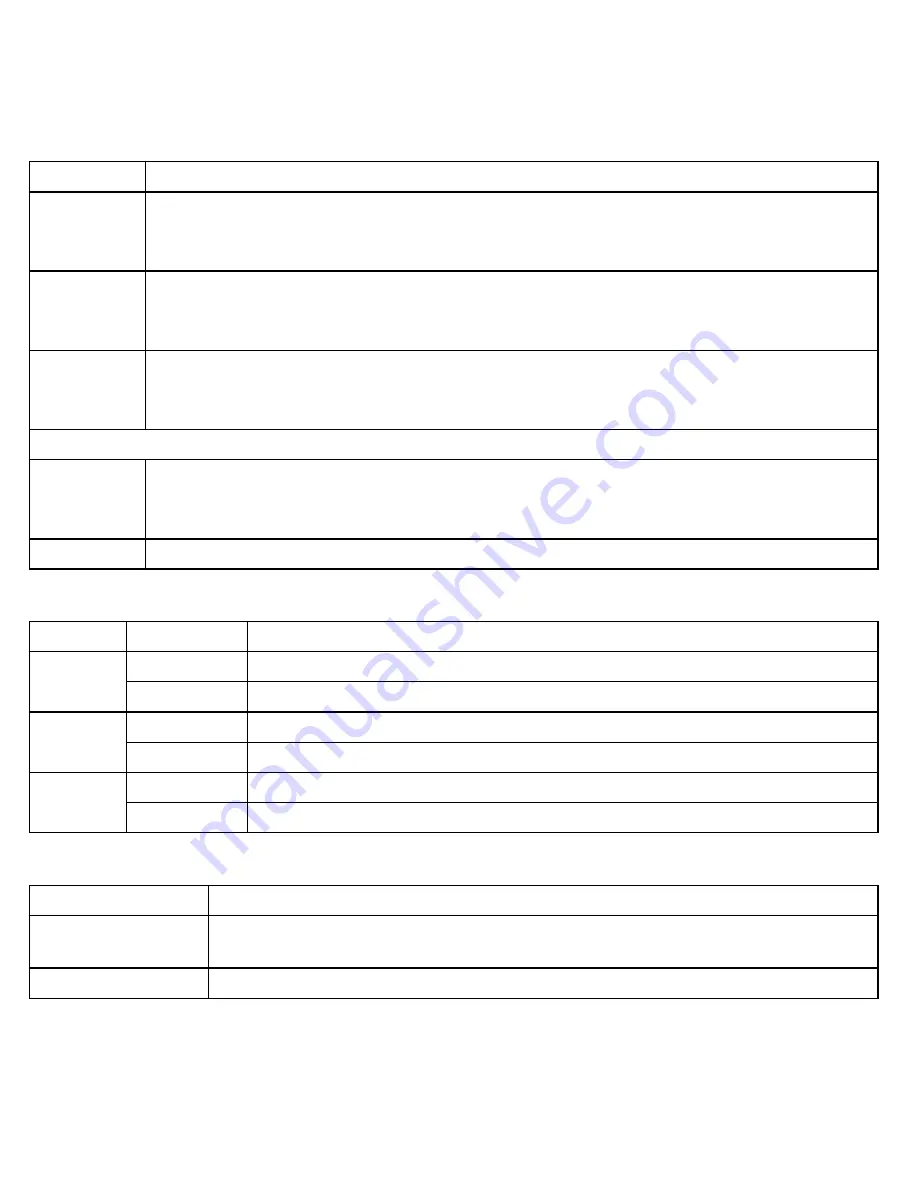
Uniden UDW-20000 Series Owner'S Manual Download Page 10

10

Button 

What it does 

DOWN

In zoom mode: pan to the bottom of the zoom area.

In the menu: move the cursor down one line.

In quad display: go to channel 2.

-

-

-

LEFT

In zoom mode: pan to the left side of the zoom area.

In the menu: cycle through the available options for the selected menu item.

In quad display: go to channel 4.

-

-

-

RIGHT

In zoom mode: pan to the right side of the zoom area.

In the menu: cycle through the available options for the selected menu item.

In quad display: go to channel 3.

-

-

-

Buttons on the remote only:

UP

In zoom mode: pan to the top of the zoom area.

In the menu: move the cursor up one line.

In quad display: go to channel 1.

-

-

-

ZOOM

Enter and exit zoom mode.

-

What the lights mean

Light

State 

What it means 

Power 

status

On

The receiver is on.

Off  

The receiver is off.

Link 

status

Flashing

The receiver is in pairing mode.

Off

The receiver in normal operating mode.

Signal 

status

On

There is a good signal from the camera assigned to the selected channel.

Off

There is no signal on the selected channel.

What the connections do

Connector 

Use it to 

USB output

Connect the receiver to your computer for use with the Uniden Guardian 

Software. (See the software manual for more information.)

Audio/video output Send the signal from the camera to a standard TV (see page 13).

Summary of Contents for UDW-20000 Series

Page 1: ...disability Accessibility Help Line 800 874 9314 voice or TTY During regular business hours Central Standard Time Visit our website for detailed business hours What s in the box If you purchased model...

Page 2: ...unning power cords avoid letting them rub against any sharp edges or lie across any high traffic areas where people might trip over them Do not use the device if the adapter cords or plugs have been d...

Page 3: ...or Static 20 Resetting Your System 21 Additional Information 21 Product Specifications 21 Recycling and Disposal Information 22 FCC Compliance Information 23 Part 15 Compliance Statement 23 RF Exposu...

Page 4: ...other end of each adapter to a 120 volt AC standard indoor power outlet and press the Power button on the front of the receiver or on the remote control Make sure the Power status lights on the front...

Page 5: ...era is 1 low 2 fair 3 good or 4 perfect There is no signal from the camera 1 2 3 4 The video currently on the display comes from the camera connected to channel 1 2 3 or 4 The video is currently zoome...

Page 6: ...hing The camera is in pairing mode Orange The camera is connected to the receiver Off The camera is in standby Using the Camera Stand You can mount the camera with the stand on the bottom on a wall or...

Page 7: ...to mount it and mark the location of the screw holes Use the included screws and anchors to attach the base to the wall or ceiling Before attaching the camera tug gently on the stand to make sure it...

Page 8: ...adjust the sun shield loosen the bolts on the side of the mounting bracket see page 7 Slide the sun shield forward or back then check the picture in the receiver display When the picture is satisfact...

Page 9: ...rough the active cameras and quad display From the pairing menu link to the selected camera MENU ok Open and close the menu OK Speakers Antenna RIGHT POWER DOWN LEFT MENU OK SELECT CAMERA Display IR s...

Page 10: ...o the top of the zoom area In the menu move the cursor up one line In quad display go to channel 1 Zoom Enter and exit zoom mode What the lights mean Light State What it means Power status On The rece...

Page 11: ...minute The audio will remain active To turn the display back on press OK Factory Reset Reset the receiver to factory defaults Any changes or settings will be lost OK Audio Vol Scan Time CAM1 CAM2 CAM...

Page 12: ...tanding Night Vision The weatherproof camera s included with your receiver has 24 infrared LEDs for low light conditions The infrared LED automatically turns on when the ambient light gets too dim aro...

Page 13: ...ge screen you can often see the edges of each pixel in the image There are a few ways to reduce the amount of pixellation on your TV Zoom out on the receiver at the zoomed in size some pixellation wil...

Page 14: ...es from camera to camera see the manual that came with your camera On the receiver open the menu Scroll down to CAM1 through CAM4 and select the channel assigned to the new camera Use Right or Left to...

Page 15: ...bled channel regardless of whether there is a camera present on that channel If there is no camera signal on a particular channel the receiver shows a black screen with the message No Signal You shoul...

Page 16: ...ly selected channel then scans the remaining channels in order The receiver will only scan channels that are enabled in the menu The receiver does not go into quad display during a scan If you press t...

Page 17: ...here is no signal from the camera that channel s section of the quad display will be blank To enter quad display Open the menu Scroll down to select Scan time Use Right or Left to select Quad OR press...

Page 18: ...your television The receiver brightness setting does not affect the television The image does not fit my TV screen Changing the TV out setting on the receiver in the system setup sub menu The display...

Page 19: ...metal objects that might reflect the signal Avoid placing the camera and receiver where the signal path crosses a high traffic area or body of water For example place the camera on the same side of a...

Page 20: ...other radio based wireless devices such as cordless telephones wireless controllers or wireless headphones or speakers large florescent light fixtures especially if they give off a buzzing noise worki...

Page 21: ...are not responding The image on the screen is frozen and resetting the camera did not help To reset the camera or receiver unplug the AC adapter Wait at least 15 seconds then reconnect the AC adapter...

Page 22: ...ght sensor Low light sensitivity 1 8 lux Picture sensor OV7725 1 4 Color CMOS Lens F3 6mm H 53 V 40 Output Jacks AV OUT 3 5 mm headset jack to RCA USB USB 1 1 or above Recycling and Disposal Informati...

Page 23: ...m the receiver Plug the equipment into an outlet on a circuit different from that to which the receiver is connected Consult the dealer or an experienced radio television technician for additional sug...

Page 24: ...sentatives in connection with the performance of this warranty Warrantor at its option may replace the unit with a new or refurbished unit THE LIMITED WARRANTY SET FORTH ABOVE IS THE SOLE ENTIRE WARRA...

Reviews: