background image

Page 4

What Else Can I Do with Routes?

When you leave the 

Avoid Roads

 screen, the device remembers 

which roads you selected; it can save these selections until you 

recalculate or delete the route.

Adding waypoints 

Once you have a route plotted, you can add waypoints, that is, any 

place where you want to stop along the way:

Plot the route to your final destination, then tap anywhere on 

the route view screen.
Tap the 

menu

 button to go to the main 

Menu

 screen.

On the main 

Menu

 screen, tap the 

destination

 button. 

Find the location you want to set as a waypoint. You’ll follow the 

exact same steps you normally use to set the destination until 

you get to the 

Confirm Destination

 screen. 

On the 

Confirm 


Destination

 screen, tap 

the 

options

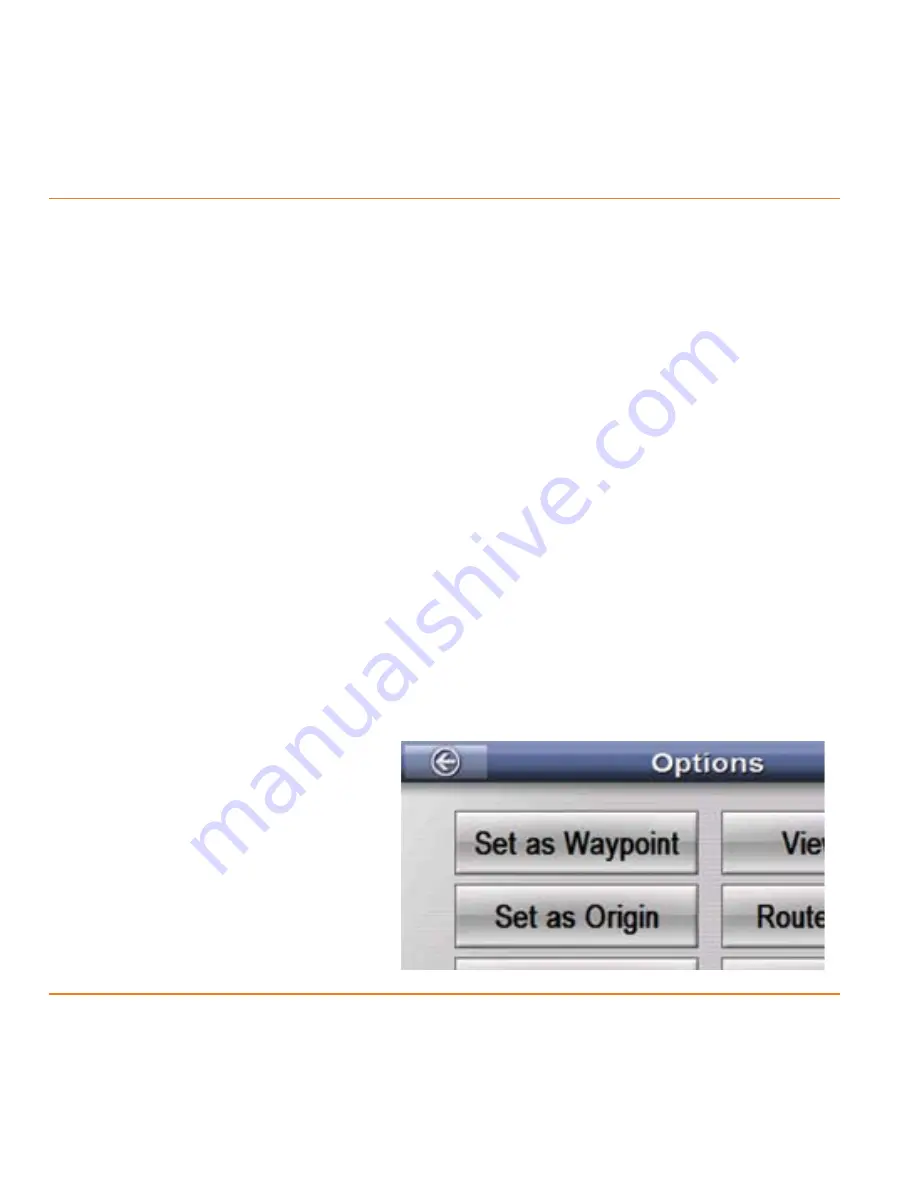
 button. The 

Options

 screen now has 

one more button 

available: the 

set


as


waypoint

 button.

1)

2)
3)
4)

5)

Summary of Contents for TRAX430

Page 1: ...User s Guide ARE YOU READY FOR A WORLD WITHOUT WRONG TURNS TRAX430 GPS Navigation Device...

Page 2: ...ield mount 23 Mounting on a flat surface 23 How Do I Use It 25 Entering a new destination 25 Entering an address or intersection 26 Selecting a Point of Interest POI 30 Choosing a destination you ve u...

Page 3: ...on 70 How long should the battery last 70 How do I update or add maps 70 What if I need to update the software 70 How do I find the software version 71 Where can I find the serial number 71 Why can t...

Page 4: ...tion device Press the power button to turn off the screen the device stays on and can still give directions Press the power button in and hold it for three seconds to turn the device completely off GP...

Page 5: ...ces If you do put the device on your windshield don t forget to lock it up or take it with you when you leave your car Included accessories Suction latch Bracket lock Suction cup pull tab Bracket Suct...

Page 6: ...age You can turn the device on or off anytime you want just push the power button on top of the device hold the button for three seconds to turn the device off 2 Plug the other end into your car s cig...

Page 7: ...which language you want to use for menus and voice prompts You can always change the language later from the Settings menu See page 64 Set your time zone From the main menu screen select Select This...

Page 8: ...Pacific Standard Time PST HNP Alaska Alaska Standard Time AKST HNY Hawaii Hawaii Aleutian Standard Time HAST In the daylight saving field select auto if your area uses daylight savings time Select no...

Page 9: ...om the Destination screen you can choose how you want to enter your home location To enter a complete address choose To enter an intersection of two streets choose The device shows you the default or...

Page 10: ...that match your entry Go to the Menu screen Go to the volume settings Switch to the SYMbol or number keypad only available if a name in the database has a symbol or numeral Go back to the previous sc...

Page 11: ...e are 5 or fewer city names that start with the letters you typed the device goes to the Select City Name screen Just tap the name of the city you want Enter the street name using the same process you...

Page 12: ...tions screen choose Enter any name you want for your home location the default name is HOME Tap the ok button when you finish The device confirms that it saved your new home location and you re done T...

Page 13: ...creen POI icons Go to the Menu screen Car icon you are here elapsed time Name of the road you re on Zoom icon miles travelled current speed Compass icon Volume icon Trip Computer Icons Lightly tap any...

Page 14: ...on a specific POI Volume Whether the audio is muted Change the volume or mute the audio Trip Computer Miles driven current speed elapsed time Open the Trip Computer screen to see more details Battery...

Page 15: ...of the screen and the car icon rotates to point in the direction you re going The compass icon s needle the red half always points straight up Zoom out Current zoom level Zoom in 100 mi 50 mi 25 mi 10...

Page 16: ...direction The compass icon s red needle rotates to point north Three dimensional 3D view The map and all icons are shown in three dimensions so your current heading is forward or away from you The map...

Page 17: ...that location This also gives you some additional options Go to the previous screen Plot a route to this location Go to the Map screen Mark this location as home favorite destination etc The map cente...

Page 18: ...use it see these sections To find out more about See the section called Entering destinations Entering a new destination p 25 Re using a previous destination Choosing a recent destination p 34 What th...

Page 19: ...here exactly you can put them If you re not sure if there are any applicable laws in your state contact the state agency that issues drivers licences It s a good idea to take valuable items with you w...

Page 20: ...ket up and fit it into the gap under the GPS antenna Let go of the bracket lock and gently tug on the windshield mount to make sure the device is locked into place 1 2 3 4 5 Insert the bracket hook in...

Page 21: ...and left any just about angle in between Angle the suction cup and the bracket where you want them then push the adjustment lock back down to lock the windshield mount into position If the bracket sti...

Page 22: ...eld Push the suction lock up towards the suction cup until it snaps into place Gently pull on the mount to make sure it is secure If you have trouble getting the suction cup to stick Clean the spot wi...

Page 23: ...down the windshield mount installs inside the disk just like it does on glass When you re deciding where to put the anchor disk here are some things to keep in mind The surface should be as flat as p...

Page 24: ...d the disk exactly above the spot where you want to glue it down Remember the glue is designed to be permanent Press the disk firmly against the surface Push down along the edges too so that every par...

Page 25: ...to go you have a whole range of options on how to get there Entering a new destination From the main Menu screen tap the destination button There are three basic ways to enter a new destination 1 2 En...

Page 26: ...The device opens the Select Region screen Use the up and down buttons to find the region you want to use and tap the region name The US maps contain 53 regions all 50 states Puerto Rico the US Virgin...

Page 27: ...ys out all the letters except for those that come after Fo on the list of city names If any city names on the list include a symbol punctuation letter with accents etc the sym button will be active Ta...

Page 28: ...e device goes to the Select City Name screen Just tap the name of the city you want Enter the street name using the same procedure you used to enter the city name Enter numbered streets as numerals pl...

Page 29: ...street name using the same procedure you used to enter the city name and the street name After you enter the address or second street name the device shows the Confirm Destination screen Tap the butto...

Page 30: ...screen The main screen shows the most common categories To see all POI categories tap the more button at the bottom of the screen Use the arrow buttons to find the category that best describes what yo...

Page 31: ...ng near city Enter the name of the city you want to search near The device displays the POI list sorted by distance with the closest items to the selected city listed first 5 Sort POI items by distanc...

Page 32: ...ou entered sorted by distance On the Select POI Name screen the POI list use the arrow buttons to find the POI you want The POI at the top of the screen is expanded to show more information When you c...

Page 33: ...on you ve used before Going Home Tap the home button to use your home location as a destination the device goes directly to the Confirm Destination screen This button is only available after you enter...

Page 34: ...st of recent locations Use the arrow buttons to find the destination you want then tap that line to select it The device goes to the Confirm Destination screen Choosing a favorite location You can sav...

Page 35: ...e location Confirming your destination When you choose your destination the device goes to the Confirm Destination screen Tap the go button to plot a route to this destination using the default option...

Page 36: ...as the Destination Options screen HOME Save this location as your new home location see page 38 FAVORITE Save this location to your list of favorites see page 38 DESTINATION Select this location as a...

Page 37: ...r new home location Move the car icon and center the map on this location not available when the device has a valid GPS signal lock View Map The device centers the map on the location and marks it wit...

Page 38: ...en Enter a name for this location The name can be up to 30 characters and it can use spaces punctuation accents etc If the location already had a name for example if it is a POI or if you had already...

Page 39: ...ons to calculate a route from your current location to the destination This may take a few seconds depending on how complicated the route is how far the destination is how many turns there are etc Whi...

Page 40: ...Go to the Menu screen The route is marked in green Estimated arrival time Name of the street you are currently on Miles left to go Time left to go The direction you need to go How far it is Name of st...

Page 41: ...regular view on the previous page the split screen view and the full screen view The split screen view divides the screen between the map and the next maneuver area The split screen view also shows a...

Page 42: ...l instructions and voice prompts From the Confirm Destination screen tap the demo route button at the bottom of the screen The device runs through the entire route at an accelerated rate When it reach...

Page 43: ...e map and see more options just like on the Map screen Tapping on the map just pauses the route it does not end or cancel it Tap on or above the next maneuver title bar to see the complete list of man...

Page 44: ...the up and down single arrow buttons to scroll through the list one maneuver at a time Use the page up and page down double arrow buttons to skip to the next screen Tap the button to go to the route v...

Page 45: ...te tap the route method button This takes you to the Route Method screen see page 52 for detailed information on the route method options Tap the delete route button to end the route this works the sa...

Page 46: ...rmediate stops or waypoints to the route Change the way the device calculates the route Avoiding roads on the route At any point in a route if you prefer not to use particular roads you can tell the d...

Page 47: ...lines the device clears that selection and will no longer avoid that road When you have selected all the roads you want to avoid tap the recalculate button at the bottom of the screen The device re pl...

Page 48: ...the way Plot the route to your final destination then tap anywhere on the route view screen Tap the menu button to go to the main Menu screen On the main Menu screen tap the destination button Find th...

Page 49: ...destination When you leave the Waypoint screen the device saves your waypoints until you delete the route When you are finished adding waypoints tap the recalculate button The device re plots the rout...

Page 50: ...screen Tap anywhere on the route view screen then tap the route button to go to the Route Info screen The Route Info screen now has one more button available the edit waypoints button The Edit Waypoi...

Page 51: ...utton to move the selected waypoint after the one below it For example if you want to go to Waypoint A after Waypoint B use the move down button to move Waypoint A to the bottom of the list after Wayp...

Page 52: ...when it calculates a route Choose one Select the things you want to avoid You can select all of them if you want Tap either RECALCULATE button when you re finished Use highways as much as possible Use...

Page 53: ...m Destination screen tap the OPTIONS button On the Route Info screen tap the ROUTE METHOD button On the Options screen tap the ROUTE METHOD button 1 2 From the Confirm Destination screen tap the OPTIO...

Page 54: ...ay N up North up H up heading up 3D 57 Map display color Change the colors used on the map Day Night Auto 58 Breadcrumb trail Leave markers on the map as you drive On Off 58 POI display Choose which p...

Page 55: ...ert Trigger an alarm if you exceed the speed limit recorded for the current road On Off 61 System Brightness Change how bright the screen backlight appears 15 levels default 15 63 Time zone Set the de...

Page 56: ...the screen touch tones On Off 64 User Data Edit your list of favorite locations No favorite locations saved 65 Customizing the Map screen The following pages give details and examples of all the optio...

Page 57: ...fault here North up North stays at the top of the screen and the car icon rotates to point in the direction you re going Heading up The direction you are currently going is always at the top of the sc...

Page 58: ...eme here Leave this option at Auto if you want the map to continue changing the color Showing the Breadcrumb Trail As you drive the device can leave a trail of markers or breadcrumbs so you can retrac...

Page 59: ...This opens the Edit POI Icon Display screen Tap on any POI categories that you want to see on the Map screen When you select a category the line is highlighted and the check mark beside it turns green...

Page 60: ...ns you have for the guidance the device gives you during a route From the Menu screen tap the SETTINGS button Tap the BACK icon when you re finished On the Settings screen tap the GUIDANCE button From...

Page 61: ...you want the device to zoom in as you approach the next maneuver set Auto Zoom to On Activating Speed Alert The information in the map database includes the posted speed limit of each road Because th...

Page 62: ...Tap the arrow icons to switch to the next page From the Menu screen tap the SETTINGS button Tap either BACK icon when you re finished On the Settings screen tap the SYSTEM button From the Menu screen...

Page 63: ...f you want to increase the battery life decrease the screen brightness by a few levels Changing how distance is displayed Unit Setup Choose mile if you want the device to show distances in feet and mi...

Page 64: ...rench Fran aise or es for Spanish Espa ol Turning off the Sounds The device usually beeps when you tap an option or a button on the screen If you want to turn off these beeps set Sounds to Off Turning...

Page 65: ...hen user data This opens the Edit Favorites screen Use the arrow buttons to find the location you want to edit The up and down buttons the single arrows scroll through the list one item at a time The...

Page 66: ...on the map 3 Go to the Map screen Edit the name of this location Go to the main Menu screen Go to Volume settings Change the icon Go back to the previous screen Delete this location from the list of f...

Page 67: ...cation or the edit phone number button to change the phone number From either screen tap ok when you re finished This only changes the name or phone number used on the favorites list if this location...

Page 68: ...information about the zoom levels and what they show At 125 feet the device displays and names all the streets that are currently within the map area Between 250 and 1000 feet the device shows most o...

Page 69: ...ave Starting at two miles the device shows only state and federal highways along with geographical features At 100 miles the device shows only interstate highways state lines and large geographical fe...

Page 70: ...for long periods of time To avoid risk of fire or damage only use power adapters made for this device see www uniden com for accessory adapters How do I update or add maps Updated maps and additional...

Page 71: ...sion of the software your device currently uses From the Menu screen tap the info button and then the system info button This opens the System Info screen which tells you the software version and the...

Page 72: ...s are Radio broadcast towers or signal repeaters Localized radio signals like at an airport High frequency power lines Tunnels large bridges or overpasses parking garages etc Tall buildings or canyon...

Page 73: ...t four satellites so it can also calculate your current altitude Signal strength of tracked satellites Your current position in latitude longitude and altitude Your current speed How accurate your pos...

Page 74: ...marks that satellite as tracked When the device synchronizes with the satellite and locks onto its position in the sky it marks that satellite as active The device must lock onto at least three satel...

Page 75: ...though the suction cup itself stays in place try tightening the bracket joint Tightening the bracket joint 1 Remove the mount from your windshield 2 Lift the adjustment lock and twist the lock handle...

Page 76: ...only If the screen remains dirty try a mild soap solution or a cleaning spray designed for electronics Do not use ammonia on the screen and never immerse the device in water I can t find a location o...

Page 77: ...nate and be of no further effect 12 months after the date of original retail sale The warranty is invalid if the Product is A damaged or not maintained as reasonable or necessary B modified altered or...

Page 78: ...BY OPERATION OF LAW INCLUDING BUT NOT LIMITED TO ANY IMPLIED WARRANTIES OF MERCHANTABILITY OR FITNESS FOR A PARTICULAR PURPOSE THIS WARRANTY DOES NOT COVER OR PROVIDE FOR THE REIMBURSEMENT OR PAYMENT...

Page 79: ...al might be different from your actual device but the operation is the same This documentation reflects the most up to date information available at the time of production The product documentation ma...

Page 80: ...nstallation If this equipment does cause harmful interference to radio or television reception which can be determined by turning the equipment off and on the user is encouraged to try to correct the...

Page 81: ...afely Do not install any device where it might block your driving veiw or mirrors Do not attempt to operate any device while you are driving a vehicle Remain alert to actual road conditions obey all l...

Page 82: ...fected area thoroughly and seek medical attention Do not expose the battery to temperatures in excess of 140 F 60 C or leave the battery in direct sunlight for an extended period of time Lithium Ion b...

Page 83: ...ing 57 POI Point of Interest One of approximately 2 million pre programmed address in the device divided into categories 30 59 Route A calculated list of roads maneuvers and instructions that tell you...

Page 84: ...A QUESTION NEED A PART Our Customer Service Specialists are ready to help During regular business hours call 1 800 620 7531 or get answers 24 7 at www uniden com USZZ01211ZZ 1 Printed in China Central...

Reviews: