background image

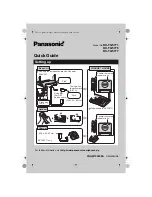
Installing the Handset Batteries

Press battery cover release.          
Slide cover off.

Install the 3 rechargeable Ni-MH
batteries.

Slide the battery cover back  
until it snaps into place

Place the handset on the base and
charge uninterrupted for 14 hours.

+

-

-

+

-

-

Registering a handset to a base unit

Each handset must be registered to a base unit in
order to make and receive calls. A handset can be
registered to up to four base units. 
• press and hold the 

[PAGE]

key on your base

until ringing begins (5-10 seconds). You will
then be ready to register another handset to
your base unit.

• press 

[menu]

key on the handset until you

reach the 

H-REGISTER

display on the LCD.

• press 

[OK]

key to choose this menu item.

SEARCH BS 2 

will be displayed.

• press 

[menu]

key to scroll between base units

2-4 (any available Base number is OK).

• press 

[OK] 

to confirm your choice.

• the RFPI code will be displayed after a short

wait.

• press 

[OK]

to confirm.

• enter your base unit PIN number and press

[OK]

.( Factory default is 1590).

To make a call

1. Press talk [

] and listen for the dial tone.  

2. Dial phone number.        

OR

1. Dial phone number

2. Press the talk [

] key.

To hang up

Press talk [

] or place the handset back on

the base unit.

To answer a call

Handset on the base unit: Remove handset from
the base and speak

Handset off the base unit: Pick up handset, press
the talk [

] key and speak

Charging the Battery

Using the Phone

iii

Only use the battery pack supplied or rechargeable AAA
Ni-MH Batteries. 

DO NOT USE STANDARD BATTERIES.

Summary of Contents for DECT 1812

Page 1: ...DECT 1812 clr OK rdl p 1 2abc 4ghi 5jkl 6mno 7pqrs 8tuv 9wxyz 0 3def m e n u i n t MANUAL OWNER S...

Page 2: ...Phonebook Dialling Key S T Function Select Key S Menu Key S Recall Key T Dial Delete Key S Menu Escape Key S Memory Clear Key S Microphone Mute Key T Keypad Number Keys Microphone Redial Pause Key S...

Page 3: ...of your owners manual and does not attempt to explain any of the advanced features of your phone A simple guide to setting up your new phone PWR AC Adaptor Plug the phone jack into the base unit then...

Page 4: ...display on the LCD press OK key to choose this menu item SEARCH BS 2 will be displayed press menu key to scroll between base units 2 4 any available Base number is OK press OK to confirm your choice...

Page 5: ...elete one number from memory 10 Delete all Caller ID numbers 11 Store a Caller ID number in your personal Phone Book 11 Call a number in Caller ID Memory 11 Personalising Your Phone 12 Ear Piece Volum...

Page 6: ...maximum per memory Redial Flash Pause and Mute Tone Dialling Extendible to 5 handsets and 4 bases Internal Calling between handsets Internal and External Call Transfer Call Barring Call Timer 200 Hou...

Page 7: ...one please read this owner s manual thoroughly Be sure to complete and mail the product registration form If any of these items are missing or damaged contact your place of purchase immediately This O...

Page 8: ...supply cord is damaged or frayed B If liquid has been spilled into the product C If the product has been exposed to rain or water D If the product does not operate normally when following the operati...

Page 9: ...dialled Pause Pause before dialling the next digit int Internal Set Up An Internal call Call Transfer Transfer an external call in the Talk Mode Talk Key Press to begin or end a call Menu Escape Key...

Page 10: ...e whether another external call might be set up 4 INTERNAL CALL The INT symbol is used for internal calls between handsets It is displayed only on the corresponding handsets 5 BATTERY The BATTERY symb...

Page 11: ...talk key to end an internal call ENDING CALLS Press talk to end a call RECEIVING INCOMING CALLS 1 If the handset rings when it is off the base unit press talk to answer the call 2 If the handset ring...

Page 12: ...alls press power The same key is used to unlock the keypad CALL BARRING Call barring makes it possible to stop individual handsets from dialling numbers starting with a certain prefix such as toll cal...

Page 13: ...reach the PHONE BOOK display on the LCD press OK key to choose this menu item press menu to scroll through the names in your phone book delete a name by pressing the clr key DELETE MEM will be displa...

Page 14: ...menu key and CALLER ID will be displayed on the LCD press OK key to choose this menu item the number of the last received phone call will be displayed press OK again to display the time and date the c...

Page 15: ...tem use the scrolling keys mentioned earlier to select the number you wish to store in the phone book press clr press menu twice INSERT PB will be displayed press OK to display NAME enter the name for...

Page 16: ...until you reach the H EXT RING display on the LCD press OK key to choose this menu item MELODY will be displayed press OK key to choose this menu item press menu key to scroll between the melody opti...

Page 17: ...ess OK to confirm DIRECT CALL The direct call option on your handset can be used to dial a specific number which you have saved no matter what key is pressed This feature provides easy one touch any k...

Page 18: ...rm your choice press talk BASE UNIT EXTERNAL RING MELODY The base unit only rings on incoming external calls It can be programmed to your preferred melody press menu key until you reach the BASE SETTI...

Page 19: ...oose this menu item press menu key until BASE RESET is displayed on the LCD press OK to choose this option FP PIN will be displayed enter your 4 digit PIN number and press OK Factory default is 1590 p...

Page 20: ...is OK press OK to confirm your choice the RFPI code will be displayed after a short wait press OK to confirm enter your base unit PIN number and press OK Factory default is 1590 SELECTING A BASE UNIT...

Page 21: ...dset press talk SHOW RFPI This function displayed the RFPI radio fixed part identity of the base unit currently locked to the handset press menu until you reach the SHOW RFPI display on the LCD press...

Page 22: ...press OK if you have entered the same new PIN number twice you will be returned to the menu Press talk if you accidentally entered a different 4 digit number RETYPE will appear again RESETTING YOUR H...

Page 23: ...play on the LCD press OK key to choose this menu item press menu key until B CHANGE PIN is displayed on the LCD press OK key to choose this option FP PIN will be displayed enter the PIN number and pre...

Page 24: ...n t make or receive calls The handset doesn t ring or receive a page Check both ends of the base telephone line cord are firmly pushed in until they click Make sure the AC adaptor is plugged into the...

Page 25: ...MHz 10 channels Power requirements Rechargeable NiMH battery Size without antenna 45mm W x 27mm H x 135mm D Weight Approx 93g without battery Battery Capacity 550 mAH 3 6V x 3 AAA size Talk mode 10 h...

Page 26: ...onform to this warranty at any time while this warranty is in effect the warrantor at its discretion will repair the defect or replace the product and return it to you without charge for parts or serv...

Page 27: ...23 NOTES...

Page 28: ...THANK YOU 2001 Uniden Australia Pty Limited Uniden New Zealand Limited FOR PURCHASING A UNIDEN PHONE...

Reviews: