


Daylight Sensor
Red LED (Wi-Fi connection failed)
Blinking: Standby status
On: Working status
Blue LED (Wi-Fi connection succeeded)
Blinking: Standby status
On: Working status
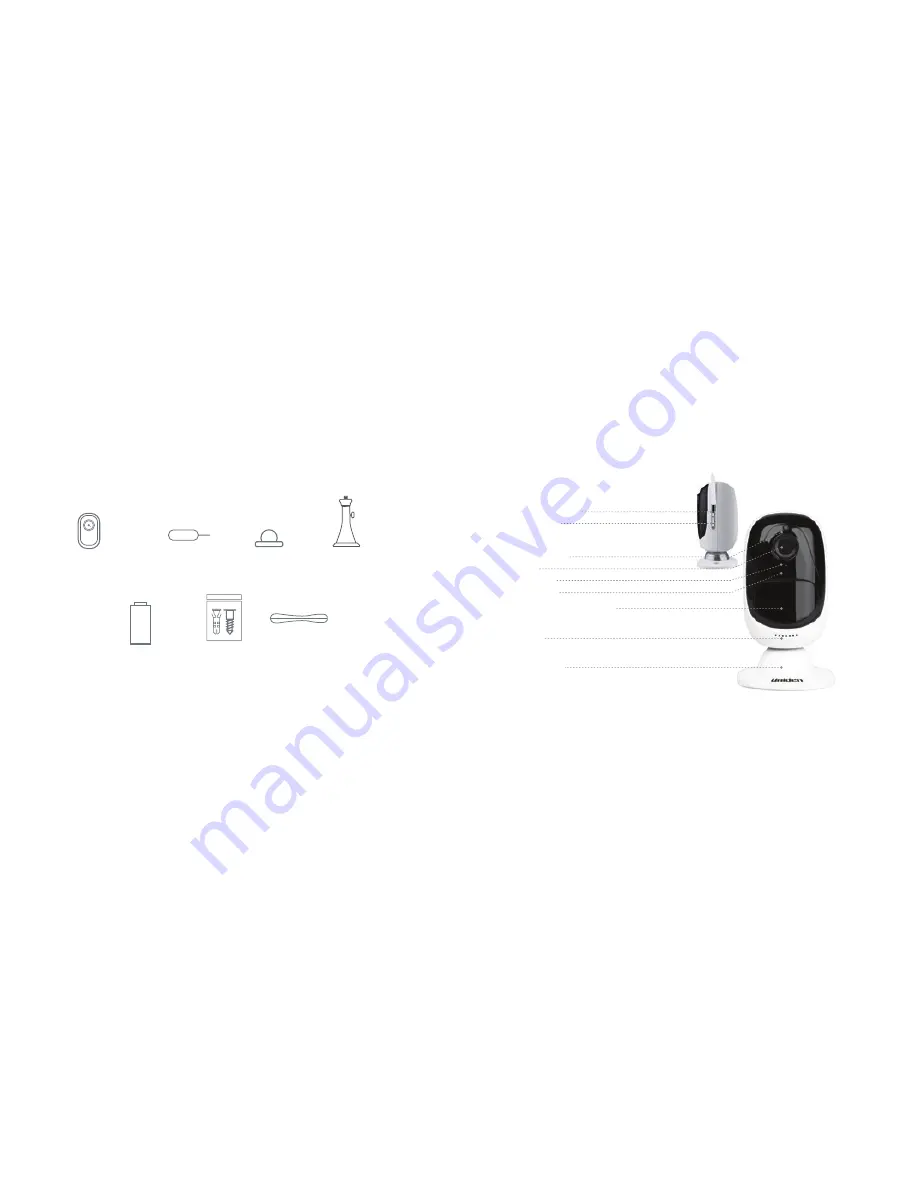
What’s in the Box
General Introduction
Micro SD Card Slot
Reset Button
Lens
Status LED
Built-in Mic
Speaker
Magnetic Mount
Built-in PIR Motion Sensor
CR123
A
AppCam Solo Camera
x1
Magnetic Mount
x1
Screw Mount
x1
CR 123A Batteries
x4
Screws (in pack)
x1
Opener
x1
2
3
Reset Needle
x1
Reset Needle
x1
Summary of Contents for AppCam Solo
Page 1: ...AppCam Solo Quick Start Guide...
Page 11: ...uniden com...


