This operating manual is subject to change without notice.
**END**
VI .Using the Meter
VII. Maintenance
● Turn on/off Power Save Mode
1. Press yellow button to turn on the Meter;
2. When the Meter turns on, it defaults at factory setup.
3. With the meter already turned on, pressing yellow button again will turn off the
Meter (UT331);
4. with the meter already turned on, press yellow button again will go into power
save mode (UT332, “ ” shows on LCD upper left corner). Repress to exit the
mode.
5. Set the sleep mode, the Meter will enter power save mode if no button is active
within the set time.
6. To ensure an accurate result, the user is recommended to wait for a while
before taking the readings if the measured humidity &temperature change
dramatically.
● Data Hold
Press HOLD button to freeze the reading, “HOLD” appears on LCD. Press again
to quit the function.
● Turn on/off Backlight
Under normal measurement status, press “ ” button to turn on the backlight.
Press again to turn it off.(backlight is off under power save mode).
● View Max/Min Reading
Press MAX/MIN button to check Max. and Min. readings. Long press the button
to exit the mode.
● View Dew Point Temperature
Press ENTER to check dew point temperature, “DEW POINT” icon indicated on
LCD. Press again to quit the function.
● Store and Recall Data
Press STORE button, the Meter will save the data into its memory and store up
to 100 sets of data (00--99).
The recorded data are those shown on the primary display. Press the button
again to exit the function.
Press RECALL to review the data stored in the memory. Press again to exit the
function.
1. Store Data
Press STORE button and “DATA” icon shows on upper part of LCD. There are
two ways to store data.
Manual Method: Preset time interval for auto storage at 00:00(refer to “Setting
Time Interval” section), then get into STORE mode, press ENTER once to save
current reading into current address of the memory, press ENTER again to save
into next address. Press ▼▲ to change the address to store. “----” shows for
blank address.
Auto Method: Preset time interval not at 00:00, then get into STORE mode,
press ENTER once, “:” icon flashes and the Meter will save the data in order into
the memory by beginning with current address and storing at a interval
previously set. Press ENTER again to pause the operation and “:” stops flashing.
Repress ENTER to continue.
2. Recall Data
Press RECALL to check recorded data, “DATA” icon flashes. Press▼▲ to scroll
through recorded readings. The Meter defaults at the reading saved last time
you exit the STORE mode. Pressing ENTER under RECALL mode can quickly
review from No.00 to 99 data and also allow you to transfer data to PC through
USB. After quick review, the number stops at 99.
3. Clear Data
Press STORE to go into STORE mode, “DATA” icon shows. Then long press
STORE for 2 seconds and “CLR” icon appears on the LCD, pressing ENTER
will clear all 100sets of data. Clearing item by item is not allowed.
“- - - -” shows for empty memory.
Note: All 100 sets of data will be completely cleared once the function is enabled.
Step-by-Step clearing is not allowed. To avoid any data loss, please think it twice
before you use the function.
● Transfer Data
The Meter will transfer data to PC under following two circumstances:
1. Enter into RECALL status, pressing ENTER button will not only allow you to
review the data quickly but also transfer the data automatically to PC.
2. When PC is running the supplied software and has been already connected to
the Meter, the measured data will be automatically transferred to PC.
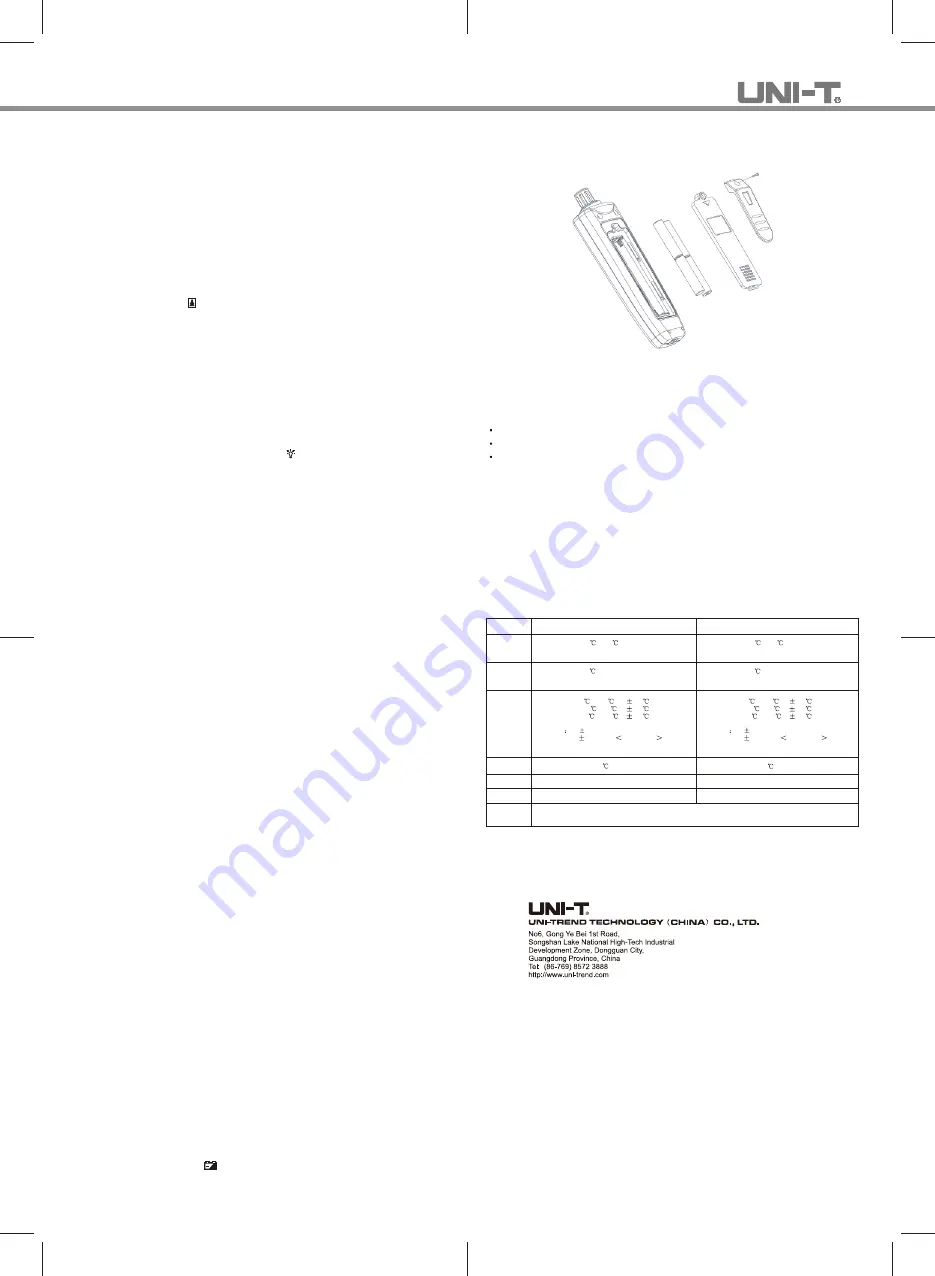
Figure 3
● Cleaning the Casing
When it becomes necessary to clean the surface of the Meter, clean it with soft
cloth or sponge dampened with just a little of water, soap water or mild detergent.
Prohibit washing the Meter with water directly, which may damage the circuits
inside.
VIII. CE Certification
The Hygro-Thermometer conforms to the following standards.
● Replacing the Battery (See Figure 3)
When the Meter indicates “
”, please replace the battery timely. Follow the
steps as below:
EN61326: 2006
EN55022: 2006
EN55024: 1998+A1+A2
Function
UT331
UT332
Temperature: -20 ~ 60
Humidity: 0%RH ~ 100%
Temperature: -20 ~ 60
Humidity: 0%RH ~ 100%
Measuring
range
Resolution
Measuring
accuracy
Response
time
Time
Data storage
Setup
Functions
Temperature: 0.1
Humidity: 0.1%RH
Temperature: 0.1
Humidity: 0.1%RH
Temperature: 0 to 40
:
0.5
-20 to 0 : 1.0
40 to 60 : 1.0
Humidity:
3.5%RH (10%RH to 90%RH)
5.0%RH ( 10%RH or 90%RH)
Temperature: 0 to 40 :
0.5
-20 to 0 :
1.0
40 to 60 :
1.0
Humidity:
2.5%RH (10%RH to 90%RH)
5.0%RH ( 10%RH or 90%RH)
About 10 seconds (25 ,1m/s air)
About 10 seconds (25 ,1m/s air)
Relative time
Real-time time
0 to 99
0 to 99
Temperature unit, auto-save time interval, humidity offset, temperature offset, dew-point offset,
sleep time setup and system time.
IX. Technical Specifications
7. Setting System Time
Press SETUP to switch to system time mode, “S-t” icon shows. Press ▼▲ to
set up system time. Long press ▼▲ to increase the time quickly; Press ENTER
to select time format “h:m” or “m:s” . To make it easy to user, “m:s” format will
be automatically converted into “h:m” after the system time exceeds 60 seconds.
1. Unscrew the battery and remove it from the meter.
2. Replace the batteries with new 4×AAA batteries;
3. Rejoin the battery cover and tight up the screw.
P/N:110401104461X DATE:2018.06.26 REV.5


