


19
Using the Selection tools
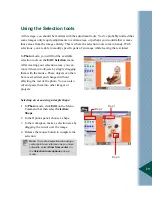
At this stage, you should be familiar with the adjustment tools. You’ve probably noticed that
some images only require adjustments to certain areas, or perhaps you would rather remove
those areas from the image entirely. This is where the selection tools come in handy. With
selections, you are able to modify specific parts of an image while leaving the rest intact.
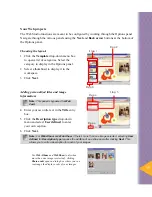
Step 1
Step 2
Step 3
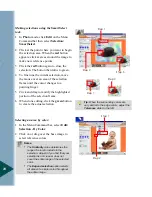
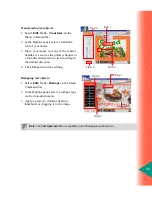
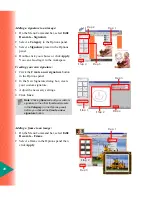
Selecting an area using a simple shape:
1 In Photo mode, click Edit on the Menu
Command bar then select Selection:
Shape.
2 In the Options panel, choose a shape.
3 In the workspace, make a selection area by
dragging the cursor over the image.
4 Release the mouse button to complete the
selection.
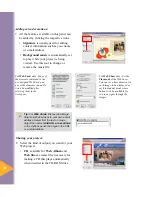
Note:
To create a selection area using a
center point as a reference as you move
outwards, select Draw from center on
the Selection tools options pop-up
menu.
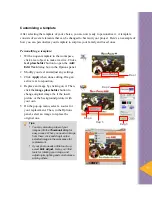
In Photo mode, you will find the available
selection tools on the Edit: Selection menu.
After creating your selection areas, you can
convert them into objects by simply dragging
them with the mouse. These objects can then
be moved, edited, and changed without
affecting the rest of the photo. You can also
cut and paste them into other images or
projects.
Summary of Contents for PHOTO EXPRESS MD 5345
Page 1: ...version 4 0 User Guide...