


Ulead DVD Workshop 2 Quick Guide
5
Click
Finish
in the
Step Panel
to preview your project in the Preview Window. To
preview the behavior of your menu, the actual video, and audio and subtitle tracks
(if any), use the buttons on the remote control.
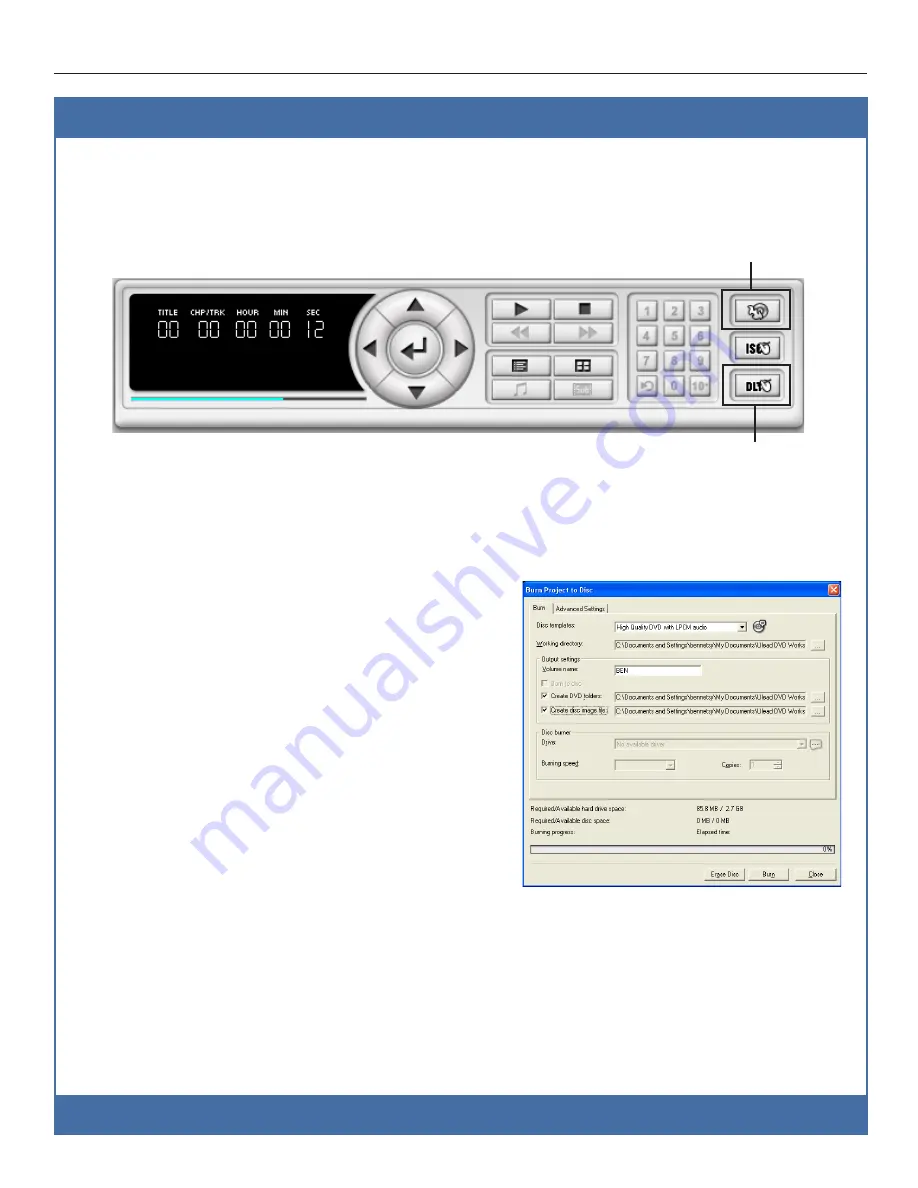
Preview and burn your project
To burn your project onto a disc, click
Burn Project to Disc
on the remote control.
In the Burn Project to Disc dialog box, select the options you want in the
Burn
and
Advanced Settings
tabs, then click
Burn
.
Tips
:
•
Select
Create DVD folders
if you want to
save and play your DVD title in your
computer. You will need a DVD software
player to play back your DVD.
•
Select
Create disc image file
to create a
disc image of your project on your hard
drive. Select this if you intend to burn
several copies of your project onto discs.
•
In the
Advanced Settings
tab, you can set
the
Region code
for your DVD to limit the
countries where your DVD can be played
back. However, this will also depend on the
DVD player’s playback capabilities.
Click
Write Disc Image to DLT
to output your project to a Digital Linear Tape
(DLT). Most production houses require DLTs if you want to mass reproduce your
DVD.
Tip
: DVD Workshop supports outputting to DVD-9 (single-side dual-layer) format and also
gives you the option of outputting your DVDs with CSS encryption to prevent duplication
of your DVDs. These options can be found inside the
Ulead DLT Writer
dialog box.
© 2002-2004 Ulead Systems, Inc. All rights reserved.
Burn Project to Disc
Write Disc Image to DLT


