22
20).
figure 20
7
Rinse using a cool beverage in order to eliminate any
remaining sanitising solution from the bottom of the containers.
Dry the inside of the containers with a disposable paper towel.
7. 5 IN-PLACE SANITIZATION
Sanitising the assembled device, prior to putting into
service, should only be performed, if necessary, as an
a d d i t i o n a l p r e c a u t i o n t o t h e s a n i t i s a t i o n o f t h e
disassembled devices described previously, never instead
of it.
1
Prepare a solution of water and sodium hypochlorite
(bleach) at a ratio of 1 tablespoon per 2 litres of water.
2
Pour the solution into the containers.
3
Using a suitable brush, wipe the solution onto all parts
above the level of the solution and on the underside of the lid.
4
Install the lid and operate the dispenser in order to allow the
solution to be stirred for about 2 minutes. Drain the sanitising
solution from the containers through the taps and then dispose
of it.
5
Remove the flow restrictor from the container (see figure
12).
6
Rinse using a cool beverage in order to eliminate any
remaining sanitising solution from the bottom of the containers.
Do not perform further rinsing.
8 ROUTINE MAINTENANCE
1
Every day
: inspect the dispenser and check for leaks of
product from the gaskets. If you notice leaks, first make sure
that the components of the dispenser are properly installed,
then check that the gaskets do not require lubrication and
finally that they are not worn or damaged. If they are, replace
them with original spare parts from the manufacturer.
2
Every month
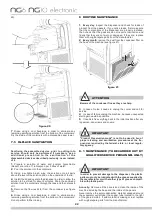
: remove the dust from the condenser filter on
the back of the machine (see figure 21).
figure 21
3
In case of noise it needs to unplug the cooler and call for
service.
4
In case of failure unplug the machine, because unexpected
start again would be possible.
5
It needs to fix everything back in the initial position after any
repairmen, like screws and covers.
8. 1 MAINTENANCE (TO BE CARRIED OUT BY
QUALIFIED SERVICE PERSONNEL ONLY)
Annually:
Remove all the panels and clean the inside of the
machine including the base and the inside of the panels.
Never remove the anti-condensation material wrapped around
the evaporator outlet tube (the copper tube located to the right
of the geared motor). If said material is missing or lost, replace
with original spare parts from the manufacturer.
ATTENTION
Beware of the condenser fins as they are sharp.
IMPORTANT
"Product Preservation mode" is not to be used in lieu of
proper cleaning and sanitization procedures at the fre-
quencies required by the federal, state, or local regula-
tory agency.
IMPORTANT
In order to prevent damage to the dispenser, the plastic
parts must only be lubricated with the grease supplied by
the manufacturer or with another type of grease compati-
ble with plastic parts.


