S9705-48D Hardware Installation Guide | 11
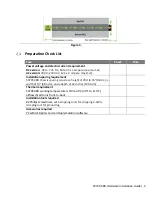
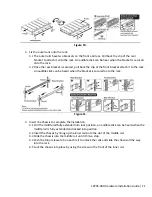
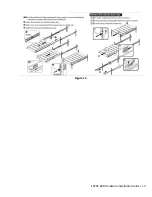
Figure 10.
3
Fix the outer rails onto the rack.
3.1
The outer rails have two brackets on the front and rear. Pull back the clip of the rear
bracket to attach it onto the rack. An audible click can be hear when the bracket is secured
onto the rack.
3.2
Once the rear bracket is secured, pull back the clip of the front bracket attach it to the rack.
An audible click can be heard when the bracket is secured onto the rack.
Figure 11.
4
Insert the Chassis to complete the installation.
4.1
Pull the middle rail fully extended into lock position, an audible click can be heard when the
middle rail is fully extended and locked into position.
4.2
Insert the chassis by lining up the inner rails into the slot of the middle rail.
4.3
Slide the chassis into the middle rail until it hits a stop.
4.4
Push the blue release tab on each rail to unlock the rails and slide the chassis all the way
into the rack.
4.5
Lock the chassis into place by using the screw on the front of the inner rail.


