while in route guidance. Press and release the
desired selection button on the touchscreen
until a check-mark appears, showing the setting
has been selected.
•
Route Progress Bar
Press this button on the touchscreen to display
the Route Progress Bar while in route guidance.
Press and release the selection button on the
touchscreen until a check-mark appears, show-
ing the setting has been selected.
•
Route Options
Press this button on the touchscreen to deter-
mine which road types are OK to travel on while
in route guidance. Press and release the de-
sired selection button on the touchscreen until a
check-mark appears, showing the setting has
been selected.
•
Offer Highway Services
Press this button on the touchscreen to display
Highway Services while in route guidance.
Press and release the selection button on the
touchscreen until a check-mark appears, show-
ing the setting has been selected.
•
Highway Services
Press this button on the touchscreen to display
the available Highway Service Types you would
like displayed while in route guidance. Press
and release the desired selection button on the
touchscreen until a check-mark appears, show-
ing the setting has been selected.
•
Use Real Time Traffic
Press this button on the touchscreen to display
Real Time Traffic Updates while in route guid-
ance. Press and release the desired selection
button on the touchscreen until a check-mark
appears, showing the setting has been selected.
•
Provide Detours on Traffic Events
Press this button on the touchscreen to display
detours on traffic events while in route guidance.
Press and release the desired selection button
on the touchscreen until a check-mark appears,
showing the setting has been selected.
•
Confirm Detours Manually
Press this button on the touchscreen to make it
mandatory for you to have to confirm detours
manaully while in route guidance. Press and
release the desired selection button on the
touchscreen until a check-mark appears, show-
ing the setting has been selected.
•
Provide Detours That Save More Than X
Min.
Press this button on the touchscreen to allow
the navigation system to display the available
detours if they save you a predetermined
amount of minutes, while in route guidance.
Press and release the desired plus or minus
button on the touchscreen until you have se-
lected the desired number of minutes saved,
from 5 minutes to 1 hour in increments of
5 minutes.
NOTE: You can press the “back arrow” button on
the touchscreen to return to the previous screen or
the “X” button on the touchscreen to exit.
Home
Refer to “Where To? — Home” in the “Where
To?” section of this chapter for information.
Work
Refer to “Where To? — Work” in the “Where
To?” section of this chapter for information.
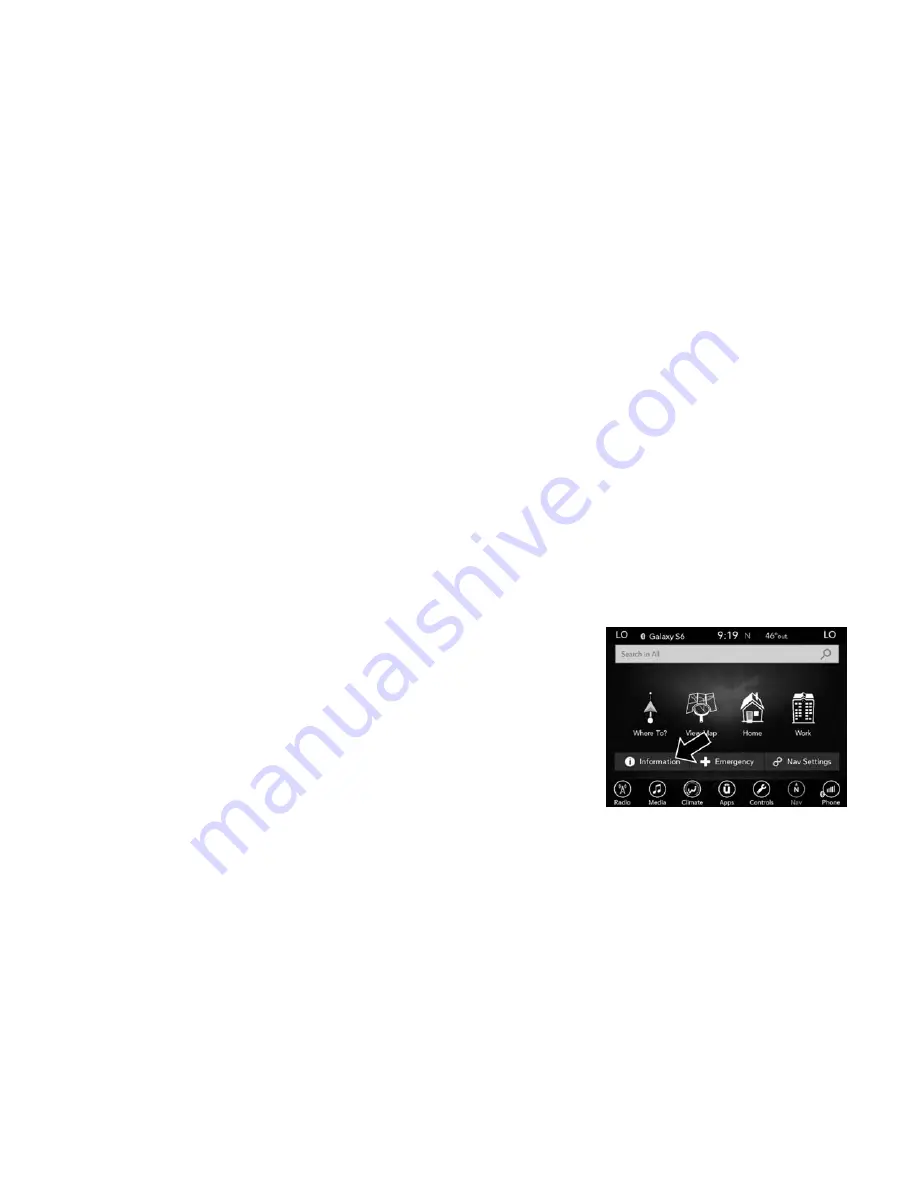
Information
From the Nav Main Menu, press the “Information”
button on the touchscreen and select one of the
following options to view additional information.
•
Where Am I?
•
Trip Computer
•
Country Info
58
Summary of Contents for Touch 8.4
Page 3: ...2...
Page 4: ...1 SAFETY GUIDELINES SAFETY GUIDELINES 4 SAFE USAGE OF THE UCONNECT SYSTEM 4 3...
Page 7: ...6...
Page 8: ...2 IDENTIFYING YOUR RADIO IDENTIFYING YOUR RADIO 8 CYBERSECURITY 10 7...
Page 13: ...Home 58 Work 58 Information 58 Emergency 60 Map Updates 62 12...
Page 65: ...64...
Page 66: ...4 UCONNECT SETTINGS UCONNECT 8 4 SETTINGS 66 65...
Page 73: ......
Page 78: ...UCONNECT 0 UCONNECT b i 0 I 0 I s 0f...
Page 80: ...UCONNECT UCONNECT 8 4...
Page 137: ...NAVIGATION 0 0 b Main Menu 1 Where To 3 View Map 0 0 P j Emergency 3 p...
Page 142: ...CYBERSECURITY...
Page 143: ......
Page 146: ...UCONNECT 1 2 3 5...
Page 147: ......
Page 148: ...UCONNECT 8 4 8 4 NAV UCONNECT UCONNECT 0...
Page 149: ...UCONNECT 8 4 8 4 NAV Uconnect 8 4 8 4 NAV 17UC84P 526 ARA AA...


