


C099-F9P - User guide
UBX-18063024 - R12
Firmware update
Page 27 of 40
C1-Public
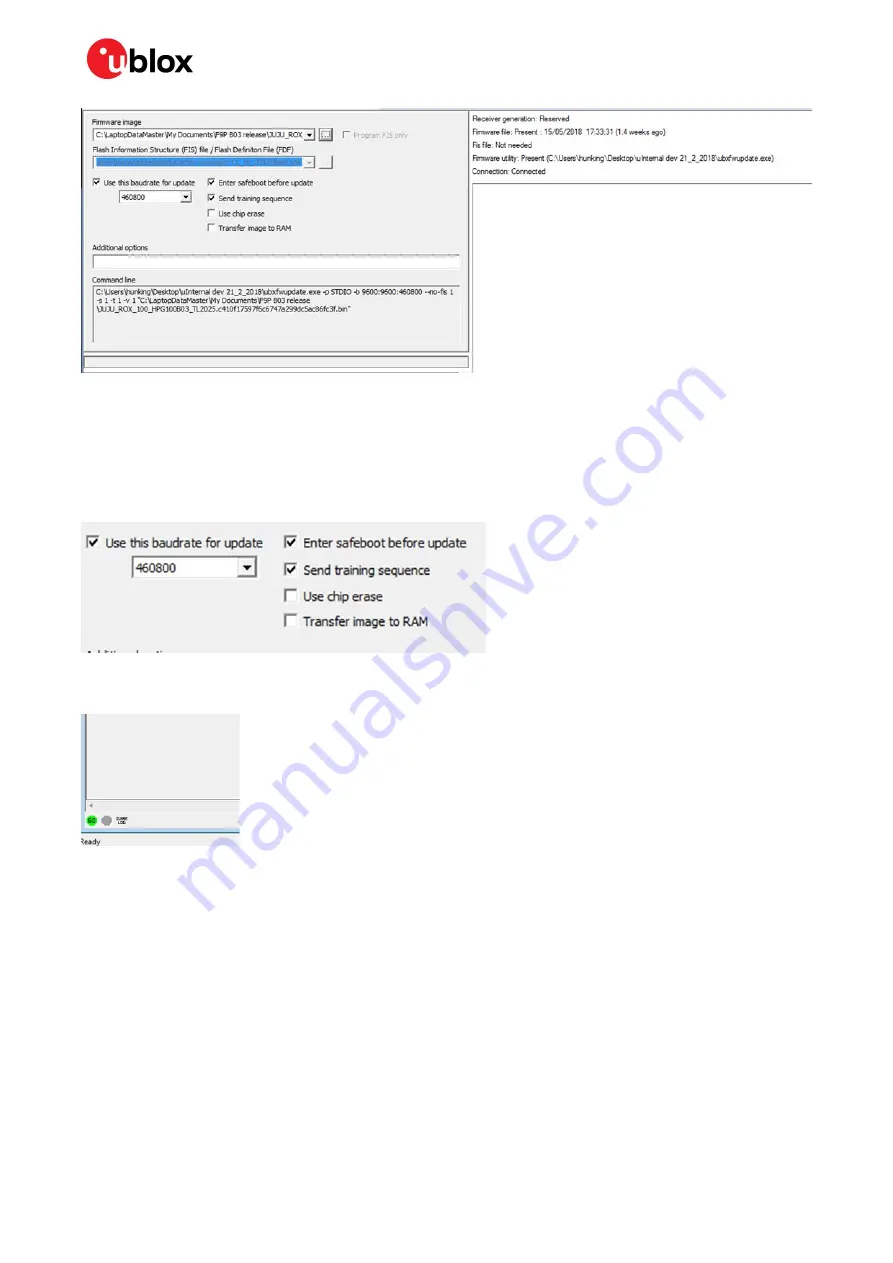
Figure 30: Selecting u-center Firmware image folder
At the top is the
Firmware image
file selection window. Click on the button on the right of the window.
This allows you to select the folder and file. Select the new firmware image bin file.
Set the
Enter safeboot before update
and
Send training sequence
options. Set the
Use this
baudrate for update
option and select e.g. 460800 from the pull-down list. This is shown in Figure
32 below.
Figure 31: Setting the required baud rate, safeboot and training sequence options
Then click the
GO
button at the bottom left corner of the window to begin the download.
Figure 32: Click GO for firmware update
The firmware update progress indication is shown adjacent to the input window.
When programming is complete, the module will start up in a default configuration in which the ZED-
F9P serial port is set to 38400 baud. This requires changing to 460800 baud to provide sufficient data
bandwidth and work correctly with the ODIN-W2 module. In order to make the baud rate change
persistent, make the selections shown in Figure 34.
Summary of Contents for C099-F9P-0-03
Page 34: ...C099 F9P User guide UBX 18063024 R12 Appendix Page 34 of 40...
Page 35: ...C099 F9P User guide UBX 18063024 R12 Appendix Page 35 of 40...
Page 36: ...C099 F9P User guide UBX 18063024 R12 Appendix Page 36 of 40 RED...
Page 37: ...C099 F9P User guide UBX 18063024 R12 Appendix Page 37 of 40...
Page 38: ...C099 F9P User guide UBX 18063024 R12 Appendix Page 38 of 40...


