U.S. BLIND STITCH MACHINE CO.
IS A DIVISION OF NEW YORK SEWING MACHINE ATTACHMENT CORP.
2011-15 85th Street, North Bergen, NJ 07047
•
Web: www.usblindstitch.com
Tel: 201-809-2009 • 1-800-225-2852 • FAX: 201-861-9201 • e-mail: [email protected]
13
2. Any time a looper is moved or changed, recheck the looper timing and reset if necessary.
Proper looper timing is absolutely essential for correct stitch formation. As described in detail
below,a properly timed looper will pass over the needle in the correct position to pick up the loop,
and also clear the chain-off pin, feeder, looper slot, and needle. The first check point for timing
the looper is at the position where the looper picks the thread loop off the needle during the needle
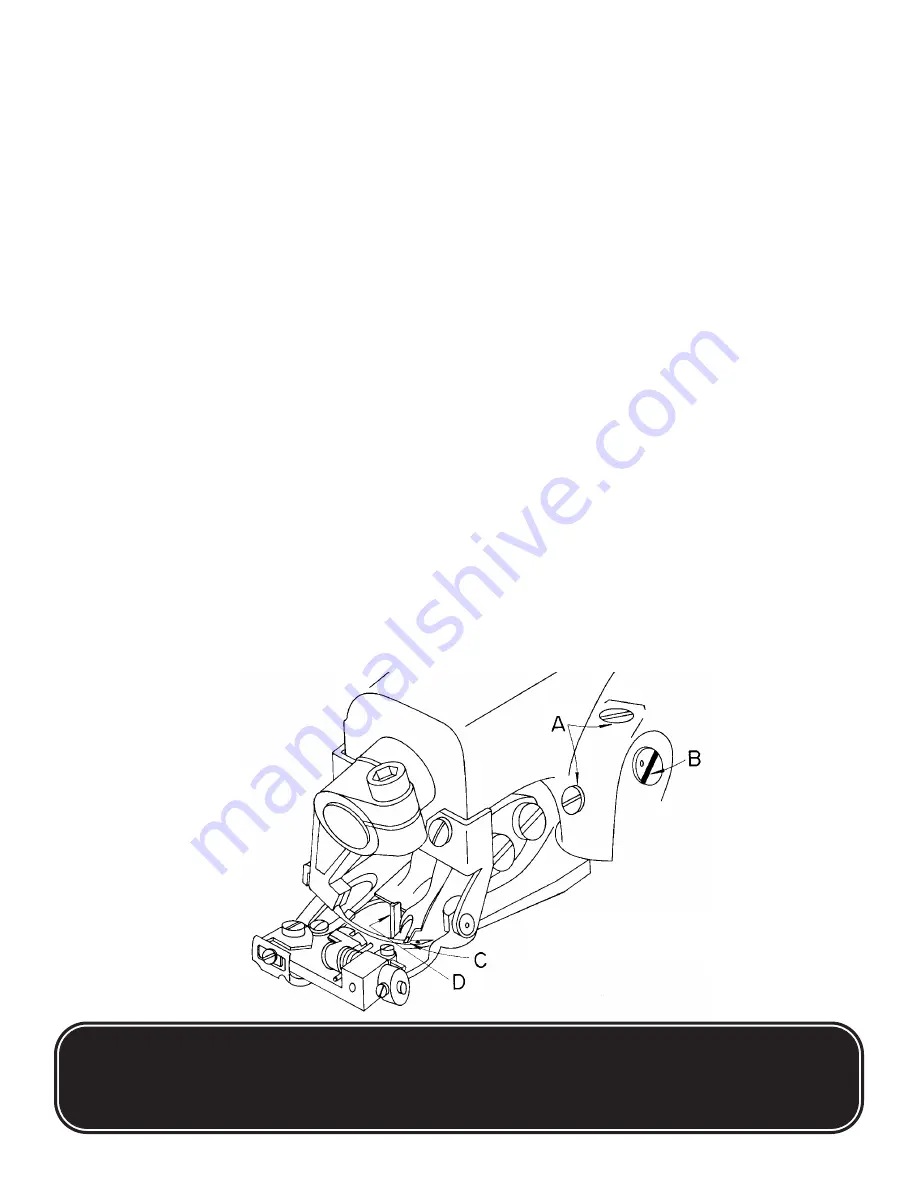
return stroke. Referring to Figure 7, (Point “C”), the long prong of the looper should pass over
and just clear the scarf of the needle, approximately 3/32” (2.4mm) behind the end of the needle
eye. At the same time, the short prong of the looper should pass over the needle with about
1/64” (.406mm) clearance, and must be set that it also clears the chain-off pin (item “D” in Figure 7).
3. To adjust the looper so that the timing checks out as noted in paragraph 2, it may be rotated
within its clamp by a limited amount. This adjustment should be made with the looper clamp
screw (item “A” in Figure 6) loosened, and the looper bottomed against its shoulder. Do not
move the looper in or out, and do not attempt to force the looper to turn beyond the limited
amount of travel available.
4. If the adjustment described in paragraph 3 is insufficient to provide the correct timing, it will
be necessary to turn the looper rod (item “E” in Figure 6) itself. This may be accomplished by
loosening with looper rod clamp screw (item “C” in Figure 6). The rod is then free to turn in
the looper rod fork (item “D” in Figure 6). It will normally be necessary to make only a very
small adjustment in order to get the looper into the correct rotational positirm for proper timing.
If, for any reason, the rod has been removed or the basic setting of the looper rod has been disturbed
by a large amount, it may be reset by noting that the distance from the center of the looper rod
fork pin (item “F” in Figure 6) to the rear face of the looper rod ball (item “G” in Figure 6) is
normally 4 & 3/32 inches (104mm) (refer to Figure 6). If the rod is set to this dimension then
only minor adjustment will be required to bring the looper into the correct timing position. Note
that this dimension is merely a guide to assist in setting a rod and variations may be expected
from machine to machine.
5. If, after completing the above adjustments, it is found that the looper is either too low or too
high, it will be necessary to adjust the eccentric stud. First loosen the two set screws (item “A”
in Figure 7). Place a wide blade screwdriver in the slot of the eccentric stud (item “B” in Figure 7)
and, using a slight turning motion, raise or lower the looper as required. Once the proper height
is established, check to see whether the looper must be moved to the left or to the right prior to
retightening the eccentric block set screws. If such a movement is required, it may be obtained
by lightly tapping the eccentric block in the correct direction with the handle of a screwdriver.
FIGURE 7
From
the
library
of:
Diamond
Needle
Corp


