background image

18


Step 3: Enter “Update System”


Select and enter function “7.6 Update System”. Press <OK> to start updating. Update will be 
completed in one minute. 
 
Caution


Please do not disrupt during BIOS update, otherwise it would cause 
irretrievable error on duplicator. We are not held responsible for any damage. 


Troubleshooting When Duplication Fails 


Check if too many bad tracks on HDDs can cause duplication failures. 


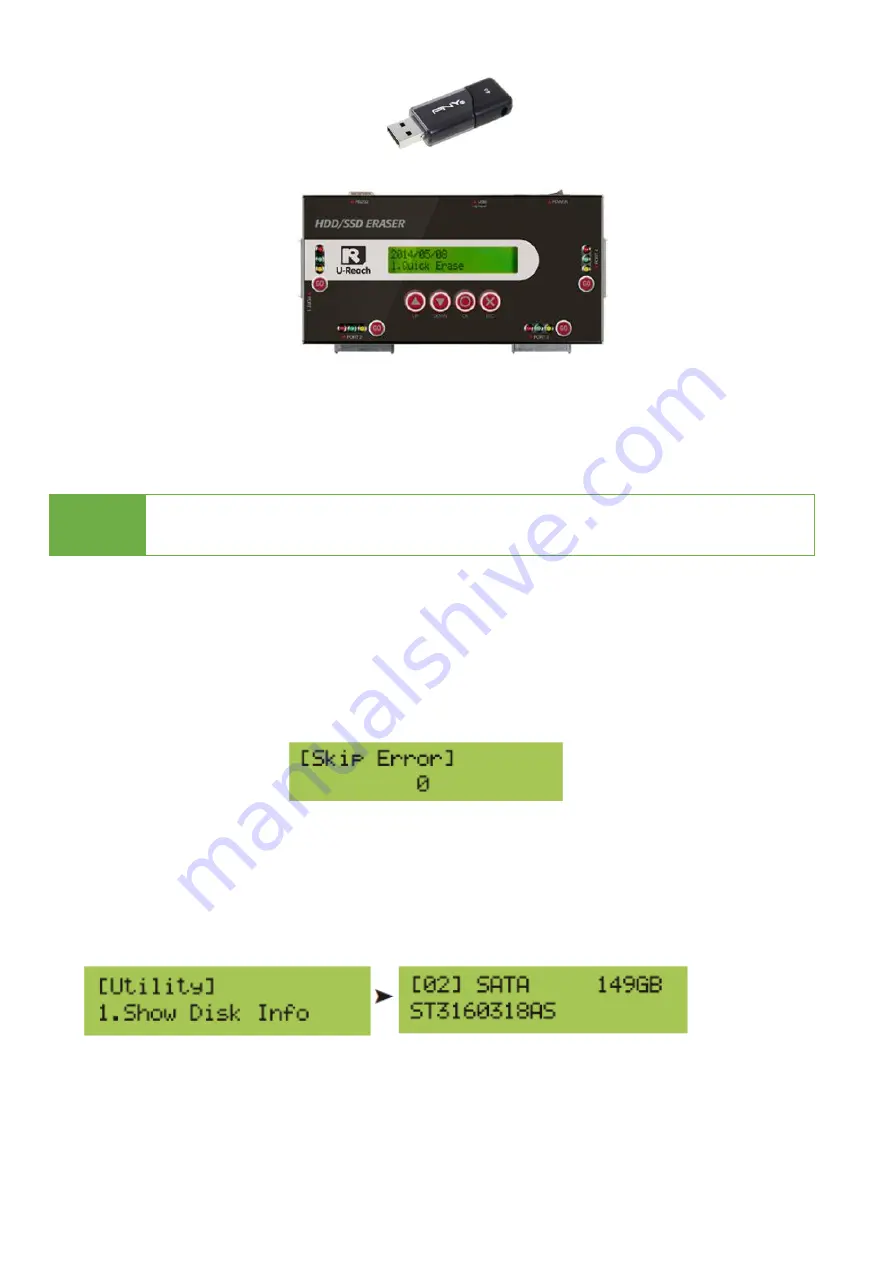
Check the setting of function "Skip Error". Enter function "5.Utility"-->""Skip Error". 


Make sure all HDDs are properly and firmly connected.   


Make sure the capacity of source HDD is smaller than target. 

Enter function "5.Utility"-->""Show Disk Info". Press 

▲▼

UP/Down keys to check HDD 

info connected to each port. 


Summary of Contents for TP Series

Page 1: ...TP Series SATA Hard Disk Eraser TP400G User Manual V3 0 ...

Page 2: ...ion 8 Quick Erase 8 Full Erase Entire HDD Area 8 DoD Erase DoD5220 22 M 9 DoD Erase Compare DoD5220 22 M 9 Secure Erase NIST800 88 10 Seven Pass Erase DoD 5220 22 M ECE 10 Utility Function 12 1 Copy 12 2 Compare 16 3 Copy Compare 16 System Info 16 Change the first Start up Menu 16 Restore factory default 17 System Update 17 Troubleshooting When Duplication Fails 18 How to Use Log Report 19 Specifi...

Page 3: ...peration of U Reach product and or software program or hardware issues can cause loss of data defective formatting or data loading U Reach will make efforts to resolve or repair any issues recognized by customer either within the warranty period or on a time and materials basis Specifications and features subject to change without notice or obligation Warranty U Reach provides a basic one year par...

Page 4: ...rer to ensure working safety Static electricity may cause erasing error Please pay attention to the eraser environment and operators equipment It is recommended to purchase static electricity elimination equipment to avoid static electricity shock when in high static electricity environment Notice Symbols Special items procedures or notes should be noticed by users before operation Note Note Refer...

Page 5: ... times complying with US Department of Defense s erase standard DoD 5220 22 M ECE 7 Utility 7 1 Copy Copy data from source to targets 7 2 Compare Compare bit by bit between source and targets to make sure accuracy 7 3 Copy Compare Copy and Compare source to targets and immediately compare after 7 4 Show Disk Info Show the information of connected HDDs such as brand name total capacity and etc 7 5 ...

Page 6: ... 4 Restore Default Back to original manufacturer setting 9 Log Manager 9 1 Out Today Report Output today s log data 9 2 Out Recent Report Output recent log data from today to recent 28 days 9 3 Out Period Report Output a period time of log data 9 4 Advanced Function default password 123456 9 4 1 Clear All Log Clean out the log records after entering password 9 4 2 Setup Password Set up the passwor...

Page 7: ...s Quick Erase Full Erase DoD Erase Secure Erase 7 Pass Erase Fast shortcut key GO can perform asynchronous HDD erase of each port Display HDD info of each port clearly After erasing press up down keys to check HDD status of each port such as serial number model or capacity etc Support hard disk copy and compare function Support multi interface Support directly 2 5 3 5 SATA HDD and SSD Support IDE ...

Page 8: ...ort To connect USB drive export out log of each port as txt file HDD socket 1 Copy source erase port HDD socket 2 3 4 Copy targets erase ports LED light Red error Green pass Green blinking working Yellow Power on do not remove HDD HDD port 1 Shortcut key Printer port USB port Power switch Power supply LCD display HDD port 4 HDD port 2 HDD port 3 Up Down OK Enter ESC Exit LED light ...

Page 9: ... key and hold continuously for 3 seconds to exit any erasing tasks The user is responsible to verify the targets quality Please pick a few completed targets for testing in a mass production environment for QC Step 1 Prepare HDDs Prepare HDDs for disposal Step 2 Place HDDs Insert HDDs for disposal into target ports Note Any port can erase data immediately Some modes will take much longer time than ...

Page 10: ...each port Setting of Erase Function There are 5 professional erase methods Quick Erase Full Erase DoD Erase Secure Erase 7 Full Erase Quick Erase Prepare disposal HDDs Insert disposal HDD to any port Enter function 1 Quick Erase Press OK or GO to start erasing Quick erase will only erase the index of the HDD It is the quickest way to erase HDD It will damage the data in HDD Please make sure you ha...

Page 11: ...antees data not recoverable This DoD erase method will erase HDD over each sector three times the first time with zeros 0x00 second time with 0xFF 0xFF and the third time with random characters DoD Erase Method DoD Erase Compare DoD5220 22 M Prepare disposal HDDs Insert disposal HDD to any port Enter function table 4 DoD EraseComp Press OK or GO to start erasing DoD EraseComp fully erases the HDD ...

Page 12: ...it might cause error on reading the HDDs which cannot be identified by the duplicators and computers If fails execute any erase mode again or disable security to save HDDs back We are not held responsible for any damages Only devices support Enhanced Secure Erase are available to execute this function Seven Pass Erase DoD 5220 22 M ECE Prepare disposal HDDs Insert disposal HDD to any port Enter fu...

Page 13: ...lease DO NOT disrupt Secure Erase Enhanced Secure Erase during operation Otherwise it might cause error on reading the HDDs which cannot be identified by the duplicators and computers If fails please execute secure erase mode again 6 ...

Page 14: ... of working targets shows on LCD Press OK to start Step 3 Use keys to select 7 1 Copy HDD and then press OK Duplication will start to proceed Note Press together for 5 seconds to stop operation on the slowest HDD It is able to use On Time Monitor feature to check operation speed of every port Step 4 Completion Quality of copy OK Fail and duplication time would show on LCD after duplication complet...

Page 15: ...r you can set the number of bad sectors that you accept to skip during Copy process If the HDD is very critical for content correctness it is strongly recommended to keep the skip error to be 0 Set Copy Area of Source HDD Appropriate copy area can greatly reduce operation time and have better efficiency There are four copy modes with different copy area please go to function Copy Area Skip error 0...

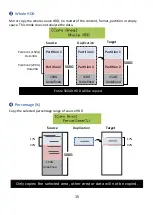
Page 16: ...de ALL Partitions Copy all of the partitions area bit by bit no matter there is data exist or not The capacity of target HDDs have to be bigger than the partition required capacity Partition1 150G Data 30G Partition2 200G Data 90G Only 120G data area will be copied it takes 12 minutes Source Duplication Target 500G 150G 150G Undefined Partition 1 Partition 2 Partition1 150G Data 30G Partition2 200...

Page 17: ...range of source HDD 150G Undefined Partition 1 Partition 2 Partition1 150G Data 30G Partition2 200G Data 90G 150G Undefined Partition 1 Partition 2 150G Undefined Partition 1 Partition 2 Entire 500GB HDD will be copied Source Duplication Target 500G 500G Source Duplication 150G Undefined Only copies the selected area other area or data will not be copied Target 500G 17 32 17 32 ...

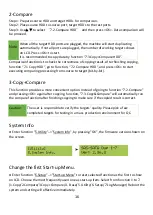
Page 18: ...o target bit by bit 3 Copy Compare This function provides a more convenient option Instead of going to function 7 2 Compare and pressing OK again after copying function 7 3 Copy Compare will automatically run the compare function after finishing copying to make sure if the copied result is correct Caution The user is responsible to verify the targets quality Please pick a few completed targets for...

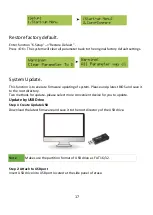
Page 19: ...system Please unzip latest BIOS and save it to the root directory Two methods for update please select more convenient device for you to update Update by USB Drive Step 1 Create Update USB Download the latest firmware and save it to the root directory of the USB drive Note Make sure the partition format of USB drive as FAT 16 32 Step 2 Attach to USB port Insert USB drive into USB port located at t...

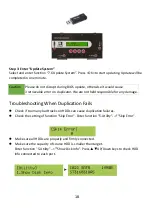
Page 20: ...ator We are not held responsible for any damage Troubleshooting When Duplication Fails Check if too many bad tracks on HDDs can cause duplication failures Check the setting of function Skip Error Enter function 5 Utility Skip Error Make sure all HDDs are properly and firmly connected Make sure the capacity of source HDD is smaller than target Enter function 5 Utility Show Disk Info Press UP Down k...

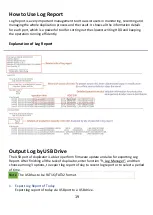
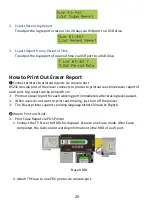
Page 21: ...eping the operation running efficiently Explanation of Log Report Output Log by USB Drive The USB port of duplicator is able to perform firmware update and also for exporting Log Report After finishing all the task of duplicator enter function 9 Log Manager and then choose among 3 options to export log report of day to recent log report or to select a period of time Note The USB has to be FAT16 FA...

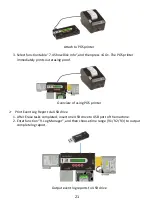
Page 22: ...al time eraser report of each port Log report can be printed from Printout eraser report for each working port immediately after erasing tasks passed When users do not want to print real time log just turn off the printer The Eraser printer supports printing language either Chinese or English How to Print out Proof Print Erase Report via POS Printer 1 Connect the TP Eraser to HDDs for disposal Exe...

Page 23: ...ely prints out erasing proof Overview of using POS printer Print Event Log Report via USB drive 1 After Erase tasks completed insert one USB drive to USB port of the machine 2 Enter function 9 Log Manager and then choose time range 9 1 9 2 9 3 to output complete log report Output event log reports to USB drive ...

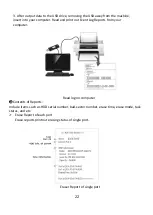
Page 24: ... Read and print out Event Log Reports from your computer Read log on computer Contents of Reports Include items such as HDD serial number bad sector number erase time erase mode task status and etc Erase Report of each port Erase reports printout erasing status of single port Eraser Report of single port ...

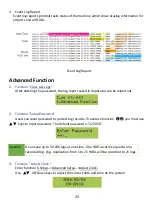
Page 25: ...iped out 2 Function Setup Password Users can reset password to protect log records To execute function you must use keys to input password The default password is 123456 Caution It can save up to 30 000 logs at one time One HDD record is equal to one recorded log E g duplication from 1 to 21 HDDs will be recorded to 21 logs 3 Function Adjust Clock Enter function 6 Setup Advanced Setup Adjust Clock...

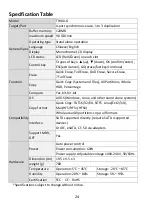
Page 26: ...nd Files All Partitions Whole HDD Percentage Compare Yes bit for bit Compatibility OS All OS Windows Linux and other stand alone systems Copy format Quick Copy FAT16 32 64 NTFS Linux Ext2 3 4 Mac HFS HFS HFSX Whole area All partitions copy all formats Interface SATA supported directly require SATA I supported devices Or IDE eSATA CF SD via adapters Support MBR GPT Yes Hardware Power Auto power con...

Reviews: