


PAGE 2 OF 6
0713 IH-707
LUBRICATE
PRINT ADJUSTMENT
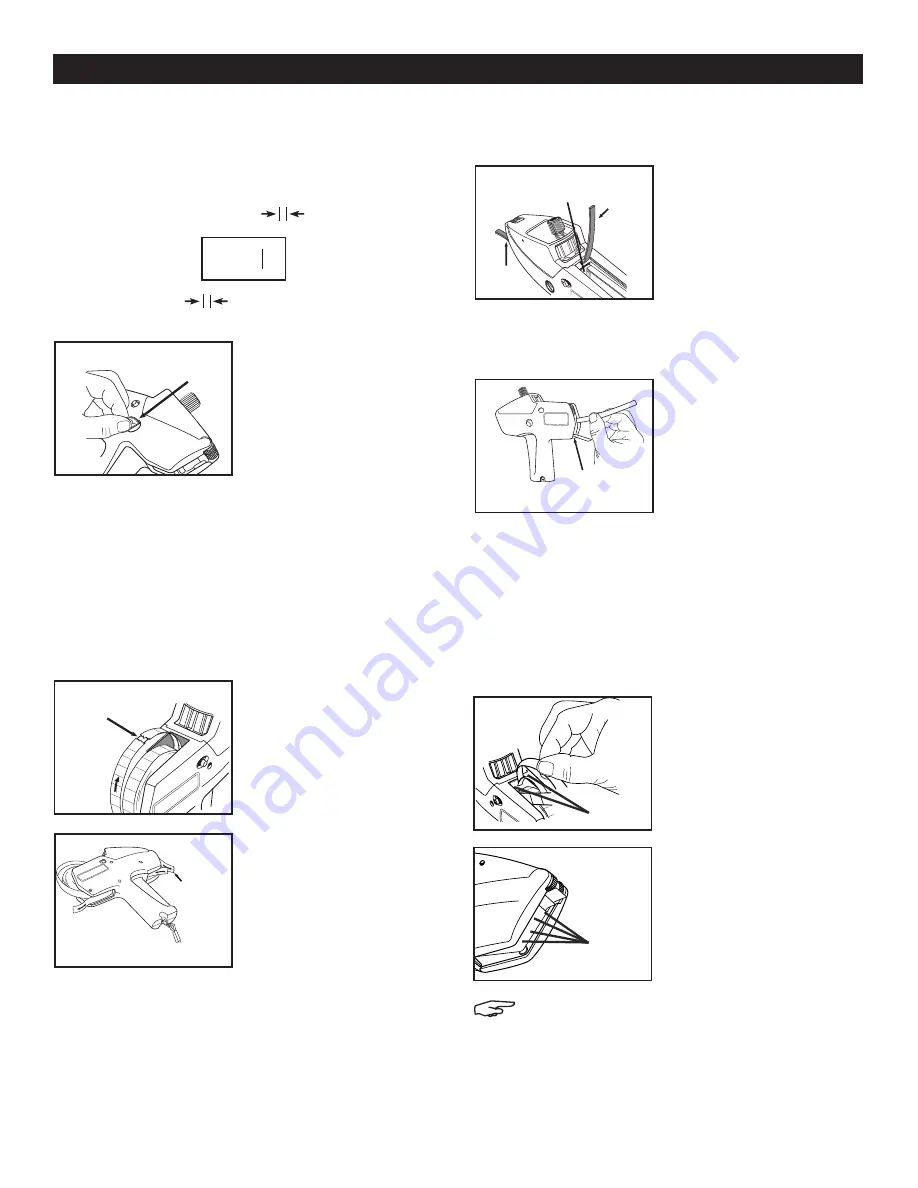
1. Print location is correct when extreme righthand and
lefthand characters are located as shown.
2.
Place small coin in
feedwheel button slot.
(See Figure 9)
3. Push feedwheel button in completely and turn
slightly clockwise if print is too far left or slightly
counterclockwise if print is too far right. Adjustments
made without completely depressing button are
temporary.
4. Repeat steps 2 and 3 until print is correctly
aligned.
REMOVE SUPPLIES
1. Tear label strip at label
roll as shown and pull
label roll from between
hubs. (See Figure 10)
2.
Tear backing paper
strip. Pull label strip
from labeler. (See
Figure 11)
3.
Squeeze and release
trigger until backing
paper is free to be
pulled out. (See
Figure 11)
CLEAR JAMS, CLEANING AND
LUBRICATION
1.
With label roll removed,
check label track and
backing paper track
for stray labels.
2. Clear label track by squeezing trigger and feeding
label removal strip under brake wheels and out front
of labeler. (See Figure 12)
3.
To clear backing
paper track:
a. Insert label removal
strip in end of track
to loosen stray
labels. (See
Figure 13)
b. Insert label removal
strip as shown,
using corner to
remove stray labels.
(See Figure 13)
4. If adhesive buildup occurs, lubricate with one drop
of a commercial 100% silicone lubricant as shown
with labels loaded.
LUBRICATE
One drop each side of
label chute between
spring and backing
paper. (See Figure 14)
LUBRICATE
One drop each spot
on backing paper
(total of four drops).
Spread with finger.
(See Figure 15)
NOTE: DO NOT OVER LUBRICATE!
LUBRICATE
FRONT
EXIT
BRAKE
WHEELS
REMOVAL
STRIP
Figure 12
Figure 14
Figure 15
FEEDWHEEL
BUTTON SLOT
Figure 9
INSTRUCTIONS CONTINUED
END OF
TRACK
Approx. 1/16 inch (1.6 mm)
Approx. 1/16 inch (1.6 mm)
FOR
+TX
99
3
c
TEAR
Figure 10
TEAR
BACKING
PAPER
Figure 13
Figure 11


