18
6
19
A
(a)
(b)
(d)
C
E
A
B
C
D
E
G
H
①
②
4.4 Coordination between needle, thread and sewing
material
Please apply needle DP
×
17, Nm125-180. The coarseness
of needle should be in accordance with the nature of
material. If stitch on heavy duty material with a slim
needle, the needle will be easily bent. Skip or thread
breakage may also occur. On the contrary, stitch on tightly
woven material with a very coarse needle, the material will
be destroyed with over-big needle hole. So the needle and
thread should be properly selected.
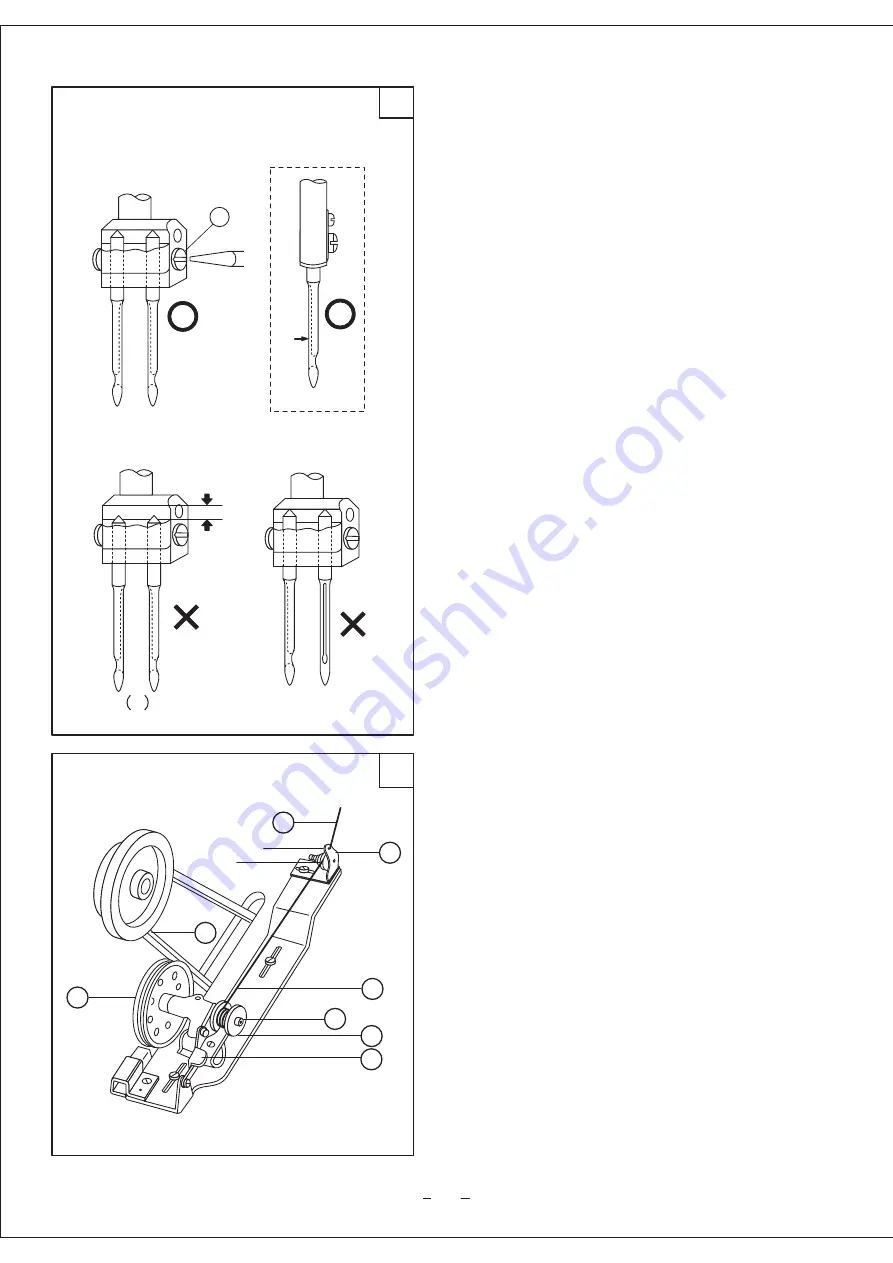
4.5 Installing the needle (Fig.18)
Turn the balance wheel to lift the needle bar to its highest
position, loosen needle set screw A, fully insert the needle
shank into the bottom of the needle socket. Keep the long
grooves of the two needles opposite to each other, then
tighten the screw A.(Fig.18.a) For single needle, keep the
long groove toward the left side of the operator as shown in
Fig.18.b.
Note: Fig.c: insufficient insertion.
Fig,d: wrong direction
4.6 Winding the bobbin thread (Fig.19)
1) Install the bobbin A to the bobbin winder spindle B.
2) Pass thread C from spool through the eye 1 on tension
bracket E. Pass it between tension discs 2, and then wind
the end of the thread a few turns on the bobbin.
3) Push stop latch thumb lever D down to lock the
bobbin, the winder pulley F is thereby a few turns on the
bobbin G.
4) Start the machine to wind thread.
5) When thread is fully wound, the bobbin winder stop
latch automatically release the bobbin winder, thus
stopping the winding motion.
S
in
g
le n
e
e
d
le
L
o
n
g g
ro
o
v
e l
e
ft t
o
w
a
rd
Clearance


