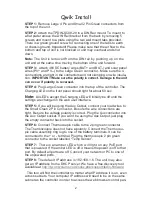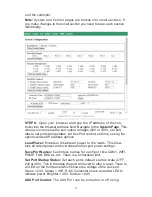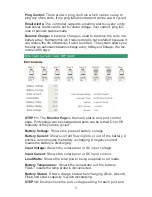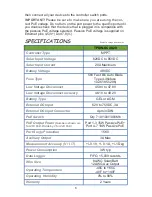
7
TECH CORNER
Additional Information you may find useful
RESET TO FACTORY DEFAULTS:
There is a button on the top of
the controller labelled FACTORY DEFAULT. Pressing and holding this
button for over 5 seconds will reset to factory defaults.
RESET the CONTROLLER:
There is a button on the top of the
controller labelled RESET. Pressing this button immediately resets
the controller. This is the same as power cycling the controller.
FRONT PANEL LED
’
s:
Charging
—
Green
Aux Output
—
24V Green / 48V Yellow
Ext Input
—
Green (powered from 4 pin mini DIN)
Overload—Red (The load is drawing too much power)
DC INPUT:
The unit can be powered via the solar input or a sec-
ondary DC Input. By using the DC input you can create a hybrid pow-
er system which uses the sun when available or a DC source like a
Grid connection or generator when the sun isn’t available. The power
on the solar input always takes priority so the DC input won’t be used
unless there is no sun.
UPS (non solar) Operation:
The unit can also be used as a high
powered UPS or battery backup system by providing 65VDC 18A into
the PV +and - inputs. Tycon offers a AC to DC power supply to ac-
complish this.
SNMP:
The controller can be accessed via HTTP or SNMP. SNMP
enables remote management via an SNMP control server.
MIB file
can be found at
http://tyconsystems.com/index.php/support/tpdin-
firmware
Graphs:
The graphs show the data in the LOG file. If there is no
data in the log file there will be no graph display. Turn on logging on
the System page by setting a Log Interval. Graphs can be captured
to a graphics file using any screen capture program including the
Snipping Tool supplied with Windows.
LOG:
The log displays all the important events which happen in the
device in addition to the data logging. The log file will show when the
system went through a reset or power cycle. It will also show when a
port was turned on or off. Please note that after a reset or power cy-
cle the log file may show a random date and time until it can recap-
ture the correct time.


