


Chapter4
Chapter4
Chapter4
Chapter4
Maintenance Mode
Maintenance Mode
Maintenance Mode
Maintenance Mode
Maintenance Mode
The settings of the printer can be changed according to its usage environment in
maintenance mode. And it is also possible to change their settings back to the initial
factory shipping setting or to adjust the cut position after printing in this mode.
And the content of the settings can be confirmed in demonstration printing mode.
To change the settings in maintenance mode, print and check the present settings.
Demonstration printing mode
Demonstration printing mode
Demonstration printing mode
Demonstration printing mode
Setting the mode
Setting the mode
Setting the mode
Setting the mode
Turning the power on while pressing the FEED switch with the front cover and the rear
cover both closed starts demonstration printing mode and the “ demonstration printing
and the present printing settings” are printed.
Setting maintenance mode
Setting maintenance mode
Setting maintenance mode
Setting maintenance mode
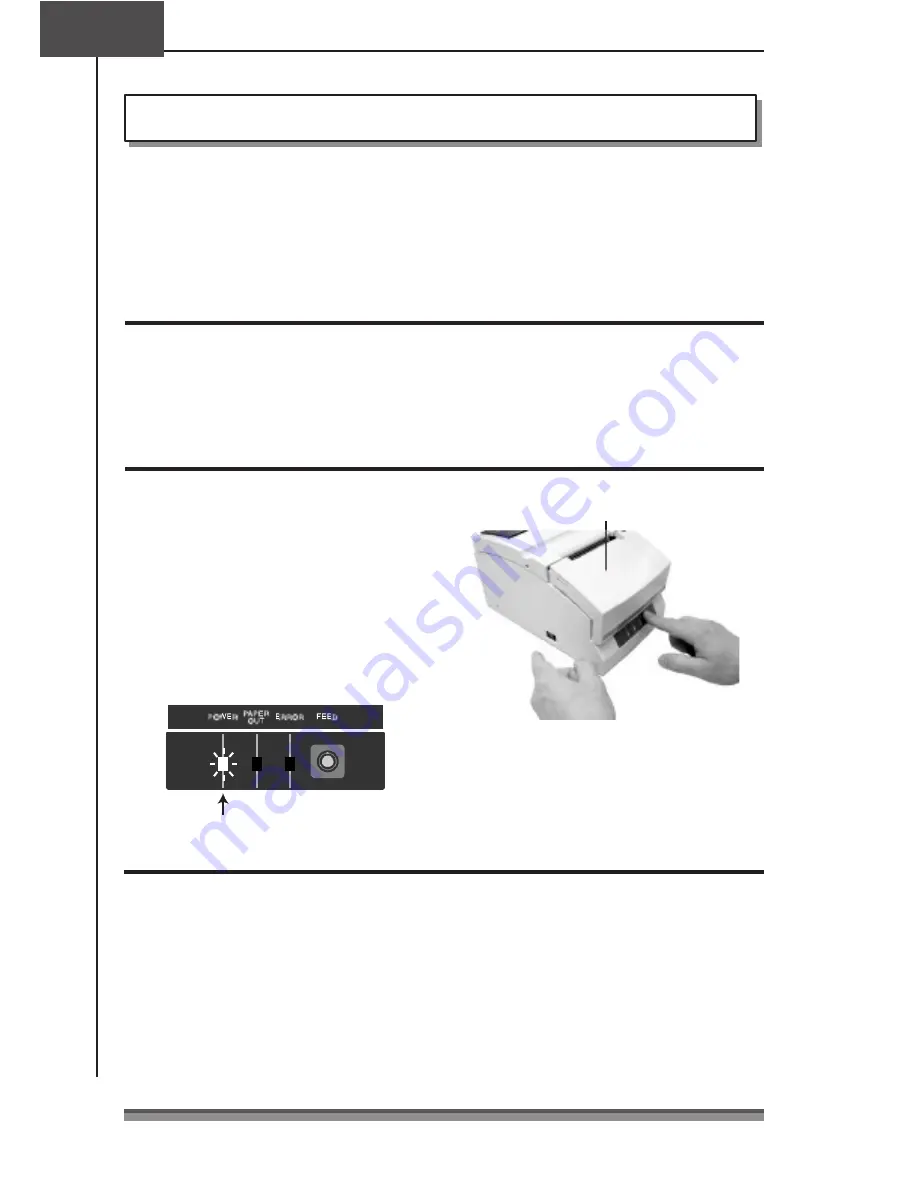
1
. Set maintenance mode by turning on
the power while pressing the FEED
switch with the front cover open and
the rear cover closed, then releasing
the FEED switch.
2
. The POWER LED flashes as the printer
enters maintenance mode.
Power switch
Front cover open
FEED switch
Close the front cover in this status.
Flashing
Types of maintenance mode
Types of maintenance mode
Types of maintenance mode
Types of maintenance mode
There are the following four types of maintenance mode.
Each mode is selected according to the number of times the FEED switch is pressed from
maintenance mode.
HEX Dump Mode: Press the FEED switch 0 times and reopen and close the front cover.
Soft SW Setting Mode: Press the FEED switch 1 time and reopen and close the front cover.
Initial Factory Shipping Mode: Press the FEED switch 2 times and reopen and close
the front cover.
Cut Position Adjustment Mode: Press the FEED switch 3 times and reopen and close
the front cover.
25
25
25
25


