background image

www.tuv.com 

  Test Report No.:  14009130 001 

Appendix 4 

page 30 of 45


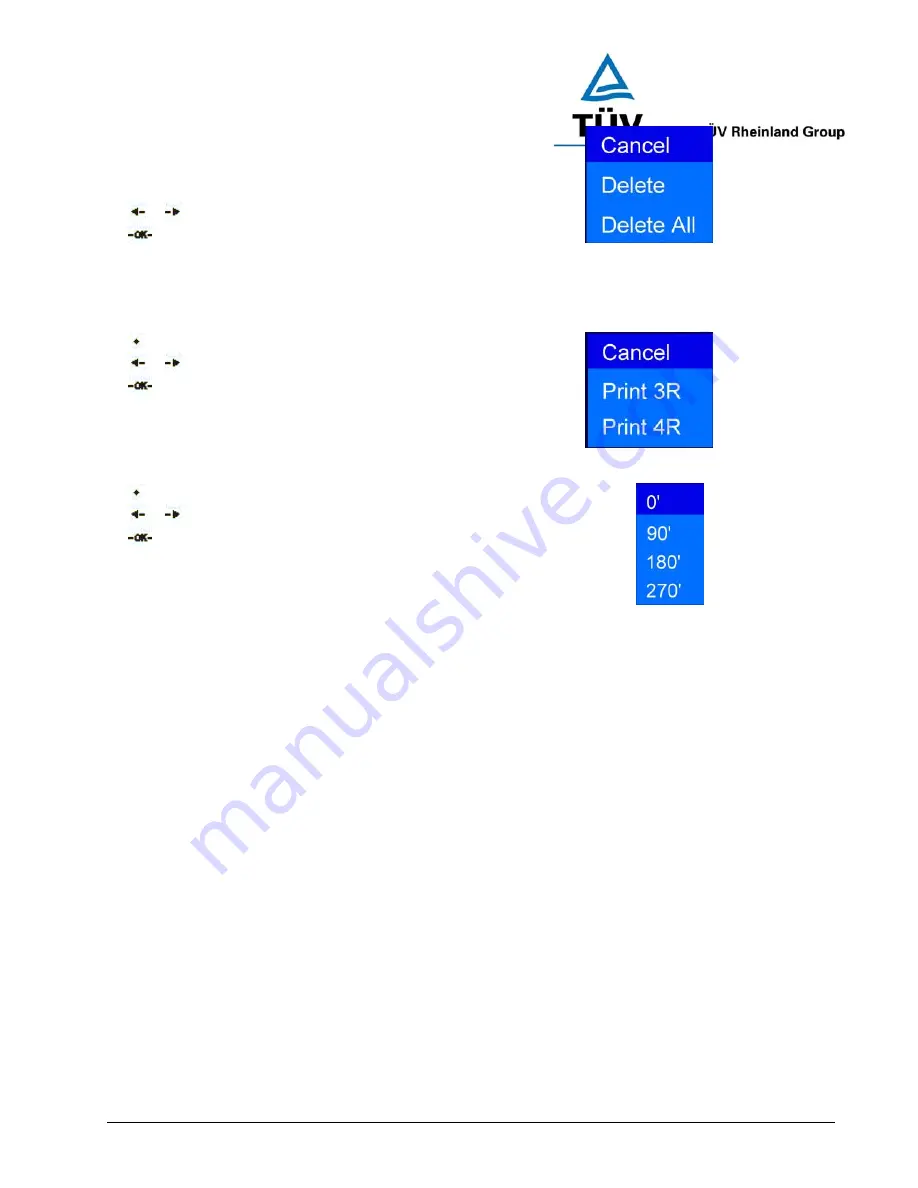
For Deleting a music, first to select the item to be deleted, 

 or 

 Press LEFT/RIGHT button to move up or down. 


Select OK to confirm selection. 


3.3 Direct Print 

You may select the print out size from the option box, 


Press SOFTKEY 1 to display the photo information. 

 or 


Press LEFT/RIGHT button to move up or down. 


Press OK to select. 


3.4 Rotate Photo 

There will be 4 options for rotation, 0

o

, 90

o

, 180

o

 & 270

o


Press SOFTKEY 1 to display the photo information. 

 or 

 Press LEFT/RIGHT button to move up or down. 


Press OK to select. 


Summary of Contents for i.Tech PowBox V25

Page 1: ...www tuv com Test Report No 14009130 001 Appendix 4 page 17 of 45 1 6 User Manual Cover i Tech PowBox V25 User Guide...

Page 2: ...Audio 28 3 PHOTO 29 3 0 Photo Menu 29 3 1 Display Mode 29 3 2 Delete Photo 29 3 3 Direct Print 30 3 4 Rotate Photo 30 4 RECORD 31 4 0 Record Menu 31 4 1 Recording Video AV in 31 4 2 Voice memo Mic in...

Page 3: ...eport No 14009130 001 Appendix 4 page 19 of 45 6 7 Default 35 6 8 Software Upgrade 35 7 FORMAT 36 7 0 Format Menu 36 8 BLUETOOTH 37 8 0 Bluetooth Stereo 37 9 ABOUT i Tech 39 9 0 About i Tech 39 Care a...

Page 4: ...de high quality sound playback and recording photo viewing video playback and recording It is also compatible with Bluetooth stereo headset Bluetooth Specification v1 2 Class 2 Supports Bluetooth A2DP...

Page 5: ...K Press to go back to the previous upper menu 3 SOFTKEY 1 Depends on the menu nature press to select from the option items 4 SOFTKEY 2 Depends on the menu nature press to select from the option items...

Page 6: ...transmitting video image to TV 9 USB For charging and also connecting with PC for file transfer 10 AV IN To connect the PowBox V25 with AV equipments e g TV Video Recorder Viewcam etc via an AV cable...

Page 7: ...charger adaptor Before using for the first time you must fully charge the battery Hold the button for 3 sec to start the PowBox V25 Press the and turn the button for navigation At any menu press to r...

Page 8: ...1 Appendix 4 page 24 of 45 MAIN MENU Fig 3 Using the UP DOWN and LEFT RIGHT button to navigate the menu and press button to confirm Hold the SOFTKEY 1 for 3 sec to toggle the LCD ON OFF Hold the SOFTK...

Page 9: ...playing all the video RANDOM Play the video randomly Press the DOWN button for MUTE UNMUTE function Press LEFT RIGHT button for choosing the video clip Press OK to play the selection 1 1 Play Video Pr...

Page 10: ...www tuv com Test Report No 14009130 001 Appendix 4 page 26 of 45 Select OK to confirm selection...

Page 11: ...only once REPEAT Repeat playing the same file REPEAT ALL Repeat playing all the files RANDOM Play the MP3 file randomly Press the DOWN button for MUE UNMUTE all audio Press the LEFT RIGHT button for m...

Page 12: ...om Test Report No 14009130 001 Appendix 4 page 28 of 45 2 1 Delete Audio For Deleting a music first to select the item to be deleted or Press LEFT RIGHT button to move up or down Select OK to confirm...

Page 13: ...N button for setting the AUTO LOOP duration 3s 5s 15s Press the LEFT RIGHT button for moving UP DOWN the photo album Press OK to display the photo 3 1 Display Mode Press the SOFTKEY 1 to set the start...

Page 14: ...nfirm selection 3 3 Direct Print You may select the print out size from the option box Press SOFTKEY 1 to display the photo information or Press LEFT RIGHT button to move up or down Press OK to select...

Page 15: ...and store it either on the internal memory or onto a SD MMC card 4 1 Recording Video AV in 1 Connect the AV cable For all the AV devices you need to plug in the three pins Red White Yellow correctly...

Page 16: ...stop recording by the preset recording time or press button to STOP 4 3 Recording Audio Audio in 1 Plug the 3 5mm audio cable to the Audio Out of your Hi Fi system 2 Connect the other end to the PowB...

Page 17: ...Press OK to start or pause 5 2 Russian Game Press the UP DOWN button to GRADE up down or Press the LEFT RIGHT button to move left right Press OK to start or pause 5 3 Set Alarm Press the SOFTKEY 1 to...

Page 18: ...be turned on Press the UP DOWN to move up down Press OK to select 6 3 Language The user interface language can be changed in this menu simply move the cursor to the language that you wish to read and...

Page 19: ...perator and press OK to confirm Press UP DOWN button to move up down Press OK to select 6 6 Auto Power OFF You can preset the auto power off time in the selection of NEVER 3 15 or 30 Minutes To activa...

Page 20: ...s provided but you must be sure that you have made a backup or you really want to erase everything that stored in the PMP To format move to the YES icon and select OK Press SOFTKEY 1 to format the int...

Page 21: ...mpowered the Bluetooth 1 2 A2DP spec which allows you to pair up with our stereo Bluetooth headset Get Prepared Prior to using your Headset for the first time you must fully charge the headset You can...

Page 22: ...the screen You should now be able to make and receive calls using your headset Setp 2 Pairing the Headset with the PowBox V25 8 Turn off the headset by holding the MFB for 3 sec until you hear a shor...

Page 23: ...www tuv com Test Report No 14009130 001 Appendix 4 page 39 of 45 9 ABOUT i Tech 9 0 About i Tech This menu provides you all the information about i Tech...

Page 24: ...o clean the PMP Do not expose the PMP to extremely high or low temperatures Do not dispose of the PMP in a fire as it will result in explosion Do not expose your PMP to contact with sharp objects as t...

Page 25: ...supplied charger when charging the headset Charging Only use the manufacturer supplied charger when charging the PMP Do not disassemble the charger as it may expose you to dangerous voltages of other...

Page 26: ...ldren to play with the PMP or headset small parts may be a choking hazard Observe all signs that require an electrical device or RF radio product to be switched off in designated areas These could inc...

Page 27: ...your mobile handset Ensure the Bluetooth feature in activated on your PMP You can see a Bluetooth icon when it is activated Ensure the headset is within a maximum of 10 meters of the PMP and there ar...

Page 28: ...rgeable Battery Operating Current 200mA Internal Memory 128MB Nand Flash Usable 100MB External Memory Up to 1GB Interface USB 1 1 Bluetooth Specification Version 1 2 Class 2 Bluetooth Profile Supporte...

Page 29: ...ng Enterprises Limited or its affiliates Bluetooth and the Bluetooth logos are trademarks owned by Bluetooth SIG Inc USA and licensed to i Tech Dynamic Limited This device complies with Part 15 of the...

Reviews: