Turn of the century 20185 Owner'S Manual Download Page 11

TM

Turn of the Century

LIMITED LIFETIME WARRANTY

To obtain Service, please contact the Service Department:

1-877-459-3267, 9 a.m.- 5 p.m. central time.

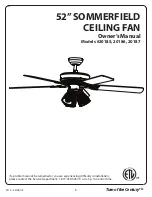
Model Name: 52” Sommerfield


Ceiling Fan

Model No:  20185 - Oil Rubbed Bronze (SKU: 355-1013) 


The limited lifetime warranty covers this ceiling fan, for residential use by the original purchaser, against 

defects in material or workmanship as follows: 
If your Turn of the Century Ceiling Fan motor fails at any time during the lifetime of the original purchaser 

due to defects in material or workmanship, we will provide a replacement part free of charge.
If your fan motor fails at any time within one year after the original date of sale to the original purchaser 

due to defects in material or workmanship, we will provide labor to repair the defect, with the exception 

of take down/reinstallation, free of charge.  The original purchaser will be responsible for all labor costs 

after this one year period.

If no replacement parts are provided for any part of your fan motor that fails at any time during your 

lifetime due to defects in material or workmanship, we will refund the original purchase price of your fan.
If your fan blades, pull chain switch, reverse switch, or any accessory, except glass globes and light 

bulbs, fails at any time within one year after the original date of purchase due to a defect in material and 

workmanship, we will repair or, if we choose, replace the defective blades, switch, or accessory free of 

charge, with the exception of take down/reinstallation services.
If the original purchaser ceases to own the fan, this warranty and any implied warranty, including but not 

limited to any implied warranty of merchantability or fitness for a particular purpose, become void. This 

warranty and any implied warranty, including but not limited to any implied warranty of merchantability 

or fitness for a particular purpose, do not cover glass globes, light bulbs, or finish on any metal portions 

of the fan.
This warranty is in lieu of express warranties. The duration of any implied warranty of merchantability or 

fitness for a particular purpose,  with respect to any Turn of Century Ceiling Fan motor, blades, switch, 

or accessories, is expressly limited to the period of the express warranty set forth above for such motor, 

blades, switch, or accessories.
This warranty excludes defects, malfunctions, or failures of any Turn of Century Fan that are caused by 

repairs by persons not authorized by us, use of parts or accessories not authorized by us, mishandling, 

improper installation, modifications or damage to the fan while in your possession, or unreasonable use, 

including failure to provide necessary maintenance.
To obtain service, contact the service department. You will be responsible for all insurance and freight or 

other transportation charges to our factory or service center.  A copy of sales receipt is required in order 

to obtain service. We will return your fan freight prepaid.  Your fan should be properly packed to avoid 

damage in transit, for we will not be responsible for any such damages.
In no event shall Turn of Century Fan be liable for consequential or incidental damages.
Some states do not allow the exclusion or limitation of consequential or incidental damages, in which 

case the above limitation or exclusion may not apply.
This warranty gives you specific legal rights and you may also have other rights which vary from state 

to state.

11

Summary of Contents for 20185

Page 1: ...EILING FAN Owner s Manual Models 20185 20186 20187 TurnoftheCenturyTM 1 If a problem cannot be remedied or you are experiencing difficulty in installation please contact the Service Department 1 877 459 3267 9 a m 5 p m Central time ...

Page 2: ...Motor Screw x 10 18 Mounting Bracket Screw x 4 19 Blade Screw x 15 20 Closemount Screw x 3 21 Downrod Set Screw x 2 22 Star Washer x4 23 Blade Washer x 15 24 Switch Housing Screw x 3 25 Wire Connector x 3 26 Thumbscrew x 9 27 Downrod Clip 28 Downrod Pin Unpack your fan and check the contents You should have the following items PACKAGE CONTENTS HARDWARE CONTENTS Note Some extra hardware has been in...

Page 3: ...hod is best suited for ceilings lower than 8 feet It does not utilize the downrod Downrod Mount is best suited for ceilings 8 ft or higher For taller ceilings you may want to use a longer downrod not included Angled Ceiling Mount is best suited for angled or vaulted ceilings A longer downrod is sometimes necessary to ensure proper blade clearance from the ceiling If using the angle mount check to ...

Page 4: ...VICING THIS FIXTURE TURNING OFF THE ELECTRICAL POWER BY USING THE LIGHT SWITCH IS NOT SUFFICIENT TO PREVENT ELECTRICAL SHOCK TO REDUCE THE RISK OF INJURY INSTALL THE FAN SO THAT THE BLADES ARE AT LEAST 7 FEET 2 1 METERS ABOVE THE FLOOR AND AT LEAST 30 INCHES 0 5 METERS FROM THE TIP OF THE BLADES TO THE WALL TO REDUCE THE RISK OF FIRE ELECTRIC SHOCK OR PERSONAL INJURY MOUNT TO OUTLET BOX MARKED ACC...

Page 5: ...port and use the mounting screws and washers provided with the outlet box 4 3 CLOSEMOUNT INSTALLATION OPTIONAL a Remove the canopy cover from the bottom of the canopy b Remove the three Phillips head closemount screws from the top of the motor housing c Align the holes in the bottom of the canopy with the screw holes in the top of the motor The larger holes in the canopy will encompass the three p...

Page 6: ...ult in fan falling causing serious injury or death Downrod Canopy Downrod Pin Yoke Downrod Downrod Clip Set Screw Yoke Tab Slot Downrod Downrod Mounting Bracket Black Hot Wire Connector White Neutral Bare Green Ground Black Blue White Green 8 Use wire connectors to connect the fan wires to the power supply wires according to the wiring diagram and the following instructions Connect the white wire ...

Page 7: ...crews from the underside of the motor Discard the motor blocks but keep the motor screws for installation of the blade arms 10 9 Canopy Round Hole Motor Block Motor Motor Screw Switch Housing Mounting Bracket Screw L shaped Slot 11 Partially insert three blade screws along with the blade washers through the blade and into the blade arm Tighten each blade screw starting with the one in the middle R...

Page 8: ...mb screws on the light kit Lift the glass shade onto the socket and secure with thumb screws Repeat for each socket 14 Single pin Connectors Socket Glass Shade Thumb Screw Light Kit Switch Housing Switch Housing Screw 13 15 Install the CFL bulbs 13 Watt into the sockets of the light kit Switch Housing Cap Switch Housing Screw 16 INSTALLATION WITHOUT LIGHT KIT OPTIONAL a Remove the three switch hou...

Page 9: ...ling fan will allow you to raise your thermostat setting in summer and lower your thermostat setting in winter without feeling a difference in your comfort Note Wait for the fan to stop before moving the reverse switch In warmer weather push the reverse switch down which will result in downward airflow creating a wind chill effect In cooler weather push the reverse switch up which will result in u...

Page 10: ...If using a light kit be sure the glass shades are finger tight Check to be sure light bulbs are snug in sockets and not touching glass shade s If vibration persists from glass remove glass and install a 1 4 in wide rubber band on glass neck to act as an insulator Replace glass and tighten screws against rubber band 5 Using a full range dimmer to control fan speed will cause humming noise from the ...

Page 11: ...arranty including but not limited to any implied warranty of merchantability or fitness for a particular purpose become void This warranty and any implied warranty including but not limited to any implied warranty of merchantability or fitness for a particular purpose do not cover glass globes light bulbs or finish on any metal portions of the fan This warranty is in lieu of express warranties The...

Reviews: