background image

Lit. No. 72623, Rev. 00 

16 

April 15, 2019

PUMP SPECIFICATIONS & INFORMATION

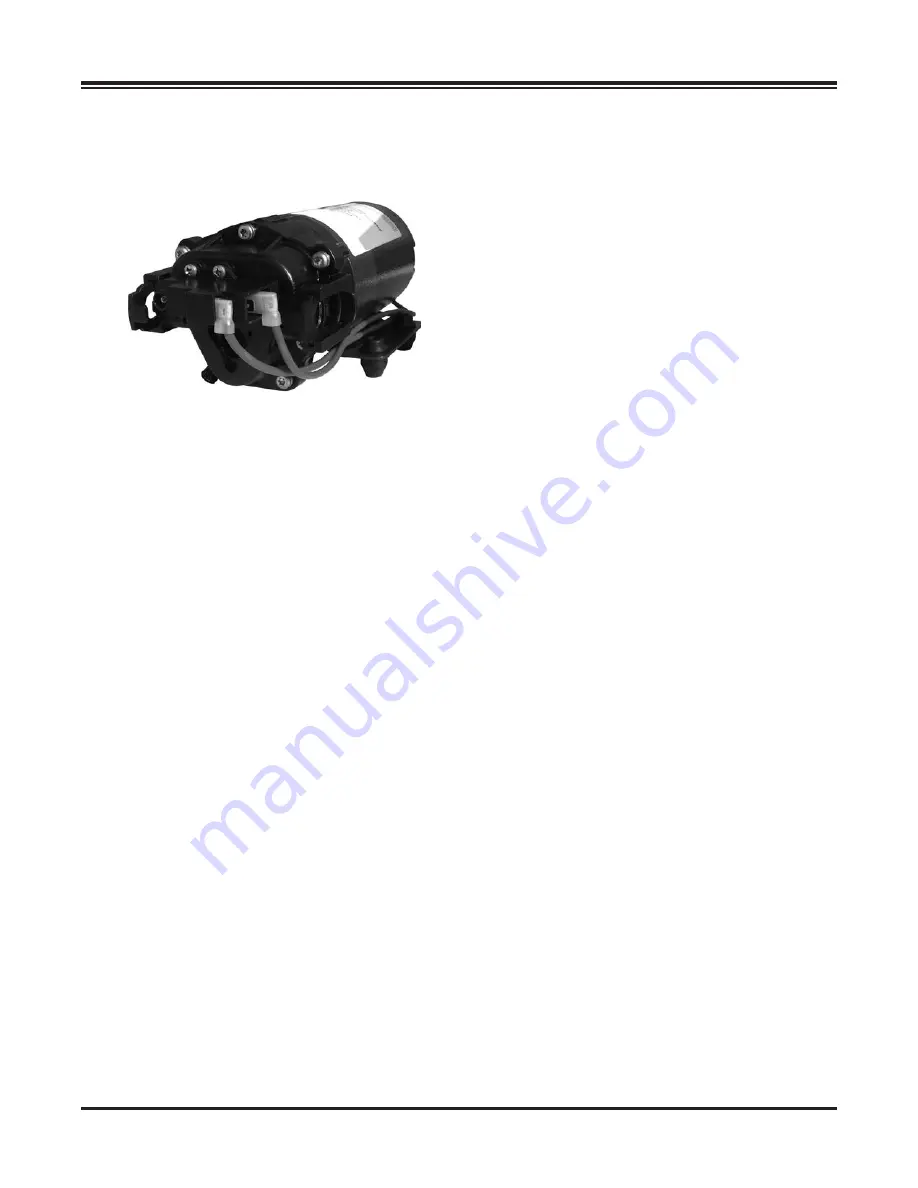
PowerFLO™ 7800 Series

12V DC Motor-Driven Diaphragm Pumps

Motor 

Type:

 12V DC, permanent magnet, totally enclosed, 

nonventilated

Leads:

 16 AWG, 12" long

Temperature Limits:

 Not equipped with thermal 

protection. For user safety, optimal performance, 

and maximum motor life, the motor surface 

temperature should not exceed 150°F (66°C).

Pump

Type:

 3-chamber positive displacement diaphragm 

pump, self-priming, capable of being run dry, 

demand or bypass model.

Certifications:

 NSF Standard 58

Maximum Liquid Temperature: 

140°F (60°C) 

Priming Capabilities:

 14 feet (4 m)

Maximum Pressure:

 60 psi

Inlet/Outlet Ports:

 Quick Attach (7802 model)

Materials of Construction


Housing: polypropylene 

Diaphragm: Santoprene 

Valves: Viton  

Fasteners: stainless steel

Weight:

 6 lb (2.7 kg)

Model 7802

2.2 gal/min

Pressure Sensing Demand Switch

The PowerFLO Series 7800 pump is controlled by 

a built-in pressure sensing demand switch. When a 

faucet or valve is opened downstream of the pump, line 

pressure drops, thus starting the pump automatically. 

Conversely, when the valve shuts, the line pressure 

increases, turning the pump off automatically. 

The pressure switch actuates in response to the 

pump outlet pressure at a predetermined and preset 

pressure. The pump label indicates the predetermined 

ON and OFF pressures. Typically, the OFF pressure 

is accurately set at the factory and the ON pressure is 

within an allowable range below that value. 

These pressure settings may vary in response to the 

characteristics of the system in which the pump is 

installed, the flexibility and length of the tubing, the 

faucet or valves and the duration that they are open. 

Therefore, variation in pressure setting is expected 

with use and over time.

Adjusting the Pressure Switch

Should the pressure sensing demand switch OFF 

setting vary with use and time to an unsuitable value, 

it may be adjusted for optimum performance. Turn 

the set screw clockwise to increase the OFF pressure 

setting and counterclockwise to decrease the setting. 

The screw should not be adjusted more than one-half 

turn without consulting the factory. Excessive 

adjustment of the pressure switch could cause low 

system pressure, rapid cycling ON/OFF operation, and 

reduced pump and motor life. Damage may occur. The 

Warranty does not cover improper adjustment of the 

pressure switch.

Summary of Contents for US200

Page 1: ...v 00 This document supersedes all editions with an earlier date CAUTION Read this document before operating or servicing the sprayer California Proposition 65 WARNING This product can expose you to chemicals including lead which are known to the State of California to cause cancer and birth defects or other reproductive harm ...

Page 2: ......

Page 3: ...5 2019 TABLE OF CONTENTS PREFACE OWNER S INFORMATION FORM 4 SAFETY 5 ASSEMBLY 10 OPERATION 11 AFTER USE MAINTENANCE WINTER STORAGE 12 FAQs 13 ACCESSORY SPRAY BOOM CALIBRATION 14 PUMP SPECIFICATIONS INFORMATION 16 TROUBLESHOOTING 18 ...

Page 4: ..._________________________________________ Date Purchased ______________________________________________________________________ Sales Outlet Name __________________________________________ Phone __________________ Sales Outlet Address __________________________________________________________________ Sprayer Type Model __________________________________________________________________ Production d...

Page 5: ...bed Unit must be strapped down and bolted into position before operating or transporting WARNING Vehicle handling and characteristics will change with the unit installed Avoid any sudden steering maneuvers starts or stops that could create sloshing and instability WARNING Never exceed 10 mph 16 km h when loaded sprayer is attached to vehicle Braking distances may be increased and handling characte...

Page 6: ...l resistant gloves when filling using and cleaning the sprayer Wear additional protective gear such as face mask or apron as recommended on the chemical label Do not wear jewelry or a necktie and secure long hair Wear safety goggles to protect your eyes from brine battery acid gasoline dirt and dust Do not eat drink smoke rub your eyes or touch bare skin while spraying Avoid touching hot surfaces ...

Page 7: ...you are the victim immediately seek assistance from nearby personnel because you may become incapacitated 2 Immediately follow First Aid instructions on chemical label 3 Call a poison control center for further advice In the U S call 1 800 222 1222 Have the chemical label available for reference Chemical Spills Chemical spills must quickly be contained and properly cleaned up Refer to the chemical...

Page 8: ...s recommended on the chemical label Exercise extra caution around children and pets Keep sprayer and spray materials away from them at all times Do not mix or pour chemicals in an enclosed unventilated area Do not use flammable or corrosive chemicals in the sprayer Flush the sprayer before switching chemicals in order to prevent dangerous chemical interactions BEFORE SPRAYING Inspect and prepare s...

Page 9: ... attempting any repairs Wear personal protective equipment and follow safety instructions SAFETY AFTER SPRAYING Clean sprayer immediately after use according to the directions provided in this manual Decontaminate yourself after you are done spraying and have cleaned the sprayer Wash all exposed areas of the body with soap and water and remove and launder clothing Dispose or store remaining chemic...

Page 10: ...mbly plug to the plug at the rear of the pump 3 Connect the Red POSITIVE wire of the lead wire assembly to a 12V source Connect the Black wire to ground or to the NEGATIVE battery post 4 Slide the supplied 5 8 hose clamp onto the open end of the wand assembly hose Press the end of the hose onto the swivel barb labeled WAND on the pump manifold and tighten the hose clamp To add the PBA 22 Spray Boo...

Page 11: ...oom 80 spray width PBA 77 7 Nozzle Boom 140 spray width For application rates refer to the Accessory Spray Boom Calibration section of this manual OPERATING PRESSURE Optimal operating pressure is 40 psi The pump has a pressure switch that will shut off the pump when pressure reaches 60 psi Typically the spray wand will be operated at between 20 and 40 psi Refer to the Spray Boom Calibration sectio...

Page 12: ...uipment including gloves and safety goggles when filling or emptying sprayer Cleaning Spray Boom Nozzles If Equipped 1 Remove the spray tips and screens from the boom Wash the tips thoroughly with water or cleaning solution appropriate for the chemical just sprayed Blow out the orifice clean and dry 2 If the orifice remains clogged clean it with a fine bristle brush not a wire brush or a toothpick...

Page 13: ...tern To overcome this slightly open the bypass valve on the pump manifold How do I adjust the pressure Operating pressure should be adjusted by regulating the bypass valve See full instructions in the Operation section To adjust the pump OFF pressure setting see full instructions under Adjusting the Pressure Switch in the Pump Specifications Information section Can the spray tip on the wand be rep...

Page 14: ...hem while spraying Add water and chemicals in the proper amounts in the spray tank and drive to your starting point When you are ready to spray turn the boom control valve OFF Once the pump is turned ON the unit will begin spraying The system pressure will decrease slightly as fluid begins flowing from the spray nozzles This is normal the pressure will recover when the control valve is turned OFF ...

Page 15: ... 0 014 30 0 0 52 0 174 0 087 0 059 0 044 0 035 0 024 0 017 40 0 0 60 0 206 0 100 0 068 0 050 0 040 0 027 0 020 ACCESSORY SPRAY BOOM CALIBRATION SPRAY COVERAGE TABLE 7 NOZZLE BOOM 80 110 02 Spray Tip 20 Spacing Pressure Capacity Speed 1 mph 88 ft min 2 mph 176 ft min 3 mph 264 ft min 4 mph 352 ft min 5 mph 440 ft min 7 5 mph 660 ft min 10 mph 880 ft min psi gal min Gallons per Acre Based on Water 2...

Page 16: ...y when the valve shuts the line pressure increases turning the pump off automatically The pressure switch actuates in response to the pump outlet pressure at a predetermined and preset pressure The pump label indicates the predetermined ON and OFF pressures Typically the OFF pressure is accurately set at the factory and the ON pressure is within an allowable range below that value These pressure s...

Page 17: ...t the pump to pressures above 125 psi 8 5 bars The pump is equipped with a pressure sensing demand switch that controls the maximum operating pressure As long as there is inlet water pressure the pump will not stop forward flow of water even if the motor is turned off Be sure the system has a positive means of shutting off the water supply Do not assume fluid compatibility If the fluid is improper...

Page 18: ...n inlet outlet hoses Debris or swelling in inlet outlet valves Pump will not shut off Air trapped in outlet line or pump head Correct voltage to pump Debris in pump inlet outlet valves Loose drive assembly or pump head screws Pressure switch operation adjustment required Pump quit and will not restart Check in line fuse and or fuse in car adapter end Correct voltage 12V 10 Pump continues to run an...

Page 19: ......

Page 20: ... its product improvement policy to change construction or design details and furnish equipment when so altered without reference to illustrations or specifications used TrynEx International may require or recommend optional equipment for sprayers TrynEx International offers a limited warranty for all sprayers and accessories Warranty information available at www TurfExproducts com The following ar...

Reviews: