background image

2 6

English

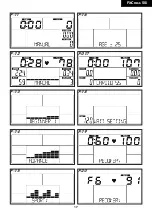
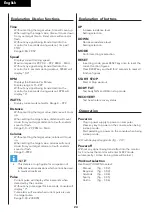
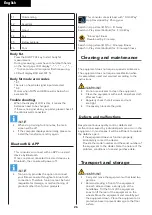
F1

Outstanding

F2

Excellent

F3

Good

F4

Fair

F5

Below average

F6

Poor

Body Fat


-

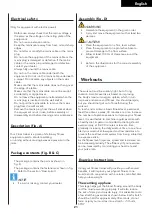
Press the BODY FAT key to start body fat 

measurement.


-

During measuring, users have to hold both hands 

on the hand grips. LCD display “-” “- -” “- - -” “- - - 

-” for 8 seconds until computer finish measuring.


-

LCD will display BMI and FAT %.

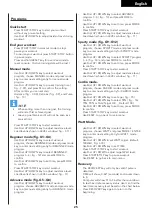
Body fat mode error codes


-

*E-1 

There is no heart rate signal input detected.


-

*E-4 

Occurs when FAT% and BMI result is below 5 or 

exceeds 50.

Trouble shooting: 


-

When the display of LCD is dim, it means the 

batteries need to be changed.


-

If there is no signal when you pedal, please check if 

the cable is well connected.

NOTE

•  When stop training for 4 minutes, the main 

screen will be off.

•  If the computer displays abnormally, please re-

install the transformer and try again.

Bluetooth & APP


-

This console can connect with an APP on a smart 

device by Bluetooth.


-

Once console is connected to a smart device via 

Bluetooth, the console will power off.

NOTE

•  Tunturi only provides the option to connect 

your fintess console throughout a blue tooth 

connection. Therefore Tunturi cannot be held 

resposible for damage, or malfunctioning of 

products other than Tunturi products.

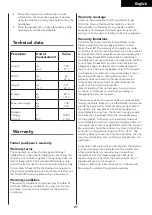
This console connects best with “Fit Hi Way” 

App Developed by: Chang yow.

Search in App store (iOS) for : fit hi way

Search in Play store (Android) for : Fit Hi Way

“Kinomap Fitness  

Developed by: Kinomap.

Search in App store (iOS) for : Kinomap fitness

Search in Play store (Android) for : Kinomap fitness

Cleaning and maintenance

The equipment does not require special maintenance. 

The equipment does not require recalibration when 

it is assembled, used and serviced according to the 

instructions.

WARNING 

•  Do not use solvents to clean the equipment.

•  Clean the equipment with a soft, absorbent cloth 

after each use.

•  Regularly check that all screws and nuts  

are tight.

•  If necessary, lubricate the joints.

Defects and malfunctions

Despite continuous quality control, defects and 

malfunctions caused by individual parts can occur in the 

equipment. In most cases, it will be sufficient to replace 

the defective part.


-

If the equipment does not function properly, 

immediately contact the dealer.


-

Provide the model number and the serial number of 

the equipment to the dealer. State the nature of the 

problem, conditions of use and purchase date.

Transport and storage

WARNING

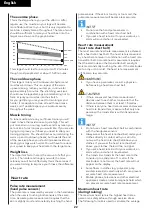
•  Carry and move the equipment with at least two 

persons.

•  Remain standing in front of the equipment 

on each side and take a sturdy grip at the 

handlebars. Tilt the front of the equipment 

so as to lift the rear of the equipment on the 

wheels. Move the equipment and carefully put 

the equipment down. Place the equipment on a 

protective base to prevent damage to the floor 

surface.

Summary of Contents for FitCross 50i

Page 1: ...Attention Upozorn n Please read this Owner s manual before assembling this product P ed pou it m si pe liv p e t te tento n vod www tunturi com User manual U ivatelsk manu l...

Page 2: ......

Page 3: ...3 FitCross 50i A...

Page 4: ...4 FitCross 50i B...

Page 5: ...8 9 2T 6 O 16 Scr ew M 8 20L 2 O 5 Scr ew M 8 16L 6 Flat washer 8 16 1T 4 O 6 O 13Spring Washer 6 4 Fl at w asher 6 13 1T 4 O 14 Fl at w asher 20 3 30 1T 2 O 10 O 2 lock nut for M8 4 0 15 Flat washer...

Page 6: ...20L 2 O 4 Curved Washer 8 9 2T 6 O 16 Scr ew M 8 20L 2 O 5 Scr ew M 8 16L 6 Flat washer 8 16 1T 4 O 6 O 13Spring Washer 6 4 Fl at w asher 6 13 1T 4 O 14 Fl at w asher 20 3 30 1T 2 O 10 O 2 lock nut f...

Page 7: ...20L 2 O 4 Curved Washer 8 9 2T 6 O 16 Scr ew M 8 20L 2 O 5 Scr ew M 8 16L 6 Flat washer 8 16 1T 4 O 6 O 13Spring Washer 6 4 Fl at w asher 6 13 1T 4 O 14 Fl at w asher 20 3 30 1T 2 O 10 O 2 lock nut f...

Page 8: ...9 2T 6 O 16 Scr ew M 8 20L 2 O 5 Scr ew M 8 16L 6 Flat washer 8 16 1T 4 O 6 O 13Spring Washer 6 4 Fl at w asher 6 13 1T 4 O 14 Fl at w asher 20 3 30 1T 2 O 10 O 2 lock nut for M8 4 0 15 Flat washer 1...

Page 9: ...20L 2 O 4 Curved Washer 8 9 2T 6 O 16 Scr ew M 8 20L 2 O 5 Scr ew M 8 16L 6 Flat washer 8 16 1T 4 O 6 O 13Spring Washer 6 4 Fl at w asher 6 13 1T 4 O 14 Fl at w asher 20 3 30 1T 2 O 10 O 2 lock nut f...

Page 10: ...8 20L 2 O 4 Curved Washer 8 9 2T 6 O 16 Scr ew M 8 20L 2 O 5 Scr ew M 8 16L 6 Flat washer 8 16 1T 4 O 6 O 13Spring Washer 6 4 Fl at w asher 6 13 1T 4 O 14 Fl at w asher 20 3 30 1T 2 O 10 O 2 lock nut...

Page 11: ...8 20L 2 O 4 Curved Washer 8 9 2T 6 O 16 Scr ew M 8 20L 2 O 5 Scr ew M 8 16L 6 Flat washer 8 16 1T 4 O 6 O 13Spring Washer 6 4 Fl at w asher 6 13 1T 4 O 14 Fl at w asher 20 3 30 1T 2 O 10 O 2 lock nut...

Page 12: ...8 9 2T 6 O 16 Scr ew M 8 20L 2 O 5 Scr ew M 8 16L 6 Flat washer 8 16 1T 4 O 6 O 13Spring Washer 6 4 Fl at w asher 6 13 1T 4 O 14 Fl at w asher 20 3 30 1T 2 O 10 O 2 lock nut for M8 4 0 15 Flat washer...

Page 13: ...M8 20L 2 O 4 Curved Washer 8 9 2T 6 O 16 Scr ew M 8 20L 2 O 5 Scr ew M 8 16L 6 Flat washer 8 16 1T 4 O 6 O 13Spring Washer 6 4 Fl at w asher 6 13 1T 4 O 14 Fl at w asher 20 3 30 1T 2 O 10 O 2 lock nu...

Page 14: ...8 9 2T 6 O 16 Scr ew M 8 20L 2 O 5 Scr ew M 8 16L 6 Flat washer 8 16 1T 4 O 6 O 13Spring Washer 6 4 Fl at w asher 6 13 1T 4 O 14 Fl at w asher 20 3 30 1T 2 O 10 O 2 lock nut for M8 4 0 15 Flat washer...

Page 15: ...1 5 FitCross 50i E...

Page 16: ...1 6 FitCross 50i F 01 F 06 F 02 F 07 F 03 F 08 F 04 F 09 F 05 F 10...

Page 17: ...1 7 FitCross 50i F 11 F 16 F 12 F 017 F 13 F 18 F 14 F 19 F 15 F 20...

Page 18: ...13 14 15 16 17 18 19 20 BEGINNER 1 G 02 0 2 4 6 8 10 12 14 16 18 1 2 3 4 5 6 7 8 9 10 11 12 13 14 15 16 17 18 19 20 BEGINNER 2 G 03 0 2 4 6 8 10 12 14 16 18 1 2 3 4 5 6 7 8 9 10 11 12 13 14 15 16 17 1...

Page 19: ...18 19 20 ADVANCE 3 G 08 0 2 4 6 8 10 12 14 16 18 1 2 3 4 5 6 7 8 9 10 11 12 13 14 15 16 17 18 19 20 ADVANCE 4 G 09 0 2 4 6 8 10 12 14 16 18 1 2 3 4 5 6 7 8 9 10 11 12 13 14 15 16 17 18 19 20 SPORTY 1...

Page 20: ...to hazards Persons responsible for their safety must give explicit instructions or supervise the use of the equipment Before starting your workout consult a physician to check your health If you exper...

Page 21: ...ith at least two persons CAUTION Place the equipment on a firm level surface Place the equipment on a protective base to prevent damage to the floor surface Allow at least 100 cm of clearance around t...

Page 22: ...requires that the skin is slightly moist and constantly touching the hand pulse sensors If the skin is too dry or too moist the pulse rate measurement will become less accurate NOTE Do not use the ha...

Page 23: ...ion Tighten the locknuts to lock the support feet Adjusting the pedal position The both pedals can be adjusted according to the height and the exercise position of the user Loosen the 2 pedal fixing k...

Page 24: ...h Range 0 9999 NOTE This data is a rough guide for comparison of different exercise sessions which cannot be used in medical treatment Pulse Current pulse will display after 6 seconds when detected by...

Page 25: ...al UP DOWN key to select ADVANCE program 1 4 fig 13 and press MODE to confirm Use Dial UP DOWN key to set time press MODE to confirm Press START STOP key to start workout Use Dial UP DOWN key to adjus...

Page 26: ...p store iOS for fit hi way Search in Play store Android for Fit Hi Way Kinomap Fitness Developed by Kinomap Search in App store iOS for Kinomap fitness Search in Play store Android for Kinomap fitness...

Page 27: ...commended use of the product as described in the Owner s Manual and providing that Tunturi New Fitness BV s instructions for installation maintenance and use have been complied with Neither Tunturi Ne...

Page 28: ...ng standards and directives EN 957 HB 89 336 EEC The product therefore carries the CE label 01 2017 Tunturi New Fitness BV Purmerweg 1 1311 XE Almere The Netherlands Disclaimer 2017 Tunturi New Fitnes...

Page 29: ...aby bylo cvi ebn prost ed dostate n v tran Abyste p ede li nachlazen necvi te v pr vanu B hem tr ninku sn stroj teploty prost ed 10 C a 35 C Stroj lze skladovat p i teplot ch 5 C a 45 C Vlhkost vzduch...

Page 30: ...ujte sv ho prodejce Mont obr D Upozorn n Mont prov d jte v po ad jak je uvedeno na obr zc ch S trena rem manipulujte v dy jen za pomoci druh osoby Upozorn n Trena r umis ujte v dy jen na rovn a pevn p...

Page 31: ...moc hrudn ho p su je nejp esn j m typemm en M en prob h d ky elektrod m um st n ch nahrudn m p su kter pou ijete dle instrukc uveden ch najeho obalu Elektrody vys laj zaznamenan puls do p ij ma ena po...

Page 32: ...en pozice ped l Oba ped ly lze nastavit dle v ky u ivatele Uvol ete oba ped lov kol ky Posunujte ped ly do po adovan pozice Ut hn te kol ky INFO Ujist te se e jsou ob podp ry vysunuty na stejnou rove...

Page 33: ...n data Start Stop Zah j nebo ukon cvi en Body fat Zm v t lesn tuk a zobraz BMI Recovery Test obnovy srde n ho tepu Funkce Zapnut P ipojte elektrick p vodn kabel Stiskn te jak koliv tla tko pro probuze...

Page 34: ...ijte UP DOWN pro nastaven asu a potvr te stiskem MODE Stiskn te START STOP pro zah jen cvi en Pou ijte UP DOWN pro nastaven z t e Z t se zobrazuje v ok nku LEVEL obr F 11 Watt M d Stiskn te UP DOWN p...

Page 35: ...Pokud po adujete n hradn d ly v dy uve te model v robn slo stroje a slo n hradn ho d lu kter po adujete P esun a uskladn n Upozorn n Posilovac stroj p em s ujte podle n sleduj c ch pokyn proto e jeho...

Page 36: ...v robce Tunturi New Fitness BV prohla uje e tento v robek spl uje normy p edepsan ve sm rnici EN 957 HB 89 336 EE a je ozna en CE zn mkou 01 2017 Tunturi New Fitness BV Purmerweg 1 1311 XE Almere The...

Page 37: ...her 20 3x 30x1t 1 F 6 Sensor wire 400mm 2P 1 F 7 Sensor fixed bracket 1 F 8 Flat washer 5x 10x1 1 F 9 DC wire 500mm 3P 1 F 10 Screw for sensor bracket M4x10L 1 F 11 Bearing 6004RS 2 F 12 Belt J6 1143m...

Page 38: ...motor set 1 N Adapter Swiching power DC 9V 1000mA 1 O Hardware kit set 1 O 1 Allen bolt M8x16 4 O 2 Nut M8 4 O 3 Carriage bolt M8xP1 25x40L 4 O 4 Curved washer 8x 19x2t 6 O 5 Screw M8xP1 25x16L 6m m...

Page 39: ...3 9 FitCross 50i...

Page 40: ...om Tunturi New Fitness BV Purmerweg 1 NL 1311 XE Almere P O Box 60001 NL 1320 AA Almere The Netherlands www tunturi tness com info tunturi tness com 20180628 Dovozce FITNESS STORE s r o B lot n 341 75...

Reviews: