background image

7. Maintenance

1.Avoid removing the lens cap in a dusty environment.

2.When removing the lens cap or mounting a lens, hold the camera face down  to 
prevent dust from falling on the sensor surface.

3.When the camera is not being used, the lens cap should be replaced.

4.Use a professional dust removal tool to remove any dust on the camera optical  
filter.

·  If dust gets on the filter, it should be removed using low pressure air.

·  For stubborn oily dust, the surface can be gently wiped using a lint-free cotton  
swab dipped in ethanol.

5. If  it still cannot be cleaned, contact the after-sales personnel for assistance. 
The  use of non-professional equipment for cleaning is prone to lead to scratches 
on the  filter surface.

6. If the camera has been stored in a low temperature environment, allow the  
camera to gradually warm up before use, because otherwise condensation may  
form on the optics and electronics.

7. Use only the original power adapter. Ensure the adapter and associated cables  
are free from items that may cause damage. If the power adapter is damaged,  
please contact the supplier for an immediate replacement.

8. Inevent that the adaptor appears to be operating abnormally, cut off the 
adapter  power supply immediately in order to avoid damage to the camera.

9. The camera has been designed for external triggering functions, that can be  
activated via an external connector. Consult the supplier if you require additional  
information regarding these functions.

- 17 -

- 18 -

8. Warranty 

service

Tucsen carries out two years of free warranty service, warranty starts from the date 
of product acceptance. Except for the special provisions of the contract, 7 days after 
the receipt of goods without doubt is considered to be qualified acceptance. Man-
made product quality problems are not within the scope of warranty. After warranty 
period, Tucsen implements lifetime maintenance policy, and only a certain material 
cost is charged for product maintenance.

Immediate 

repairrequest

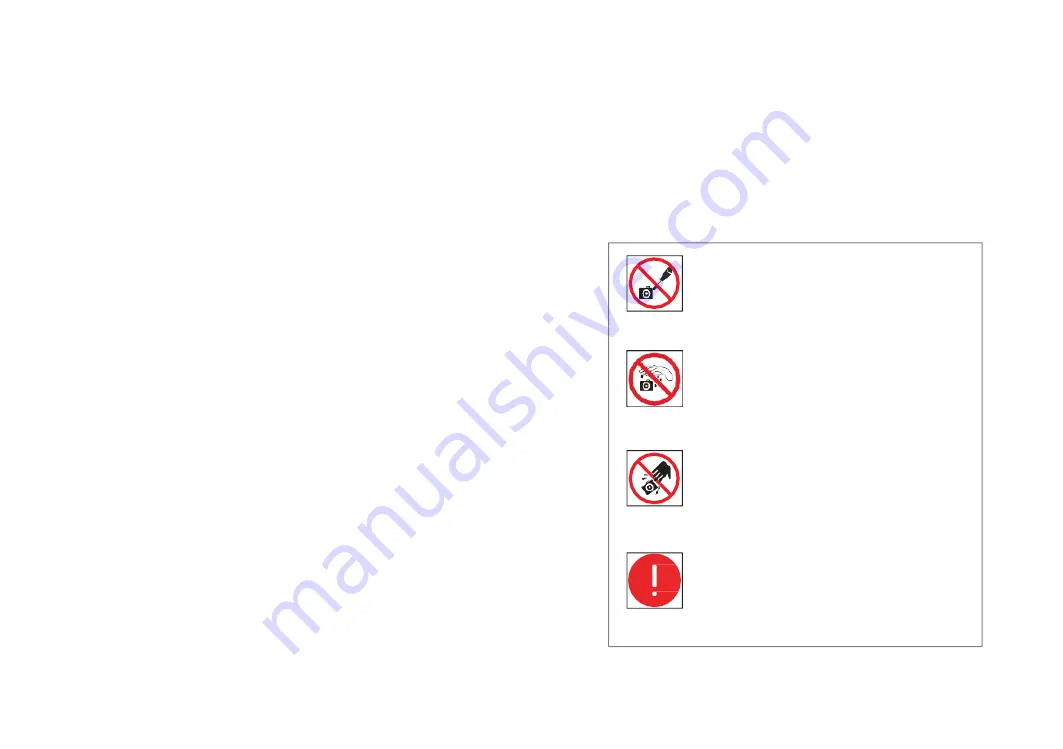
Do not disassemble, repair or modify on your own 
Otherwise it will cause damage to the camera chip  
or devices on the circuit board.

Unplug the data cable and the power supply  
thenrequest TUCSEN to have the authorized dealer  
or sales for repair.

Do not contact water

Do not disassemble

Do not subject the  

camera to physical 

shock

Avoid allowing the camera to get wet, since this 
may cause the failures such as circuit board device  
corrosion, burnout and so on.

Avoid physical impacts such as dropping or banging.

Summary of Contents for Dhyana 201D

Page 1: ...electricCo Ltd Allrightsreserved Thisguideisforinformationpurposesonlyanddoesnotconstitute any commitment Ifthereisinconsistencybetweentheimageandtheactualproduct the actualproductshallgovern Dhyana sCMOS camera Quick Start ...

Page 2: ...mera 01 2 Camera interface description 03 3 Water cooled interface installation 09 4 Data interface installation 13 5 Driver installation 14 6 Software installation 16 7 Maintenance 17 8 Warranty service 18 9 After sale support 19 ...

Page 3: ... resolution Up to 95 QE C mount USB3 0 interface CameraLink interface SMA trigger interface Air cooling Water cooling Monochrome 2 sensor size 11um pixel size 4 MP resolution Up to 95 QE T mount C mount F mount USB3 0 interface CameraLink interface SMA trigger interface Air cooling Water cooling Monochrome 3 2 sensor size 9um pixel size 16 MP resolution Up to 74 QE F mount C mount USB3 0 interface...

Page 4: ... TRIG OUT2 Global exposure signal 9 TRIG OUT1 Image readout signal 10 Water connector 1 water cooling 11 Water connector 2 water cooling Dhyana 95 V2 3 4 Dhyana 4040 Serial No Part name Function 1 DC12V 8A Power supply 2 Switch Control camera power 3 LED indicator Indicates if the camera is working 4 Cameralink interface Camera data transmission 5 USB 3 0 Camera data transmission 6 TRIG IN Externa...

Page 5: ...ge readout signal 10 Water connector 1 water cooling 11 Water connector 2 water cooling Data interface Dhyana 400BSI V2 Water cooled interface Serial No Part name Function 1 DC12V 8A Power supply 2 USB fixed hole Fixed USB 3 0 data cable 3 USB3 0 interface Camera data transmission 4 Online upgrade button Upgrade the firmware 5 LED indicator Indicates if the camera is working 6 TRIG IN External tri...

Page 6: ...amera interface description Serial No Part name Function 1 DC12V 8A Power supply 2 USB fixed hole Fixed USB 3 0 data cable 3 USB3 0 interface Camera data transmission 4 Online upgrade button Upgrade the firmware 5 LED indicator Indicates if the camera is working 6 TRIG IN External trigger signal input HIROSE interface 7 TRI_IN_GND GND 8 TRI_OUT_GND GND 9 TRIG OUT0 Image readout signal 10 TRIG OUT1...

Page 7: ...s of water cooled pipe Note After the water pipe is pulled out a small amount of water remains in the camera water valve Please carefully pour the water out with the valve orifice down Water valve sliding sleeve 1 Disconnect power for camera and all other equipments including the circulating water cooler 2 According to the instructions of cooling water circulator unplug its water pipe and discharg...

Page 8: ...ator and cooled water correctly according to its instructions 3 3 Installation precautions 11 12 7 According to the experimental data condensation water will occur in water valves and water pipes under inappropriate environmental conditions and there is a potential risk of damage to the equipment In order to ensure the normal operation of the equipment the following provisions are made on the ambi...

Page 9: ...face Cameralink frame grabber 13 14 5 Driver Installation 5 2 The driver installation of USB 3 0 Interface USB 3 0 CameraLink PC XeonE5 2640 CPU HP Z820 workstations System Windows 7 10 64bit Windows 7 10 64bit Memory 8GB or more 32GB or more Connect the camera to the PC Opening the U disk comes with the camera operate the exe file and follow the Next button to finish the installation After the in...

Page 10: ... the computer s frame grabber via two Cameralink cable 15 16 6 Software Installation 6 1 Double click the software to start the installation and follow the Next button to finish the installation 6 2 After finish the installation software shortcut will be created on the desktop Note If previous version Mosaic was installed in your PC the installer will automatically detect it and ask to remove it f...

Page 11: ...or appears to be operating abnormally cut off the adapter power supply immediately in order to avoid damage to the camera 9 The camera has been designed for external triggering functions that can be activated via an external connector Consult the supplier if you require additional information regarding these functions 17 18 8 Warranty service Tucsen carries out two years of free warranty service w...

Page 12: ...chnical support TEL 86 591 88194580 811 Email service tucsen com Or landing the official website to leave a message http www tucsen com please have the following information prepared 1 Camera model and S N product serial number 2 Software version number and system information 3 Description of the problem and any images related to the problem 19 ...

Reviews: