


This chapter contains information on;
Operating the Fusion as a CD Player or Transport
Operating the Fusion as a D.A.C.
Controls & Remote Functions
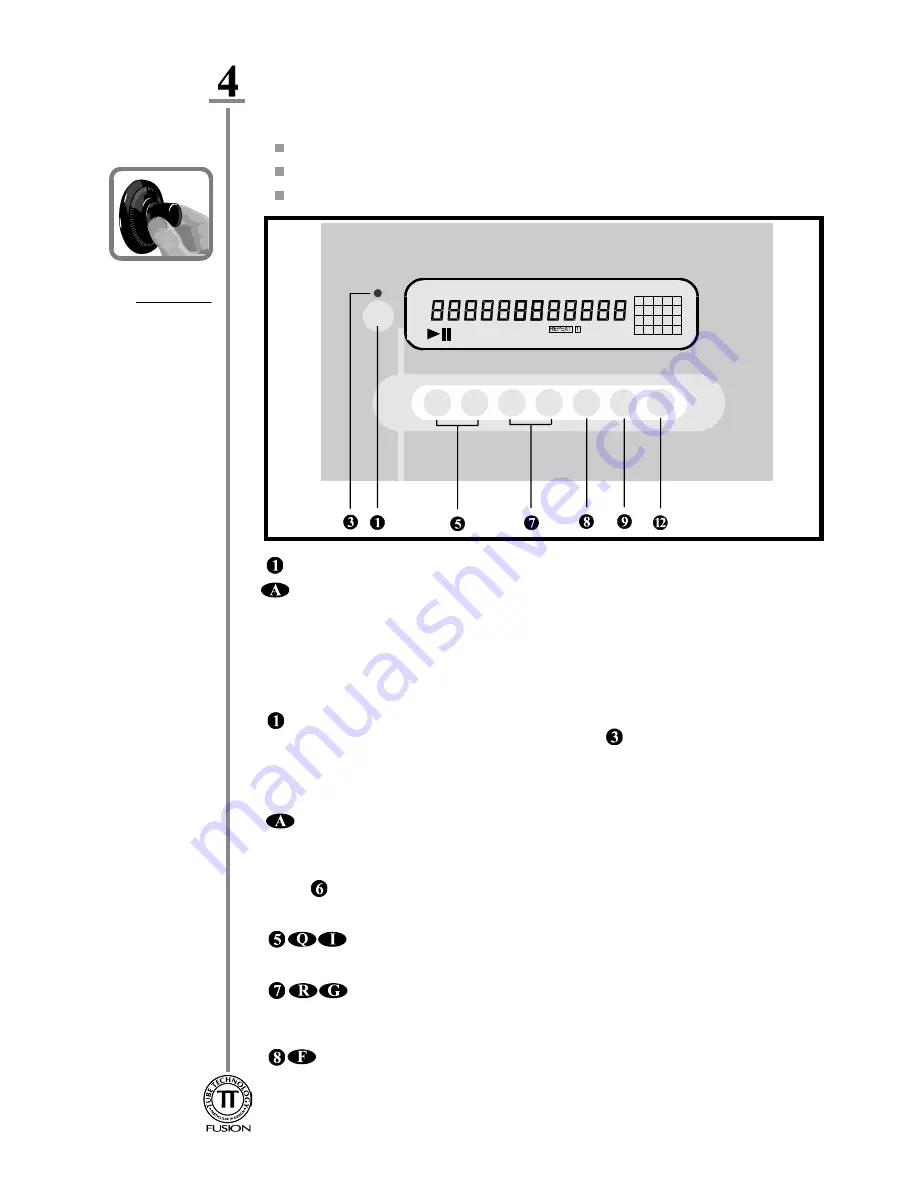
Diagram 2
Front Panel
Operating your System - 7
Operating
your System
To operate the Fusion as a CD player, switch MASTER SWITCH(9) located on the rear panel,
to ON. You should hear the mute relays click, which ensures the software has loaded. Always
allow at least 10 seconds between switching the master switch, as the program clears. The
display should now be illuminated. The CD Player will now remain in a MUTE state, for 30
seconds until the internal vacuum tubes have reached operating temperature.
POWER
- Pressing the POWER button on the front panel disables the CD player only, the
DAC circuitry remains ever-warm. The DAC MODE LED
on the front panel is illuminated.
In this mode external digital sources can be played. Pressing it once again will return the unit
to a CD player or transport. To completely power down the whole unit switch the Master
Switch on the rear panel to the OFF position.
DISPLAY
This function can only be used if a disc is inserted in the tray. Pressing this
button once switches the display OFF. Pressing it once again decreases the luminance of the
vacuum fluorescent display, and pressing it once again restores the display to it's original
brightness. During play if any function key is depressed the display will illuminate for a short
period.
A red indicator is illuminated when the display is OFF.
I<< SKIP >>I
Skips between tracks during play
I<<
for previous track or
>>I
for next track. Also used for direct track access before pressing PLAY.
<< SEARCH >>
Searches audibly either backwards or forwards through a track
to a particular point as desired. If SEARCH is used when the disc is in PAUSE mode, search
is engaged inaudibly .
STOP
Stops the disc from playing or clears Program setting. The total number of
tracks and the total playing time will appear briefly on the display panel to indicate that the
player is in STOP mode, followed by
0
on the display.
Operating as a
CD Player
or Transport
Operating as a
D.A.C.
Controls &
Remote
Functions
Numbers in the circles relate to the Front Panel -
Diagram 2
Letters in the ellipses relate to the Remote Control Handset -
Diagram 3
TRACK
INDEX STEP
PROGRAM
CD TEXT
SEC
MIN
1
2 3 4 5
6
7 8 9 10
11 12 13 14 15
16 17 18 19 20


