


Hardware connections to setup
Before you start to run the setup software at first time, you should connect the Pedal to
your Windows computer, that would allow your system to find it and install the driver, the
driver installation will be done automatically. Your system would identify the Venom-P pedal
after the driver installation is completed. Please wait a while until the system prompts that
the driver has installed and the Venom-P is working properly.
Connect your Display unit to your computer to allow Windows identify it the same way as
your Pedal.
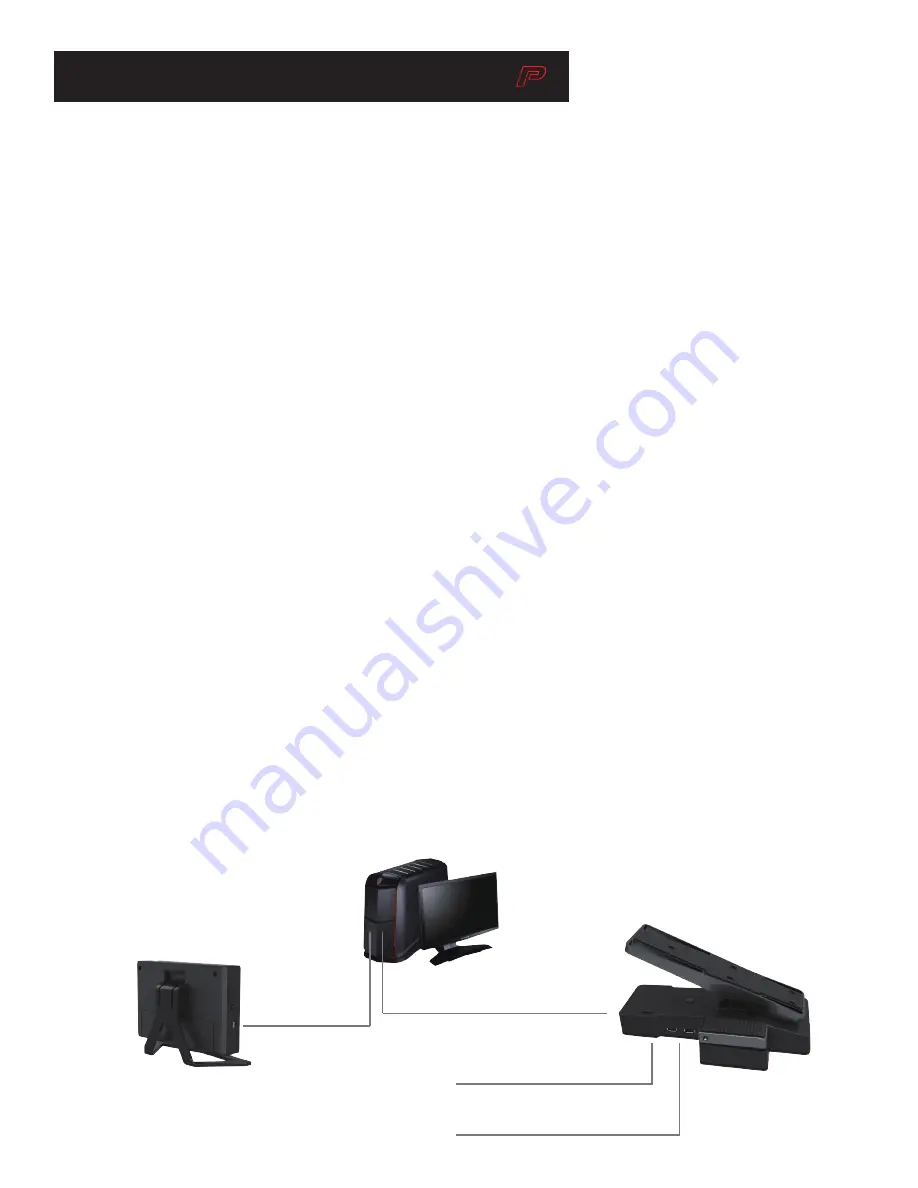
Connect Venom-P Pedal:
• Slide the “Host Select” switch at the bottom of the Pedal to “PC” position to
select PC as host.
• Plug the USB cable from front “Host Port” on Venom-P Pedal to PC USB port
Connect Venom-P Display unit:
• Connect the Venom-P Display Unit to PC USB port with the Micro-USB cable.
Driver Installation:
Windows will find the proper driver and install it automatically. There is no dedicated
driver is needed for Windows XP, Vista, Win7, Win8 or Win10.
Note:
DO NOT plug your Game controller or other device onto Pedal while running the
Setup software, this is because the Pedal would switch the mode to Game Pad
mode in which the Setup software would not recognize it.
Before you run the Setup software, PLEASE WAIT until your Windows system finish
the driver installation, otherwise the software would report error.
Tip:
Venom-P Pedal and Display unit can be plugged in your PC at the same time
or independently.
P
V
enom
TM
USB cable
Micro-USB cable
Leave this 2 USB port empty
Host Select switch to “PC”
Summary of Contents for Venom-P
Page 10: ......


