Trust Ami Mouse Wireless 200
5
GB
4. Channel selection
Before you can use the mouse, you must make sure the channel that the mouse is using is the same
channel as the RF Receiver.
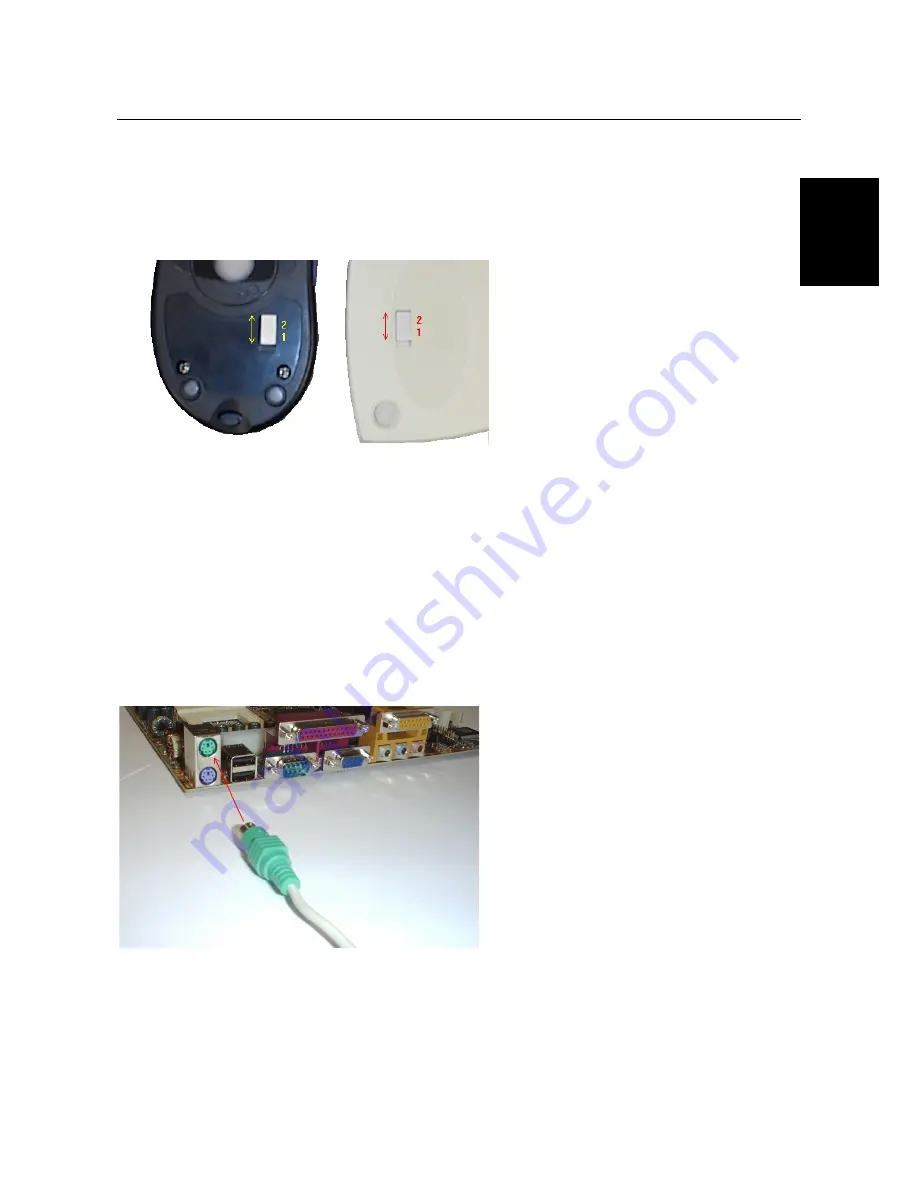
1. Locate the switch on the bottom of the mouse used to change the channel (see figure 3).
2. Move this down or up (respectively channel 1 or 2). Channel 1 is recommended.
Figure 3: Bottom of the mouse (left) and the RF Receiver (right)
3. Locate the switch on the bottom of the RF receiver used to change the channel (figure 3).
4. Set this to the same channel as you have just set the mouse to (position 1 or 2).
5. Connecting the mouse
Note:
The drivers for your old mouse must be removed before installing the software for the Ami Mouse
Wireless 200. Read the instruction manual for your previous mouse for instructions on how to do
this.
Follow the points below to connect your mouse.
1. Turn off your computer and all the connected peripheral devices.
2. Remove the old mouse from your computer.
3. Connect the RF Receiver to the PS/2 port for the mouse on your computer (figure 4).
Figure 4: Connecting the mouse to the PS/2 port on the computer
4. Next, turn on the computer and all the connected peripheral devices.


