G
H
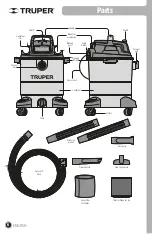
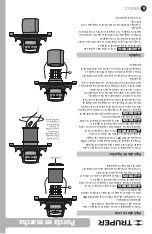
Switch
7
E
D
A
B
C
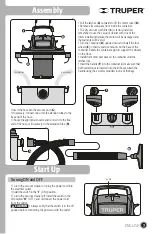
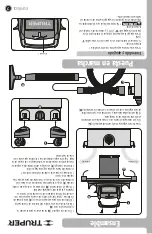
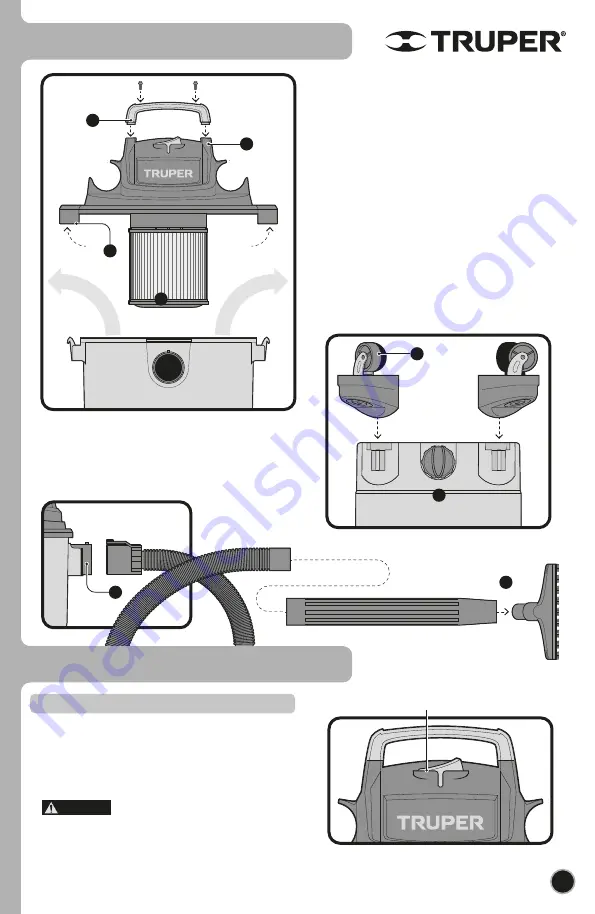
• Pull the latches (
A
) outwards to lift the motor cover (
B
).
• Remove all accessories from inside the container.
• The dry vacuum cloth filter (
C
) is factory installed,
remember to use the vacuum cleaner with one of the
filters installed otherwise the motor will be damaged and
the warranty will be void.
• Turn the container (
D
) upside down and install the four
wheels (
E
) in their respective mounts on the base of the
container. Rotate the container again to support the wheels
on the floor.
• Install the motor cover back on the container until the
latches click.
• Insert the handle (
F
) into the container lid, make sure that
both mamelons are inserted into the lid boxes. Attach the
handle using the 2 screws provided in one of the bags.
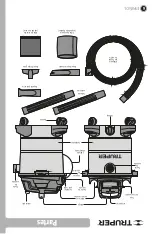
Accessories
Accessories
F
Assembly
ENGLISH
Start Up
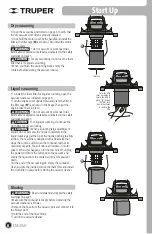
• Insert the hose into the vacuum port (
G
).
• If necessary, connect one or more extension tubes to the
free end of the hose.
• Choose the appropriate nozzle and connect it to the free
end of the hose or if necessary to the extension tube (
H
).
• To turn the vacuum cleaner on, plug the power cord into
the electrical outlet.
• Install the switch in the “
I
” (ON) position.
• To turn the vacuum cleaner off, install the switch in the
off position “
O
” (OFF), and disconnect the power cord
from the outlet.
• Always verify that the switch is in the off
position before connecting the power cord to the outlet.
Turning ON and OFF
CAUTION
Summary of Contents for 101509
Page 10: ...10 Notes ENGLISH...
Page 15: ...ESPA OL 10 Notas...

