Summary of Contents for Aventa compact plus AU
Page 1: ...Installation instructions Aventa compact plus AU...
Page 9: ......
Page 10: ......
Page 11: ......
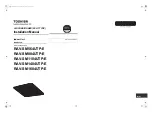
The Truma Aventa compact plus AU air conditioning unit offers powerful cooling for your vehicle. Ensure proper installation with the included Installation Instructions Manual. Download your free manual from manualshive.com to easily set up and use your new Truma Aventa compact plus AU. Stay cool on the go!
Page 1: ...Installation instructions Aventa compact plus AU...
Page 9: ......
Page 10: ......
Page 11: ......