background image


13                             Manual Number 9017942  •  Revision K, May 14, 2020 

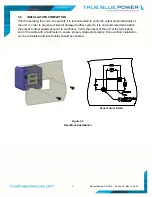
Step 4: place unit through 

panel cutout. Tighten 

pawl screws (x2) 

Step 5: Peel adhesive backing, align pins on 

rear of cover plate into holes on 

mounting plate and press firmly

1.550±0.010

1.600±0.025

R.125


Figure 3.6 

Front Mount Installation 


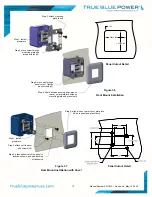
Step 1: install 

grommets 

Step 2: place screw through 

mounting plate and 

into pawl latch (x2)

Step 3: attach mounting

plate to unit

Step 2: attach unit to panel 

with screws (x2)

Step 1: install 

grommets

Step 3: place adhesive (x2) on panel in 

locations shown, and peel backing 

off adhesive

Step 4: align pins on rear of cover plate into 

holes in panel and press firmly. 

Figure 3.7 

Rear Mount Installation with Cover 


Panel Cutout Detail 

Panel Cutout Detail 

Summary of Contents for TA102

Page 1: ...Revision K May 14 2020 ...

Page 2: ...truebluepowerusa com www mcico com We welcome your comments concerning this manual Although every effort has been made to keep it free of errors some may occur When reporting a specific problem please describe it briefly and include the manual part number the paragraph figure table number and the page number Send your comments to True Blue Power c o Mid Continent Instrument Co Inc Attn Technical P...

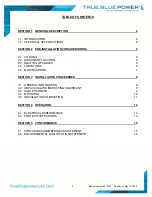
Page 3: ...ON 6 2 3 ROUTING OF CABLES 6 2 4 LIMITATIONS 6 2 5 MODIFICATIONS 7 SECTION 3 INSTALLATION PROCEDURES 8 3 1 GENERAL INFORMATION 8 3 2 UNPACKING AND INSPECTING EQUIPMENT 8 3 3 CABLE HARNESS 9 3 4 MOUNTING 10 3 5 INSTALLATION COMPLETION 11 SECTION 4 OPERATION 14 4 1 ELECTRICAL PERFORMANCE 14 4 2 PROTECTIVE FEATURES 14 SECTION 5 CONFORMANCE 15 5 1 CONTINUED AIRWORTHINESS STATEMENT 15 5 2 ENVIORNMENTAL...

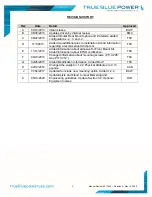
Page 4: ...recommended crimp tool TKV E 11 14 2013 Added information about adhesive for Front Mount Kit Added information about ETSO certification TKV F 06 10 2014 Changed information about mounting screws PT 0 285 was PT 0 312 TKV G 02 26 2015 Added Modification Information Added Mod 1 TKV H 09 12 2016 Changed the weight in 1 2 2 Physical Attributes to 0 13 pounds CAS J 01 04 2017 Updated to include new mou...

Page 5: ...r the USB Battery Charging 1 2 Compliance Plan Early generation or smaller consumer electronics typically accept one 1 0 amp of power during charging However newer electronics such as the Apple iPad other tablets and larger devices can accept and in some cases require up to 2 1 amps of power to charge and operate As a high power DCP the TA102 can provide up to 2 1 amps of power to charge any USB d...

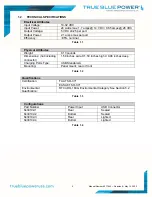
Page 6: ...ibutes Weight 0 13 pounds Dimensions not including connector 1 50 inches wide X 1 50 inches high X 0 96 inches deep Charging Ports Type USB Standard A Mounting Panel mount rear or front Table 1 2 Qualifications Certification FAA TSO C71 EASA ETSO C71 Environmental Qualification RTCA DO 160G Environmental Category See Section 5 2 Table 1 3 Configurations Part Number Power Input USB Connector 643010...

Page 7: ...onnector to be located either on the rear of the unit or from the bottom The unit can be mounted in any orientation Clearance should be provided for the mating connector which may require an additional inch beyond the rear of the unit 2 3 ROUTING OF CABLES Avoid sharp bends in cabling and routing near aircraft control cables Avoid close proximity and contact with aircraft structures avionics equip...

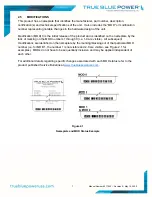
Page 8: ...eplate by the lack of marking on the MOD numbers 1 through 9 i e 1 9 are visible All subsequent modifications are identified on the nameplate by the marking blacking out of that particular MOD number i e for MOD 1 the number 1 is not visible and 2 9 are visible see Figure 2 1 for examples MODs do not have to be sequentially inclusive and may be applied independent of each other For additional deta...

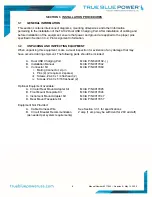
Page 9: ...dence of any damage that may have occurred during shipment The following parts should be included A Dual USB Charging Port MCIA P N 6430102 B Installation Manual MCIA P N 9017942 C Connector Kit MCIA P N 9017960 i Mating Connector 2 pin ii Pins 4 2 required 2 spares iii Screws 4 40 x 1 4 flat head 2 iv Screws 4 40 x 5 16 flat head 2 Optional Equipment Available A Circular Rear Mount Adapter Kit MC...

Page 10: ...e Pins should be crimped using Molex Hand Crimp Tool 63819 0000 Preferred 63811 2800 obsolete or 11 01 0200 obsolete See the Molex Hand Crimp Tool User Manual for crimp procedures Pin Assignment Information INPUT POWER Pin A keyed Positive DC input 10 to 32 VDC power Pin B Negative DC input ground Harness Verification Failure to install aircraft power and ground wires in the proper mating connecto...

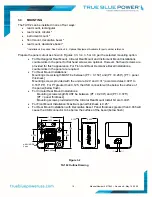
Page 11: ...ovided for flush appearance For Front and Rear Decorative Bezel Installations countersinks in the panel are required For Rear Mount Installations Mounting screws length MUST be between PT 0 150 and PT 0 260 PT panel thickness Mounting screws provided with the unit are 0 24 and 0 31 accommodates 0 020 to 0 160 PT For PT greater than 0 125 the USB connector will be below the surface of the panel bel...

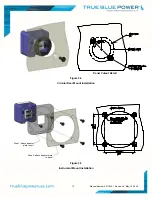
Page 12: ... order to prevent accidental damage to other systems it is not recommended to attach the output to other equipment prior to verification Verify the output of the unit at the terminating end of the cable with a multimeter to ensure proper voltage and polarity Once verified installation can be completed and functionality should be checked Figure 3 3 Rear Mount Installation Panel Cutout Detail ...

Page 13: ...mber 9017942 Revision K May 14 2020 Figure 3 5 Instrument Mount Installation Step 1 attach adapter plate to unit Step 2 attach adapter plate to panel Panel Cutout Detail Figure 3 4 Circular Rear Mount Installation ...

Page 14: ...ront Mount Installation Step 1 install grommets Step 2 place screw through mounting plate and into pawl latch x2 Step 3 attach mounting plate to unit Step 2 attach unit to panel with screws x2 Step 1 install grommets Step 3 place adhesive x2 on panel in locations shown and peel backing off adhesive Step 4 align pins on rear of cover plate into holes in panel and press firmly Figure 3 7 Rear Mount ...

Page 15: ... returns to a safe level the TA102 will automatically reestablish the higher charge current level with the device and continue charging 4 2 PROTECTIVE FEATURES Short Circuit Protection The TA102 is capable of surviving a short circuit event without permanent damage The unit goes into an over current condition so that the average current is significantly reduced and the device is protected Over Cur...

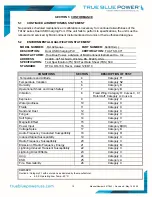
Page 16: ...12 08 10 CONDITIONS SECTION DESCRIPTION OF TEST Temperature and Altitude 4 Category F1 Temperature Variation 5 Category S2 Humidity 6 Category B Operational Shock and Crash Safety 7 Category B Vibration 8 Fixed Wing Category R Curves C C1 Rotorcraft Category U Curve G Explosion 9 Category X Waterproofness 10 Category X Fluids 11 Category X Sand and Dust 12 Category X Fungus 13 Category X Salt Spra...

Reviews: