background image

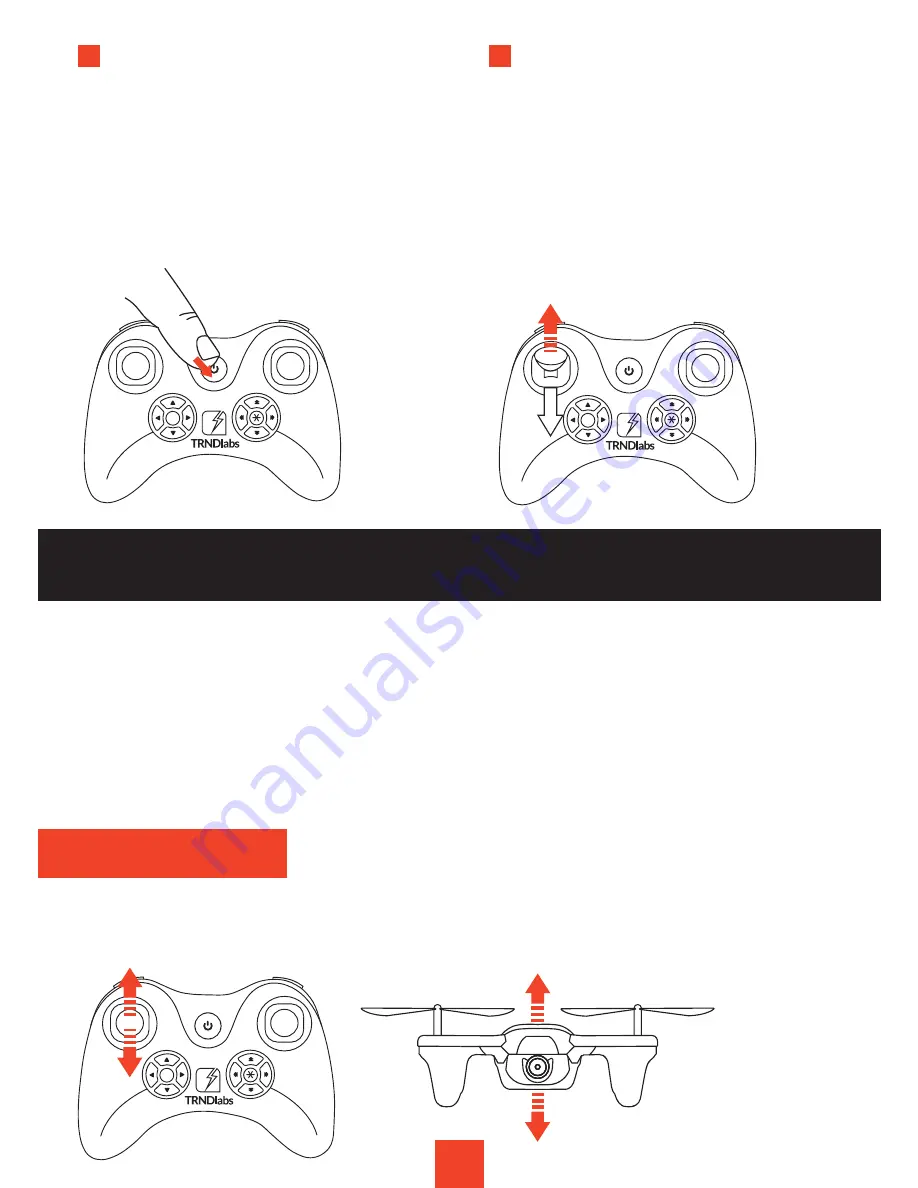
5

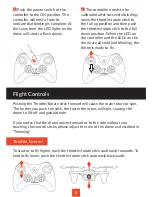
4.

 The controller needs to be 

calibrated after successful binding: 

move the throttle/rotate stick to 

the full up position and then push 

the throttle/rotate stick to the full 

down position. When the LED on 

the controller and the LEDs on the 

drone are all solid (not blinking), the 

drone is ready to fly.

3.

 Push the power switch of the 

controller to the ON position. The 

controller will emit a tone to 

indicate that binding is complete. At 

the same time, the LED lights on the 

drone will start to flash slowly.

Throttle Control

Pushing the Throttle/Rotate stick forward will cause the main rotors to spin. 

The farther you push the stick, the faster the rotors will spin, causing the 

drone to lift off and gain altitude.

If you notice that the drone moves forward or to the side without you 

touching the control sticks, please adjust the trim of the drone as described in 

“Trimming”.

To start or to fly higher, push the throttle/rotate stick cautiously forwards. To 

land or fly lower, push the throttle/rotate stick cautiously backwards.

Flight Controls

Summary of Contents for SKEYE

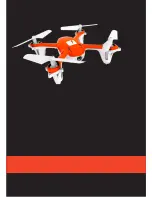
Page 1: ...SKEYE USER GUIDE Mini Drone ...

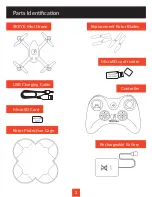
Page 2: ...2 Parts Identification SKEYE Mini Drone USB Charging Cable MicroSD Card Rotor Protection Cage Replacement Rotor Blades MicroSD card reader Controller Rechargeable Battery ...

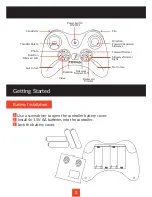
Page 3: ...ght Not In Use Video Rotation Power Switch ON OFF Sideways Trimmer Left Backward Trimmer Throttle Rotate Photo Rotation Trimmer Left Not In Use Controller Functions Getting Started 1 Use a screwdriver to open the controller battery cover 2 Install 4x 1 5V AA batteries into the controller 3 Lock the battery cover ...

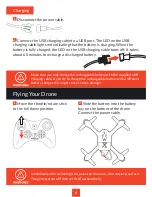
Page 4: ...attery 2 Slide the battery into the battery bay on the bottom of the drone Connect the power cable 1 Move the throttle rotate stick to the full down position Make sure you only charge the rechargeable battery with the supplied USB charging cable If you try to charge the rechargeable battery with a different battery charger this might cause serious damage Immediately after switching it on place the...

Page 5: ...g is complete At the same time the LED lights on the drone will start to flash slowly Throttle Control Pushing the Throttle Rotate stick forward will cause the main rotors to spin The farther you push the stick the faster the rotors will spin causing the drone to lift off and gain altitude If you notice that the drone moves forward or to the side without you touching the control sticks please adju...

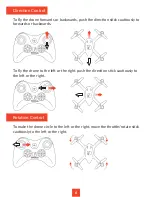
Page 6: ...on stick cautiously to the left or the right To make the drone circle to the left or the right move the throttle rotate stick cautiously to the left or the right Direction Control To fly the drone forwards or backwards push the direction stick cautiously to forwards or backwards ...

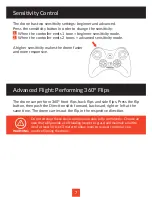
Page 7: ...ity Control The drone can perform 360 front flips back flips and side flips Press the flip button then push the Direction stick forward backward right or left at the same time The drone carries out the flip in the respective direction Advanced Flight Performing 360 Flips Do not attempt these stunts until you are able to fly confidently Choose an area that will provide a soft landing carpet or gras...

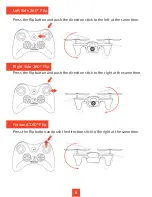
Page 8: ... the direction stick to the right at the same time Left Side 360 Flip Right Side 360 Flip Press the flip button and push the direction stick to the left at the same time Press the flip button and push the direction stick to the right at the same time ...

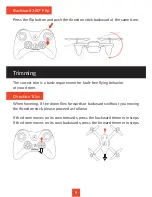
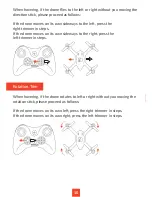
Page 9: ...ic requirement for fault free flying behavior of your drone When hovering if the drone flies forwards or backwards without you moving the direction stick please proceed as follows If the drone moves on its own forwards press the backward trimmer in steps If the drone moves on its own backwards press the forward trimmer in steps Trimming ...

Page 10: ... the left press the right trimmer in steps If the drone moves on its own sideways to the right press the left trimmer in steps When hovering if the drone rotates to left or right without you moving the rotation stick please proceed as follows If the drone moves on its own left press the right trimmer in steps If the drone moves on its own right press the left trimmer in steps ...

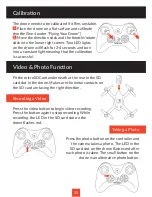
Page 11: ...oSD Card underneath at the rear in the SD card slot in the drone Make sure the metal contacts on the SD card are facing the right direction Press the video button to begin video recording Press the button again to stop recording While recording the LED in the SD card slot on the drone flashes red Press the photo button on the controller and the camera takes a photo The LED in the SD card slot on t...

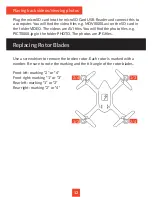
Page 12: ...find the photo files e g PICT0000 jpg in the folder PHOTO The photos are JPG files Use a screwdriver to remove the broken rotor Each rotor is marked with a number Be sure to note the marking and the tilt angle of the rotor blades Front left marking 2 or 4 Front right marking 1 or 3 Rear left marking 1 or 3 Rear right marking 2 or 4 Replacing Rotor Blades Playing back videos viewing photos 2 4 1 3 ...

Page 13: ...equency bound with the receiver on the drone Solution Please carry out the binding procedure as described in Flying Your Drone Problem The drone does not lift Cause The rotor blades rotate too slowly Solution Push the throttle up Cause The battery s power is not sufficient Solution Charge the battery see chapter Getting Started Charging Problem During flight the drone loses speed and height withou...

Page 14: ...e drone in sight at all times during operation and flight Discontinue operation immediately if the drone flies out of your field of view Because your drone is controlled by radio it is subject to radio interference from many sources that are beyond your control Radio interference can cause momentary losses of radio control always allow a safety margin in all directions around the drone to prevent ...

Page 15: ...e When transporting or temporarily storing the rechargeable battery the temperature should be between 5 50 C If possible do not store the battery or the drone in a car and do not expose it to direct sunlight In case the battery is broiled it can be damaged or catch fire Do not submerge the drone or remote control in water This will damage the electronic components and could pose a severe risk to t...

Page 16: ......

Reviews: