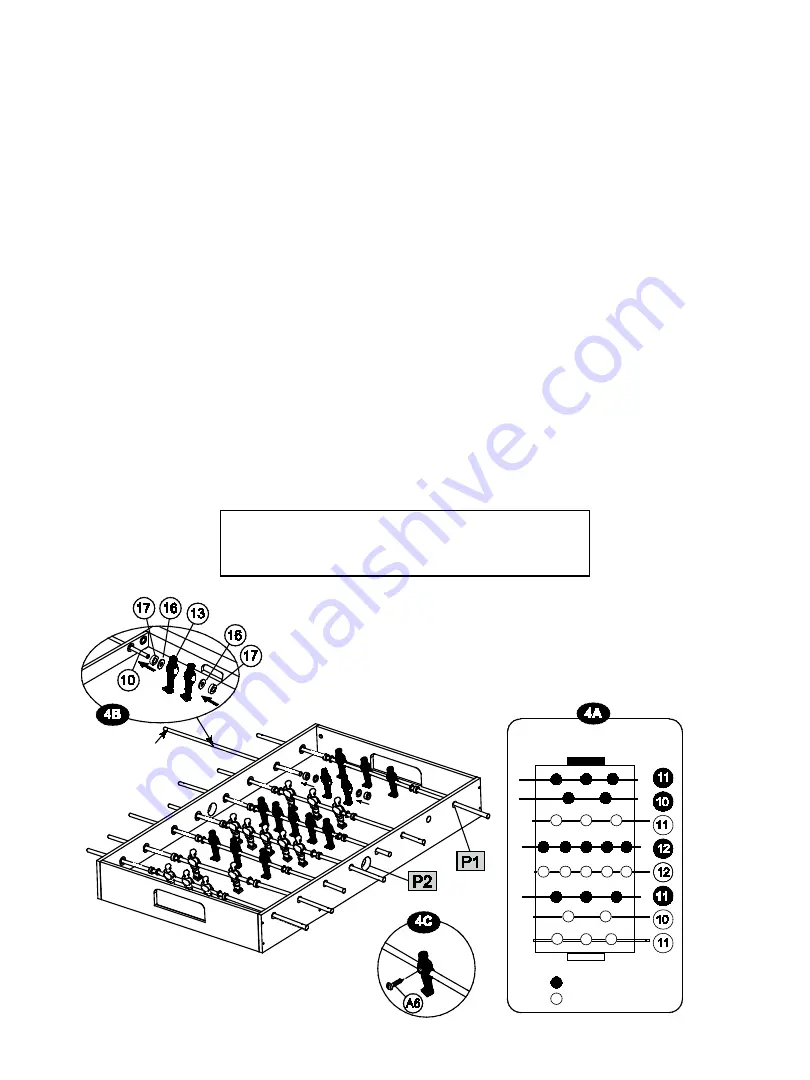
Step 6
Slide the empty Rods (#10, 11,12) through the Rod Bushings (#P1), which are the plastic
sleeves in the Side Apron (#1). Be sure to insert the empty Rods (#10, 11, 12) on only
one side of the Side Apron (#1) in the order shown in 4A, as this will determine how many
players will attach to each rod.
Note: The player Rods have a hole at their end where the Handles (#18) will go.
Insert the players onto the empty Rods (#10, 11, 12) by pulling the empty rod back toward
the Rod Bushing (#P1) and inserting a Rod Bumper (#17), Rod Washer (#16) and the
appropriate number of Players (#13 or #14) followed by Rod Washer (#16) and Rod
Bumper (#17) as shown in 4B.
Now insert the end of the rod through the Rod Bushing (#P1) on the other side of the Side
Apron (#1).
Secure the Players (# 13 and #14) which you have attached to the Rods (#10, 11, 12)
using one screw (#A6) as shown in image 4C.
Note: The goalie should be at the left side of each player.
Note: Players of the same team color should
have Handles on the same side, and each team’s
players should be facing their opponent.
Slide empty rod
into rod bushing
and attach parts
BLACK
IVORY
ORDER OF PLAYERS
(Overhead View)


