background image

FAX Operation (Basic) 

3-28

Registering Shortcuts

Add shortcuts in the Quick Setup screen for easy access to the frequently used functions. A function name linked 
to a registered shortcut can be changed as necessary. You can register up to 6 shortcuts.

Adding Shortcuts

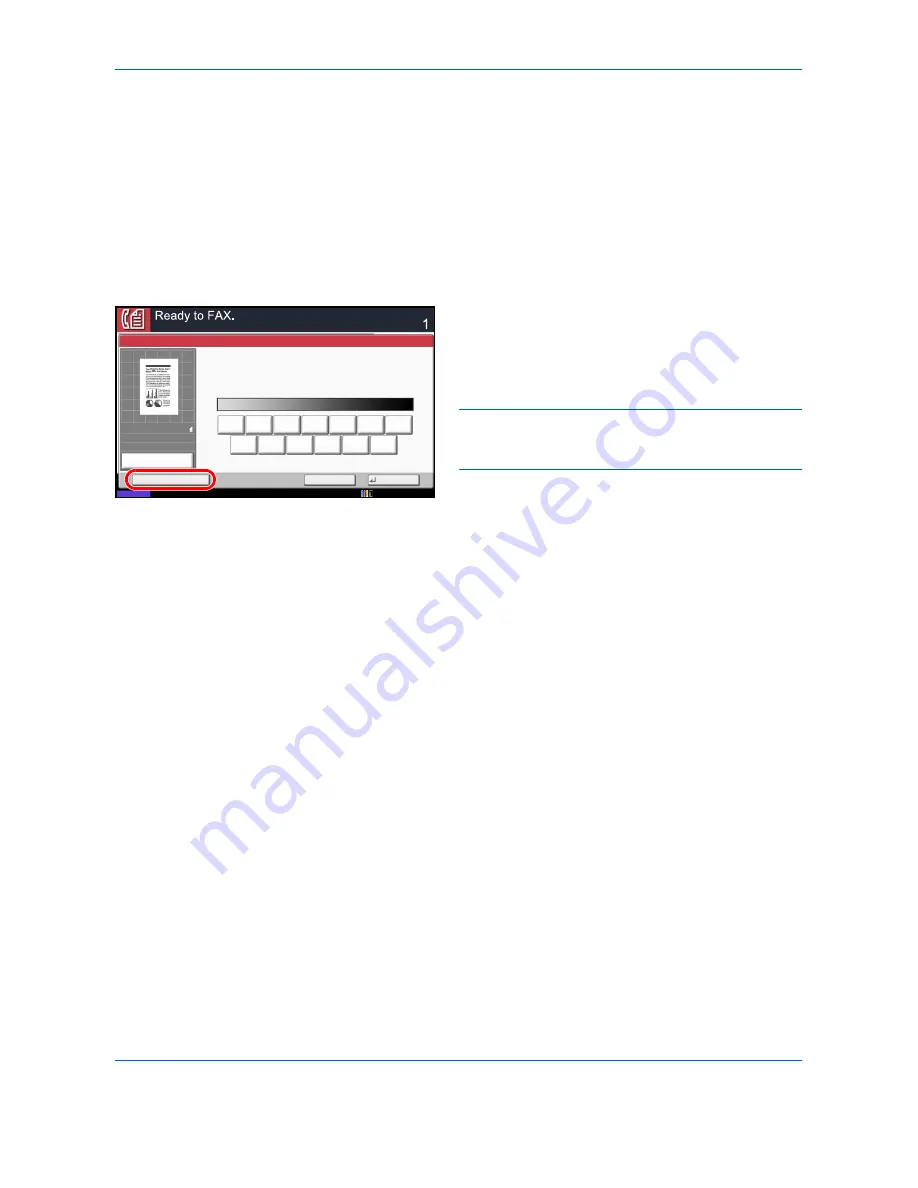
Shortcut registration is performed in the setup screen of each function. Shortcuts can be registered for all 
functions in which [Add Shortcut] appears on the screen.

Use the procedure below to register a shortcut.

1

After making the desired settings in the setup 
screen of each function, press [Add Shortcut].

2

Press the keys corresponding to the shortcut 
number (01 to 06) to register.

NOTE: 

If you select a shortcut number already 

registered, the currently registered shortcut can be 
replaced with a new one.

3

Enter the shortcut name and press [Save] to add 
the shortcut.

Editing and Deleting Shortcuts

Follow the steps shown below to change a shortcut number/name or delete a shortcut.

1

In the setup screen of each function, press [Add 
Shortcut] in the bottom of the screen.

2

Press [Edit] and press the keys corresponding to 
the shortcut number (01 to 06) to change or delete.

3

To edit a shortcut, press [Change] to change the 
shortcut button number and name and press [OK] 
and then [Save]. Choose [Yes] in the confirmation 
screen to change the shortcut.

To delete the shortcut, press [Delete this Shortcut]. 
Choose [Yes] in the confirmation screen to delete 
the shortcut.

Darker

Density

Normal

Lighter

Cancel

OK

Add Shortcut

Status

10/10/2010

Destination

0

+1

+2

+3

-1

-2

-3

-2.5

-1.5

-0.5

+0.5

+1.5

+2.5

100%
A4

A4

Preview

Original
Zoom
Send

:
:
:

Summary of Contents for DC 2435

Page 1: ...Faxsystem V User Manual Faxsystem V DC 2435 2445 2455 2465 2480 DCC 2930 2935 2945 2950 Digital Multifunctional Systems Copy Print Scan Fax A3...

Page 2: ......

Page 3: ...Symbols The symbol indicates that the related section includes safety warnings Specific points of attention are indicated inside the symbol The symbol indicates that the related section includes info...

Page 4: ...ii Note Due to performance updating information in this Operation Guide is subject to change without notice...

Page 5: ...Registering Shortcuts 3 28 4 FAX Operation Advanced Long Originals 4 2 Delayed Transmission 4 3 Broadcast Transmission 4 6 Standby Transmission 4 9 Interrupt Send 4 10 Chain Dial 4 11 Manual Send 4 13...

Page 6: ...on 6 36 Remote Diagnostics 6 37 Prohibiting FAX Printing at Specified Times Unusable Time 6 38 Setting the Paper Output 6 39 7 Optional Equipment Internet FAX Kit A 7 2 Expansion Memory 7 3 Dual FAX 7...

Page 7: ...e before you start using the machine Keep it close to the machine for easy reference During use refer to the Operation Guide for your machine for information regarding the sections listed below Cautio...

Page 8: ...elephone company 2 This equipment connects to the network via USOC RJ11C 3 A plug and jack used to connect this equipment to the premises wiring and telephone network must comply with the applicable F...

Page 9: ...st page of the transmission the date and time it is sent and an identification of the business or other entity or other individual sending the message and the telephone number of the sending machine o...

Page 10: ...dans ce manuel Ne pas jeter les piles dans le feu elles peuvent exploser Se conformer aux r glements pertinents quant l limination des piles CONSERVER CES INSTRUCTIONS CANADIAN IC REQUIREMENTS This pr...

Page 11: ...technology equipment EN55022 Class B Limits for harmonic currents emissions for equipment input current 16A per phase EN61000 3 2 Limitation of voltage fluctuations and flicker in low voltage supply s...

Page 12: ...6R00 AN for D GR and P ES 01R01 National AN for E AN 07R01 AN for D E P and N GR 01R00 National AN for GR AN 09R00 AN for D GR 03R00 National AN for GR AN 10R00 AN for D GR 04R00 National AN for GR AN...

Page 13: ...witched telephone networks PSTN in the following countries Austria France Liechtenstein Slovakia Belgium Germany Lithuania Slovenia Bulgaria Greece Luxembourg Spain Cyprus Hungary Malta Sweden Czech I...

Page 14: ...ation functions of the machine that are compatible with other makers systems and job accounting functions convenient for checking the communication status of fax Chapter 5 Checking Transmission Result...

Page 15: ...d the specifications of the machine NOTE This Operation Guide contains information for using both the inch and metric versions of this machine The inch version of this machine is shown in the screens...

Page 16: ...d on the PC screen Press the Start key Regular Indicates the touch panel keys Press OK Italic Indicates the messages displayed on the touch panel Ready to copy is displayed Note Indicates supplemental...

Page 17: ...o indicate originals and paper placement directions on the touch panel Placement direction Indicated size The size of the originals paper that can be used depends on the function and source tray For d...

Page 18: ...xvi...

Page 19: ...s and Functions This chapter explains the names of parts when the machine is used as a fax machine after installing the FAX kit For other parts refer to the machine s Operation Guide Operation Panel 1...

Page 20: ...display in the Copy screen Send screen or FAX screen Displays the Document Box screen Blinks during printing fax sending and receiving scan send and print data receiving Displays help guidance Display...

Page 21: ...en Pauses the printing job in progress Starts faxing copying and scanning operations and processing for setting operations Finalizes numeric key entry and finalizes screen during setting of functions...

Page 22: ...panel Perform the fax operation with this panel 2 Main power switch Set this switch to the ON side when performing the fax or copier operation The touch panel lights to enable operation 3 MP Multi Pur...

Page 23: ...t Processor The indicator lights in green when the original is correctly set 8 Top cover Open this cover when the original jammed in the Document Processor 9 Original width guides Adjust these guides...

Page 24: ...Part Names and Functions 1 6...

Page 25: ...essary before the machine is used There is no need for the customer to undertake this preparation if it has already been carried out by a service representative Quick Setup Wizard Fax Setup 2 2 Date a...

Page 26: ...ch you can communicate Enter the four digit local FAX ID number 6 5 TTI Select whether or not to print the local fax information on the fax on the receiving system 6 3 3 Sound Volume FAX Speaker Volum...

Page 27: ...up is finished press Finish End Next FAX Quick Setup Wizard 1 Dialing RX Mode This wizard will help you set the basic settings to use the fax 10 10 2010 Status 2 Local FAX info 3 Sound Volume 4 Rings...

Page 28: ...the login user name and password are both Admin 3 Press Change of Time Zone 4 Select the region and press OK NOTE Press or to view the next region 5 Press Off or On of Summer Time and then press OK NO...

Page 29: ...tination You can register new destinations to the Address Book There are two registration methods contact registration and group registration for registering several contact registrations as a unit NO...

Page 30: ...digits can be entered as the number of the receiving system Press Space to enter a space Use or to move the cursor To correct the fax number press Backspace on the touch panel and delete the digits on...

Page 31: ...Encryption Key No If you are not using encryption go to step 19 15 Press On and select Encryption Key No NOTE Register the encryption key in advance For details refer to Registering an Encryption Key...

Page 32: ...ged by selecting the destination and pressing Detail 25 Press Change for Display Name and Destination to change the settings as needed 26 Press Register If the one touch key has already been registere...

Page 33: ...an be entered NOTE For details on character entry refer to Character Entry Method on page 2 of the Appendix 8 Press i FAX 9 Press Change of i FAX Address 10 Enter the destination address and press OK...

Page 34: ...eived by the destination fax machine If you try to send an i FAX using a prohibited resolution it is automatically changed to a permitted resolution and then sent 200 100 dpi Permitted fixed 200 200 d...

Page 35: ...ess Number 4 Use the numeric keys or to enter the address number 0001 to 2 500 NOTE The address a number is the identification number for each group You can select a number available from a total of 2...

Page 36: ...ey registration screen appears Go to the next step If you selected No registration ends 14 Select the One touch key number to which to register the destination and Press Next 15 Select the destination...

Page 37: ...sort the list in the order of index or address numbers of the destinations 1 Press the System Menu key 2 Press Edit Destination and then Next of List Print 3 Press Print of FAX List Index or FAX List...

Page 38: ...ay name Up to 24 characters can be entered If a destination is selected without entering a display name the selected destination s registered name in the address book will be entered Press Change and...

Page 39: ...ouch key number by direct input 4 Change Registration Contents When changing the display name 1 Press Register Edit 2 Press Change in Display Name and enter the new display name When changing the dest...

Page 40: ...es on the change confirmation screen registers the destination to the One touch key When deleting registration contents 1 Press Delete 2 Pressing Yes on the deletion confirmation screen deletes the re...

Page 41: ...Automatic Send 3 4 FAX Automatic Reception 3 12 Canceling Communication 3 14 Changing Deleting Registration Contents 3 19 Selecting a Destination by One touch Key 3 21 Using the Speed Dial key 3 22 Di...

Page 42: ...e Enter key performs the same action as OK 2 Once you have set the date and time press the Enter or OK key Using the Quick No Search key Use the Quick No Search keys to perform an action by simply ent...

Page 43: ...1 and 3 digits long press the Enter key or OK The specified destination appears in the destination list Status 10 10 2010 ABCD abcd efg com Address Book FAX No Entry No 1 100 AAA BBB CCC DDD FFF GGG...

Page 44: ...ginals that cannot be placed in the document processor After originals placed on the glass surface are scanned and stored in the memory the receiving system is dialed NOTE When continuous scan is set...

Page 45: ...can also select the transmission method on the basic FAX screen In the basic screen for FAX press Direct This selects the direct transmission method and the keys on the touch panel are highlighted Pre...

Page 46: ...ame FAX number and press OK to complete the entry For details refer to Entry Check for New Destination in the machine s Operation Guide To continue entering a new number press FAX No Entry and repeat...

Page 47: ...o the receiving system After pressing this key you can dial the number of the receiving system using the numeric keys For details refer to Manual Send on page 4 13 Dialing methods without using the nu...

Page 48: ...Images on page 3 24 Key Description Sub Address To communicate using the sub address press this key For details refer to Sub Address Communication on page 4 45 Transmission Start Speed To change the t...

Page 49: ...on 200 200 dpi Fine when sending originals with relatively small characters and thin lines Typical character size 8 point example Resolution Resolution 200 400 dpi Super Fine when sending originals wi...

Page 50: ...Detail Standard Sizes 1 Have the size of original detected automatically or select from the standard sizes Inch models Auto Ledger Letter R Letter Legal Statement R 11x15 and Oficio II Metric models A...

Page 51: ...d press Cancel When the cancel confirmation screen appears press Yes NOTE Pressing the Stop key on the operation panel while originals are being scanned cancels the transmission Log 0123456789 438 14...

Page 52: ...to page 4 14 Checking and Changing the Reception Method 1 Press the System Menu key 2 Press FAX Next of Reception Next of FAX and then Change of RX Setting 3 Select Auto Normal 4 Press OK Reception S...

Page 53: ...r or mailbox is attached to the machine received originals are output with the print side facing downward Paper can also be placed in the multi purpose tray to print a fax The multi purpose tray can b...

Page 54: ...ed following the completed scanning of originals use the following procedure NOTE You can cancel transmission by disconnecting the telephone line For details refer to Cancelling Transmission Disconnec...

Page 55: ...talled disconnect the line currently being used for communication 1 Press the Status Job Cancel key 2 Press Device Communication 3 Press Line Off of FAX Port 1 or FAX Port 2 option When the cancel con...

Page 56: ...for the machine Status 10 10 2010 10 10 ABCD abcd efg com Address Book FAX No Entry No 1 100 AAA BBB CCC DDD FFF GGG HHH III JJJ 0004 0003 0005 0001 0002 0006 0007 0008 0009 0010 Check Destinations D...

Page 57: ...B OFFICE 1234568907 C OFFICE 1234569078 Search Name Name 2 1 4 3 Keys used Search method Search words etc 1 Search Name Search by the registered name 2 Search No Search by the registered address numb...

Page 58: ...t to search Search No Press Search No and enter the address number you want to search Destination type search refinement Press FAX or Group The destination by the destination type is displayed Capital...

Page 59: ...setting For details refer to steps 3 to 21 in Contact Registration fax or steps 3 to 16 in Contact Registration i FAX When editing a group 1 Change Address Number and Name For details refer to Group...

Page 60: ...ct registration or group Press Delete Press Yes in the confirmation screen to delete the destination or group 6 Press Register When the change confirmation screen appears press Yes Changes or deletion...

Page 61: ...played on the touch panel press on the right side The next previous One touch keys are displayed Status 10 10 2010 10 10 ABCD abcd efg com Address Book FAX No Entry No 1 100 AAA BBB CCC DDD FFF GGG HH...

Page 62: ...then press OK NOTE When entering a one two or three digits One touch key number you don t need to enter zero 0 at the beginning For example you can enter as 1 for One touch key number 1 Status 10 10 2...

Page 63: ...s Recall and you can call the receiving system you dialed on the destination list 1 Press Recall The receiving system you dialed is displayed on the destination list NOTE When the last transmission in...

Page 64: ...the first page is previewed Detail can be pressed to view all preview images Press to move through the preview images in the order they were scanned You cannot change the transmission functions while...

Page 65: ...in You can also see a preview image in the same way with polling transmissions When you press the Start key for a polling transmission the machine scans the originals and saves the images in the polli...

Page 66: ...Registration Functions Available for Registration 1 Original Size 2 FAX TX Resolution 3 Density 4 2 sided Book Original 5 Continuous Scan 6 Original Image Original Size Sending Size Density FAX TX Re...

Page 67: ...oom Quality function will be Key 3 newly registered Status 10 10 2010 10 10 Destination Destination 1 1 0123456789 Shortcut 1 Shortcut 2 Shortcut 3 Shortcut 4 Shortcut 5 Shortcut 6 Org Sending Data Fo...

Page 68: ...lready registered the currently registered shortcut can be replaced with a new one 3 Enter the shortcut name and press Save to add the shortcut Editing and Deleting Shortcuts Follow the steps shown be...

Page 69: ...6 Standby Transmission 4 9 Interrupt Send 4 10 Chain Dial 4 11 Manual Send 4 13 Manual Reception 4 14 Remote Switch Function 4 16 Printing Sending Received Faxes by Requirements Memory Forwarding 4 18...

Page 70: ...ey 2 Place the originals in the optional document processor 3 Press Original Sending Data Format and then Long Original 4 To scan long originals press On and to scan standard size originals press Off...

Page 71: ...the specified transmission time Refer to Changing Deleting Delayed Transmission on page 4 4 If you use delayed transmission when sending documents stored in the Custom Box by fax you cannot move docu...

Page 72: ...ress the Status Job Cancel key 2 Press Sending Jobs and then Scheduled Job 3 Select the job you want to change or delete from the list and press Detail Detailed information of the selected job is disp...

Page 73: ...mplete entering the number If Entry Check for New Destination is On press OK and you are prompted to confirm the FAX number is correct Re enter the same FAX number and press OK to complete the entry W...

Page 74: ...er the fax number 1 Press FAX No Entry and use the numeric keys to enter the fax number Press Next Dest to enter the next fax number If Entry Check for New Destination is Off press OK to complete ente...

Page 75: ...inations press the Start key Transmission begins NOTE When On is selected in Dest Check before Send a destination confirmation screen is displayed when you press the Start key For details refer to Con...

Page 76: ...on 3 Press OK Select the destination from the One touch keys Press all the One touch keys to which necessary destinations are registered NOTE For details of the Address Book refer to Selecting a Desti...

Page 77: ...rrupt send up to 200 transmissions can be scheduled You can use other functions such as broadcast transmission 1 Press the FAX key 2 Place the originals 3 Select the destination and set transmitting f...

Page 78: ...pt Send 3 Press Advanced Setup and then FAX Direct Transmission 4 Press On 5 Press OK 6 Set the destination and press the Start key The originals are left in queue and the transmission will start when...

Page 79: ...he FAX key 2 Place the originals 3 Press FAX No Entry and enter 010 using the numeric keys To use the Address Book or One touch keys select the destinations to which 010 has been registered NOTE For t...

Page 80: ...ss FAX No Entry and repeat the above procedure To correct the FAX number press Edit and then re enter the chain number Select fax number from the Address Book 1 Press Address Book 2 Select the destina...

Page 81: ...ion begins NOTE When On is selected in Destination Check before Send a destination confirmation screen is displayed when you press the Start key For details refer to Confirmation Screen of Destination...

Page 82: ...ble on port 2 is FAX Automatic reception Receiving after Confirming Connection to the Sending System You can receive originals after confirming by sound that the telephone line has connected to the se...

Page 83: ...sending system When the conversation is over follow steps 1 to 2 above After the sending system has started transmission the machine starts receiving originals 4 When reception starts when the Process...

Page 84: ...essary to connect the tone signal sending telephone set commercially available product to the machine However even if it is a tone signal sending telephone set this function may not be used satisfacto...

Page 85: ...f the telephone 3 When you hear the fax tone from the handset enter the two digit remote switch dial number using the dial button on the telephone set NOTE The remote switch dial is set to 55 at the f...

Page 86: ...cified forwarding requirements will be forwarded to one destination If the fax meets multiple forwarding requirements the forwarding requirement that was registered first is given priority The forward...

Page 87: ...ub address as the forwarding requirement you can restrict relay broadcasting to a specific communication NOTE When forwarding is used you can select whether to print or not to print the received origi...

Page 88: ...s Change of Forwarding 6 Select On or Off whether to forward or not to forward the received documents and press OK 7 Press Change of Forward Destination 8 Set the Forwarding Destination Select the oth...

Page 89: ...Entry Forward originals in e mail transmission Enter the e mail address of the other party to which you will forward the received originals Folder Path Entry Forward originals with folder SMB transmis...

Page 90: ...ic RX 4 Press Add 5 Press Change of Requirement Number 6 Press or or use the numeric keys to enter the requirement number You can enter the requirement number between 001 and 100 7 Press OK 8 Press Ch...

Page 91: ...can use up to 20 digits including the numbers from 0 to 9 space and characters to enter a sub address Sender FAX Number Press Sender FAX Number and enter the sender s fax number using the numeric key...

Page 92: ...mail Addr Entry Forward originals with e mail transmission Enter the e mail address of the other party to which you forward the received originals Folder Path Entry Forward originals with folder SMB...

Page 93: ...28 21 Press OK 22 Press Change of Storing in FAX Box 23 To store the originals in the FAX Box press On If you do not want to store the originals in the FAX Box select Off press OK and proceed to step...

Page 94: ...il and change the settings NOTE If other is not selected received faxes that do not meet the conditions will be printed Save to FAX Box cannot be set in other settings 29 Select the checkbox beside th...

Page 95: ...4 3 Press Delete When the confirmation screen is displayed press Yes and go to step 6 4 Press Detail 5 Refer to steps 5 to 26 of Using Rule for Specific RX on page 4 22 to change the settings 6 When t...

Page 96: ...ress Change of Activating Time 4 Select All Day or Preset Time To forward received originals all day select All Day press OK and then go to step 5 To set the forwarding time select Preset Time and go...

Page 97: ...s OK E mail Subject Add Info Setting Specify whether any information will be added to the subject of the E mail When adding information you can select either Sender Name or Sender 1 Follow steps 1 to...

Page 98: ...2 2 Select the requirement and press Detail 3 Press Change of File Separation 4 Press Off or Each Page To have one file created for each page select Each Page 5 Press OK Setting a Number of Copies You...

Page 99: ...quirement and press Detail 3 Press Change of File Name 4 Press File Name 5 Enter the file name and press OK 6 To insert additional information into the file name press Job No Date and Time Add No Addr...

Page 100: ...e displays basic information about the machine and Embedded Web Server RX as well as the current status of the machine 3 Enter the user name and password of the administrator and click Login Setting A...

Page 101: ...faxes are processed in the same way However the process of saving them in a FAX box cannot be selected For the setting procedure refer to Print Settings on page 4 34 Item Description Requirement Numb...

Page 102: ...ority Prioritize the search keys when conducting searching over the sending criterions Requirement Type Select the condition type from the following items FAX Sub Address FAX Number FAX Reception Port...

Page 103: ...Encrypted TX Turn On to enable encryption for transmission Note the SSL protocol must also be turned on Subject Additional Information When a forwarding address is specified as destination Sender Nam...

Page 104: ...page to edit destinations The settings available on the Forward Edit page are shown below If you selected E mail as the destination type specify the settings below E mail If you selected SMB or FTP as...

Page 105: ...umber Transmit Start Speed ECM Sub Address Password Encryption Key No Encryption Box Encryption Box No If you selected i FAX as the destination type specify the settings below i FAX Address Connection...

Page 106: ...s Document Box Removable Memory Next of FAX Box and Register Edit of Register Edit Box 3 Press Add 4 Press Change of the required items NOTE The Owner and Permission are displayed when the user login...

Page 107: ...ntry refer to Character Entry Method on page 2 of the Appendix When Box Password is selected 1 Press Password and enter the password Up to 16 digits can be entered 2 For confirmation press Confirm Pas...

Page 108: ...step and to change the FAX Box go to step 4 3 Press Delete When the deletion confirmation screen appears press Yes Go to step 5 4 Press Detail Edit and change the FAX Box referring to steps 4 to 5 of...

Page 109: ...rmation on working with lists in FAX Boxes refer to the machine s Operation Guide From a FAX Box only printing is available Sending cannot be done 5 Press Print 6 Select whether the originals are to b...

Page 110: ...or the selected original are displayed 4 When you have finished checking the details press Close Close File Name Detail Date and Time Delete Print Size 1 1 0001 1 2010 10 10 09 00 MB Box Preview 10 10...

Page 111: ...e pressed in the enlarged image to move the part that is displayed 3 If the original consists of multiple pages press or to move back or forward 1 page Press to skip to the first page or to skip to th...

Page 112: ...he FAX Boxes the number of pages is displayed NOTE The list can be printed when user login has been enabled and the machine is logged in with administrator privileges 1 Press the System Menu key 2 Pre...

Page 113: ...with various kind of functional communication When registering a sub address and sub address password in the Address Book and One touch keys you can omit their entry before transmission For details r...

Page 114: ...correct the FAX number press Edit 5 Press Detail 6 Press Change of Sub Address 7 Press Sub Address and enter the sub address using the numeric keys NOTE You can use up to 20 digits including the numb...

Page 115: ...ion requirements such as the other party to which you send originals and transmission time as a program After registration you can recall transmission requirements only by pressing the program number...

Page 116: ...When you press Yes on the deletion confirmation screen the program is deleted Using Program Dial 1 Press the Program key 2 Place the originals 3 Press Recall and then the key of the program number to...

Page 117: ...to Off the originals are stored in the Polling box until you delete them You can use polling transmission with the same originals as many times as you wish Refer to page 4 50 NOTE You can store up to...

Page 118: ...ddress bulletin board communication refer to Using Polling Reception with Sub Addresses on page 4 55 Deleting Originals After Polling Transmission Originals intended for polling transmission are autom...

Page 119: ...processor File Name Entry Allows you to rename the files created from scanned originals You can also use this function to add the job number and or date Density Adjusts the density used for scanning...

Page 120: ...you enter a matching password You can use up to 20 digits including the numbers from 0 to 9 space and characters to enter a sub address password When the machine receives originals a sub address pass...

Page 121: ...r party is using sub addresses refer to Using Polling Reception with Sub Addresses below 1 Press the FAX key 2 Press Advanced Setup and then FAX Polling RX 3 Press On 4 Press OK 5 Select the destinati...

Page 122: ...n Advanced 4 54 NOTE When On is selected in Dest Check before Send a destination confirmation screen is displayed when you press the Start key For details refer to Confirmation Screen of Destinations...

Page 123: ...confirm the FAX number is correct Re enter the same FAX number and press OK to complete the entry When New Destination Entry is set to Prohibit the numeric keys cannot be used to enter a fax number F...

Page 124: ...s no longer ticked To check the image of the originals refer to the preview For information on previewing images refer to Previewing Images on page 4 59 For information on working with lists in a Poll...

Page 125: ...ing transmission Refer to page 4 50 1 Follow steps 1 to 3 in Printing from a Polling Box on page 4 56 2 Press Delete 3 When the deletion confirmation screen appears press Yes The original is deleted C...

Page 126: ...33 10 10 2010 23 Polling Box doc20101010095022 10 10 2010 4 doc20101010100011 5 Preview Store File 10 10 2010 10 10 2010 Status KB KB KB Search Name File Close Status 10 10 2010 10 10 Change File Name...

Page 127: ...n prohibit direct entry of fax numbers with the numeric keys when faxes are sent When direct entry is prohibited faxes can only be sent to destinations stored in the address book or one touch keys 1 P...

Page 128: ...to the machine s Operation Guide Item Description Local User List Register user access privileges User ID and Password Enable Disable User accounting Enable Disable User accounting Item Description A...

Page 129: ...o the receiving system Polling transmission Network FAX transmission i FAX Transmission Transmission from the document box Destinations include FAX and i FAX destinations IMPORTANT You can use Make a...

Page 130: ...E For details on character entry refer to Character Entry Method on page 2 of the Appendix 3 Press Login Password 4 Enter the password and press OK 5 After confirming that the correct User ID and pass...

Page 131: ...y a department by entering the Account ID and pressing Check Counter Press Close in the counter browsing screen to log in 2 Perform the fax operation NOTE When the operation is completed press the Aut...

Page 132: ...ne Mixed Sized Originals Use the optional document processor to place originals of different sizes together and send them In this method up to 30 sheets can be placed in the document processor NOTE Fo...

Page 133: ...you press Scan Finish You can change the following items during scanning Original Size Selection 1 sided 2 sided Selection Sending Size Selection Original Orientation Original Image Density FAX TX Re...

Page 134: ...r Erase Book Erase black borders found around and in the middle of pages of thick books You can set the width of Border Erase for around and in the middle of books separately Individual Border Erase E...

Page 135: ...rm when the transmission of e mail is completed Send and Print When you send originals this feature allows you to print a copy of the document being sent Send and Store When you send originals this fe...

Page 136: ...FAX Operation Advanced 4 68...

Page 137: ...heck fax transmission results and functional registration status Various Tools for Checking Transmission Results and Registration Status 5 2 Checking FAX Job History 5 3 Printing Administrative Report...

Page 138: ...Any time 5 3 Send result report Receiptresult report Report printing Latest send or receipt result Automatic printout after every sending or receiving operation No Print Output or Error Only is also o...

Page 139: ...check the results of file storage in FAX Boxes and Polling box Then press Log 3 Press in Job Type and select FAX or i FAX Description of the Job Log Screen Items shown in each job log screen and the...

Page 140: ...e number End Date Job completed date Type Icon indicates job type Fax transmission i FAX transmission Destination Recipient destination name fax number or i FAX address User Name User name Blank if no...

Page 141: ...End Date Job completed date Type Icon indicates job type Storing fax reception data Storing i FAX reception data Job Name Job name User Name User name Blank if no information is available Result Resu...

Page 142: ...heck the result for each destination Job Type Job type Destination Recipient The number of destinations is displayed User Name User name Blank if no information is available Job Name Job name Accepted...

Page 143: ...ld then indicate whether the transmitted image is to be attached by selecting Off do not print transmitted image Partial Image print transmitted image at full size or Full Image print all of the trans...

Page 144: ...t 3 Press Off not to print On to print or Error Storing in Box Only 4 Press OK Activity Report Activity reports are reports of both the sent faxes and the received faxes Each report lists the history...

Page 145: ...es sent or received 1 Press the System Menu key 2 Press Report and Next of Admin Report Settings Then press Change of Outgoing FAX Report or Incoming FAX Report 3 Press Off not to print or On to print...

Page 146: ...setups FAX related information includes the Local FAX Number Local FAX Name fax line setting etc You can print it out as necessary 1 Press the System Menu key 2 Press Report and Next of Print Report T...

Page 147: ...l notification is only provided when an error occurs or the received original is forwarded to FAX Boxes 1 Press the System Menu key 2 Press Report and Next of Result Report Setting Then press Change o...

Page 148: ...ted destination To delete the destination select the destination you want to delete and press Delete Press Yes in the confirmation screen The destination is deleted To add the destination press Cancel...

Page 149: ...ring Machine Auto Switch Reception 6 9 Rings 6 11 Volume Adjustment 6 12 Retry Times 6 13 Receiving Mode 6 14 Reception Date Time 6 15 Media Type for Print Output 6 16 MP Tray Paper Output 6 18 DRD Re...

Page 150: ...OTE If you install 2 optional FAX Kits Dual FAX option and then use 2 phone lines select the option for each line 1 Press the System Menu key 2 Press FAX Next of Transmission Next of FAX and then Chan...

Page 151: ...can specify the same TTI for FAX and Internet FAX i FAX transmissions Normally the Local FAX Name is printed in the transmit terminal identification TTI However when job accounting is enabled and an...

Page 152: ...E For details on character entry refer to Character Entry Method on page 2 of the Appendix 4 Press OK Local FAX Information Entry Register the local FAX information local FAX number ID printed on in t...

Page 153: ...gister Up to 20 digits can be entered Press Space to enter a space Use or to move the cursor Pressing Backspace deletes the character to the left of the cursor 5 Press OK Local FAX ID Entry 6 Press Ch...

Page 154: ...nd Registration 6 6 Change of Account as Local FAX Name 10 Press Next of Basic and then Change of Account as Local FAX Name 11 To use the account name press ON To use the Local FAX name press OFF 12 P...

Page 155: ...es not respond Flow of reception NOTE At the end of the conversation you can also manually receive the originals Refer to Manual Reception on page 4 14 FAX FAX Telephone When the other party has sent...

Page 156: ...tone rings Refer to FAX TEL Auto Switch Reception on page 6 7 2 When the call is from a telephone 1 The machine makes a ringing tone urging the user to respond Lift the handset of the telephone within...

Page 157: ...FAX Answering Machine Auto Switch Reception it is necessary to connect an answering machine equipped telephone set commercially available product to the machine For details such as responding to messa...

Page 158: ...he machine enters a status the same as manual reception Refer to Manual Reception on page 4 14 2 The answering machine responds When the call is from a telephone but the user is absent The answering m...

Page 159: ...Auto TAD and Auto FAX TEL NOTE The number of ringing times can be set to between 1 and 15 times for Rings Normal and Rings TAD and 0 and 15 times for Rings FAX TEL For Rings FAX TEL this change is po...

Page 160: ...aker when the line is connected without pressing On Hook such as in memory transmission 1 Press the System Menu key 2 Press Common Settings Next of Sound and then Change of FAX Speaker Volume or FAX M...

Page 161: ...cally NOTE Retry times can be set to between 0 and 14 For Redial refer to Dialing the Same Receiving System Redial on page 3 23 1 Press the System Menu key 2 Press FAX Next of Transmission Next of FAX...

Page 162: ...e 6 19 Manual Reception Manual Refer to page 4 14 Select the mode appropriate for the way the machine is used NOTE DRD reception mode is available only for inch models 1 Press the System Menu key 2 Pr...

Page 163: ...he fax is from a different time zone NOTE When the received data is printed on multiple pages the reception date time is printed on the fist page only It is not printed on the pages that follow When t...

Page 164: ...for the print output of received faxes By specifying the media type faxes can be received on the corresponding cassette Faxes will be automatically reduced to the set paper size 1 Press the System Men...

Page 165: ...s Close The display returns to the default System Menu screen Common Settings Paper Size Set cassette paper size Standard Sizes 1 Auto Status 10 10 2010 10 10 Metric Inch Standard Sizes 2 Cancel OK Co...

Page 166: ...You can select whether to use the MP tray paper when printing out the received fax 1 Press the System Menu key 2 Press FAX Next of Reception Next of Basic and then Change of Multi Purpose Tray 3 Sele...

Page 167: ...RD reception is only possible if you subscribe to the Distinctive Ring Pattern service provided by your telephone company Contact your telephone company for further information on the Distinctive Ring...

Page 168: ...determined ring pattern When the call is from a telephone Lift the handset and speak with the other party When the conversation is over fax reception can be initiated manually When the call is from a...

Page 169: ...blishing Requirements Send Restrictions Register Permitted FAX numbers or Permitted ID numbers Refer to Registering Permit FAX No on page 6 22 or Registering Permit ID No on page 6 26 Send restriction...

Page 170: ...egister Reject FAX numbers Refer to Registering Reject FAX No on page 6 24 Reception restriction settings are specified in Reject List in Reception Restrictions Refer to Setting Reception Restriction...

Page 171: ...l 4 Use the numeric keys to reenter Permit FAX No Up to 20 digits can be entered NOTE Press Pause to insert a pause between numbers Press Space to enter a space Use or to move the cursor Pressing Back...

Page 172: ...p to 20 digits can be entered NOTE Press Pause to insert a pause between numbers Press Space to enter a space Use or to move the cursor Pressing Backspace deletes the character to the left of the curs...

Page 173: ...move the cursor Pressing Backspace deletes the character to the left of the cursor 5 Press OK When the change confirmation screen appears press Yes Go to step 7 6 Press Delete When the deletion confir...

Page 174: ...o 0000 to 9999 NOTE Press the Clear key to display the previous number 5 Press OK 6 To register other Permit ID numbers repeat steps 3 to 5 7 Press Close FAX Permit ID List FAX ID Register an ID from...

Page 175: ...7 To change and delete other Permit ID numbers repeat step 2 to 6 8 Press Close Setting Send Restriction Restrict the other parties to which you send originals only to the ones registered in Permit FA...

Page 176: ...ollow the steps below 1 Press the System Menu key 2 Press FAX Next of TX RX Restriction and then Change of RX Restriction 3 To not use the reception restriction press Off To restrict the other parties...

Page 177: ...ame 16 digit encryption key When the encryption key differs between the sending system and the receiving system the encryption cannot be conducted Therefore the sending system and the receiving system...

Page 178: ...Press FAX Next of TX RX Common and then Add Edit of Encrypt Key Registration 3 Select the unregistered encryption key and press Add Edit 4 Press Encryption Key 5 Use the numbers 0 to 9 and the alphabe...

Page 179: ...press Yes 8 To change or delete other encryption keys follow steps 2 to 7 Operation at the Sending System When sending originals by encrypted transmission use the Address Book registered for encryptio...

Page 180: ...ox and go to the next step NOTE When the machine receives originals the encryption box is not used 9 Press On and use the numeric keys to enter the encryption box number 4 digits and press OK 10 Press...

Page 181: ...mmunication cannot be used 1 Register the encryption key you have arranged with the sending system Refer to Registering an Encryption Key on page 6 30 2 Press the System Menu key 3 Press FAX Next of R...

Page 182: ...Press the System Menu key 2 Press FAX Next of Reception Next of Basic and Change of Reduced RX Size 3 Select Off or On 4 Press OK Item Description Off Print the received data at 100 of the original si...

Page 183: ...ultiple pages of data are the same width they can be printed out on both sides of paper having the same width as the data 1 Press the System Menu key 2 Press FAX Next of Reception Next of Basic and th...

Page 184: ...ts 2 pages of the original at a time on one Letter or A4 size sheet of paper NOTE If you specify 2 in 1 reception and duplex printing at the same time 2 in 1 reception is disabled 1 Press the System M...

Page 185: ...problems NOTE To use Remote Diagnostics you must first sign an agreement with our service representative and register a Predetermined ID on the machine For more information contact your Service Repres...

Page 186: ...1 Press the System Menu key 2 Press and then Date Timer The user authentication screen is displayed Enter a login user name and password and press Login The factory default settings for the login user...

Page 187: ...ing the Paper Output Set the output tray for printing of receiving faxes 1 Press the System Menu key 2 Press Common Settings and then Change of Paper Output 3 Press Change of Fax Port1 or Fax Port2 4...

Page 188: ...Setup and Registration 6 40...

Page 189: ...7 1 7 Optional Equipment This chapter introduces the optional equipment available for the FAX kit Internet FAX Kit A 7 2 Expansion Memory 7 3 Dual FAX 7 3...

Page 190: ...Optional Equipment 7 2 Internet FAX Kit A You can use Internet FAX on this machine For details refer to Internet Faxing i FAX Option on page 8 1...

Page 191: ...dcast transmissions to multiple recipients Also because you can then send and receive simultaneously there will be fewer occasions when you cannot receive a fax during fax transmission Dual FAX Settin...

Page 192: ...en is displayed Enter a login user name and password and press Login The factory default settings for the login user name and password are both Admin 3 Press Next of Job Accounting Setting Register Ed...

Page 193: ...1 8 Internet Faxing i FAX Option This chapter explains how to use the Internet faxing i FAX using the Internet FAX Kit A What is i FAX 8 2 i FAX Settings 8 4 i FAX Transmission 8 8 i FAX Reception 8 1...

Page 194: ...ed by this machine to multiple recipients as Internet faxes E mail notification of transmission results Example of sending i FAX from A OFFICE to B OFFICE i FAX Transmission Flowchart The procedure fo...

Page 195: ...e for transmissions are dependent on the performance of the receiving machine Check the specifications of the receiving machine before sending the fax If you do not know the specifications of the rece...

Page 196: ...n confirmation results sent back by recipients are included in the sent fax report For more information on sent fax reports refer to Activity Report on page 5 8 For more information on setting the con...

Page 197: ...ing from the navigation bar on the left to view and set values for that particular category 5 Click FAX i FAX The Transmit Settings dialog box will appear For details refer to the PEHGGHG HE 6HUYHU RX...

Page 198: ...cify the i FAX user POP3 account or specify another account and the user who will provide authentication Login User Name If you selected Other in the user setting enter the user name used for authenti...

Page 199: ...You can enter the DNS server IP address in the TCP IP settings screen Refer to the machine s Operation Guide for details POP3 Port Number Sets the port number used by POP3 Normally 110 is used POP3 S...

Page 200: ...ination 1 Press i FAX Addr Entry Status 10 10 2010 Destination Detail Address Book Folder Path Entry E mail Addr Entry No 1 100 AAA BBB CCC DDD FFF GGG HHH III JJJ 0004 0003 0005 0001 0002 0006 0007 0...

Page 201: ...page 3 16 Using One touch keys Refer to page 3 21 Using the Speed Dial key Refer to page 3 22 Manual Redial recall Refer to page 3 23 NOTE In addition to an i fax you can include FAX transmission e m...

Page 202: ...at can be received by the destination fax machine If you try to send an i FAX using a prohibited resolution it is automatically changed to a permitted resolution and then sent 200 100 dpi Permitted fi...

Page 203: ...d press OK Up to 500 characters can be entered for the body 6 Press OK Send Start Press the Start key Transmission begins NOTE When On is selected in Destination Check before Send a destination confir...

Page 204: ...ed cancels the transmission Log abc def com 438 14 47 1 1 10 10 2010 10 10 Status Printing Jobs Sending Jobs Storing Jobs Device Communication Paper Supplies Detail InProcess Status User Name Job Name...

Page 205: ...ting For details refer to i FAX POP3 Settings on page 8 7 Manual i FAX Reception Use this procedure to check for faxes immediately 1 Press the Status Job Cancel key 2 Press Device Communication 3 Pres...

Page 206: ...Internet Faxing i FAX Option 8 14...

Page 207: ...to use Network FAX Please also read the Network FAX Driver Operation Guide Online Manual contained in the included DVD which describes how to operate your PC to send a fax using Network FAX and make v...

Page 208: ...Supports i FAX transmission Operation is as simple as printing Flow of Network FAX Sending Network FAX sending is performed in the following sequence Flow of Network FAX Receiving Network FAX receivi...

Page 209: ...twork FAX 9 3 9 NOTE The memory forwarding function allows not only reception by the networked PC but also forwarding of the received fax by e mail forwarding to another fax machine or storing in the...

Page 210: ...ed software included in the supplied DVD on your PC required to use Network FAX For details refer to the Network FAX Driver Operation Guide Online Manual contained in the included DVD Basic Transmissi...

Page 211: ...Network FAX Driver Operation Guide 5 Specify a cover page To include a cover page select settings on the Cover Page tab NOTE For details on the settings refer to Network FAX Driver Operation Guide 6 S...

Page 212: ...ied NOTE For detailed information on the settings refer to Network FAX Driver Operation Guide Item Description Original Size Select the size of the document being transmitted from the dropdown list Av...

Page 213: ...Transmission Settings Specifying the Cover Letter Settings Opening the Online Manual Follow the steps below to refer to the online manual 1 Insert the DVD supplied with the machine into the DVD drive...

Page 214: ...About Network FAX 9 8...

Page 215: ...1 10 Troubleshooting This chapter explains how to deal with problems Indicators During Sending Receiving Operation 10 2 Precautions When Turning Power OFF 10 3 Error Messages 10 4 Troubleshooting 10...

Page 216: ...g indicator blinks when the machine is sending or receiving a fax The Memory indicator blinks when source data is being stored in memory for memory transmission The Memory indicator is lit when there...

Page 217: ...ey on the operation panel Make sure that the Power indicator and the Memory indicator are off before turning off the main power switch CAUTION The hard disk may still be operating as long as the Power...

Page 218: ...message still appears note the error code Turn the main power switch off and unplug the power cord Call your service representative FAX box limit exceeded FAX Box capacity is used up with document da...

Page 219: ...of the same size as indicated When the type of printing paper is specified the necessary paper types are also displayed To use another paper source select the paper source and press Continue Press MP...

Page 220: ...both at sender and recipient Double check the registrations both at sender and recipient 6 29 Cannot use the remote switching function Is a pulse line used Some phones may transmit tone signals using...

Page 221: ...sub address Is the recipient fax machine equipped with a sub address transmission feature Sub address transmission cannot be performed unless the recipient fax machine has a similar sub address trans...

Page 222: ...on function If the other party s fax machine does not have the same sort of sub address bulletin board communication function it cannot receive faxes via a sub address bulletin board Check with the re...

Page 223: ...ter Entry Method Appendix 2 Specifications Appendix 5 Menu List Appendix 6 Received FAX Sizes and Paper Priority Inch Model Appendix 10 Received FAX Sizes and Paper Priority Metric Model Appendix 13 E...

Page 224: ...board to enter Backspace Upper case Lower case No Symbol Space Cancel OK Lower case _ Q W E R T Y U I O P A S D F G H J K L Z X C V B N M Input characters Limit characters 0 128 10 10 2010 10 10 1 5 2...

Page 225: ...pper case Lower case No Symbol Space Cancel OK Lower case _ Q W E R T Y U I O P A S D F G H J K L Z X C V B N M Input characters Limit characters 0 128 10 10 2010 10 10 Status Use the keyboard to ente...

Page 226: ...taining and 1 9 Press and 1 10 Check that the entry is correct Press OK Status Use the keyboard to enter Backspace Upper case No Symbol Space Cancel OK Lower case 1 2 3 4 5 6 7 8 9 0 q w e r t y u i o...

Page 227: ...optional document processor Scanner Resolution Horizontal Vertical 200 100 dpi Normal 8 dot mm 3 85 line mm 200 200 dpi Fine 8 dot mm 7 7 line mm 200 400 dpi Super Fine 8 dot mm 15 4 line mm 400 400 d...

Page 228: ...smission Sending On Hook One Touch Key Chain Dial Quick Setup Type of Original Transmission Original Size Mixed Sized Originals 2 sided Book Original Original Orientation Sending Size Long Original Im...

Page 229: ...FAX Remote Diagnosis Transmission Basic Local FAX Name Port 1 Local FAX Name Port 2 TTI Account as Local FAX Name FAX Local FAX Number 1 Local FAX Number 2 Dialing Mode Port 1 Dialing Mode Port 2 Loc...

Page 230: ...t FAX Attach Send Image Canceled before Sending FAX RX Result Report Job Finish Notice Setting RX Result Report Type Edit Destination Address Book FAX Sub Address Encryption Key No Transmission Start...

Page 231: ...us Job Cancel Key Printing Jobs Status Log Sending Jobs Status Scheduled Job Log Storing Jobs Status Log Device Communication Line Off Manual Reception Check New FAX i FAX Reception Log Activity Repor...

Page 232: ...Priority Received FAX Size Paper Size 1 Paper orientation is different from the received document The image is printed after being rotated 90 automatically 2 Received Legal size document is reduced t...

Page 233: ...STR Statement R LT Letter LTR Letter R LG Legal LD Ledger When a paper type is selected in Media Type a received fax is printed using the matching paper source Refer to page 6 16 Even if All Media Typ...

Page 234: ...ven if All Media Types is selected paper types such as transparency cannot be used for fax printouts Priority Received FAX Size Paper Size 1 Paper orientation is different from the received document T...

Page 235: ...automatically chooses the printing paper according to the following priority Same Size Override Priority Received FAX Size Paper Size 1 2 3 4 5 6 7 8 9 10 A5 B5 A4 R A4 FL B4 A3 A5 R B5 A4 R A4 FL B4...

Page 236: ...page 6 16 Even if All Media Types is selected paper types such as transparency cannot be used for fax printouts Paper orientation is different from the received document The image is printed after bei...

Page 237: ...printouts Priority Received FAX Size Paper Size 1 Paper orientation is different from the received document The image is printed after being rotated 90 automatically indicates print output on two she...

Page 238: ...hough the line connection was established U00601 U00690 Communication was stopped due to the machine failure Send or receive again U00700 Communication was stopped due to failure on the part of the se...

Page 239: ...ther party s fax machine Check with the other party U03200 Sub address bulletin board reception was attempted and the other party s machine is an our brand model but the specified sub address box cont...

Page 240: ...100 Recipient machine is not equipped with a sub address box function or the sub address does not match U04200 Encrypted transmission was canceled because the specified box is not registered U04300 En...

Page 241: ...s no more free space in the memory of the recipient machine Check with the recipient U19000 Memory reception was stopped because there is no more free space in the memory of this machine Create free s...

Page 242: ...Appendix 20...

Page 243: ...count as Local FAX Name 6 6 Character Entry Method Appendix 2 Entering Characters Appendix 4 Entry Screens Appendix 2 Checking Transmission Results and Registration Status 5 1 Confirmation Screen of D...

Page 244: ...ntents 4 60 Limit 4 61 Login 4 63 L LDAP address book 2 5 Local FAX Information 6 4 Local FAX Name 6 4 Long Originals 4 2 M Machine Names 1 4 Manual Reception 4 14 6 14 Manual Send 4 13 Media Type for...

Page 245: ...n 3 26 R Received FAX Sizes and Paper Priority Appendix 10 Appendix 13 Receiving Mode 6 14 Reception Date Time 6 15 Redial 3 23 Changing Retry Times 6 13 Reduced Reception 6 34 Reject Fax No Change De...

Page 246: ...s 6 21 Reception Rejection Requirements 6 22 Reception Restriction Setting 6 28 Reject FAX No 6 24 Send Restriction Setting 6 27 Transmission Start Speed 3 8 Troubleshooting 10 6 TX Start Speed 2 8 U...

Page 247: ...MEMO...

Page 248: ...A1...

Page 249: ......

Page 250: ...TA Triumph Adler GmbH Ohechaussee 235 22848 Norderstedt Germany...

Reviews: