6
Installation
1
2
3
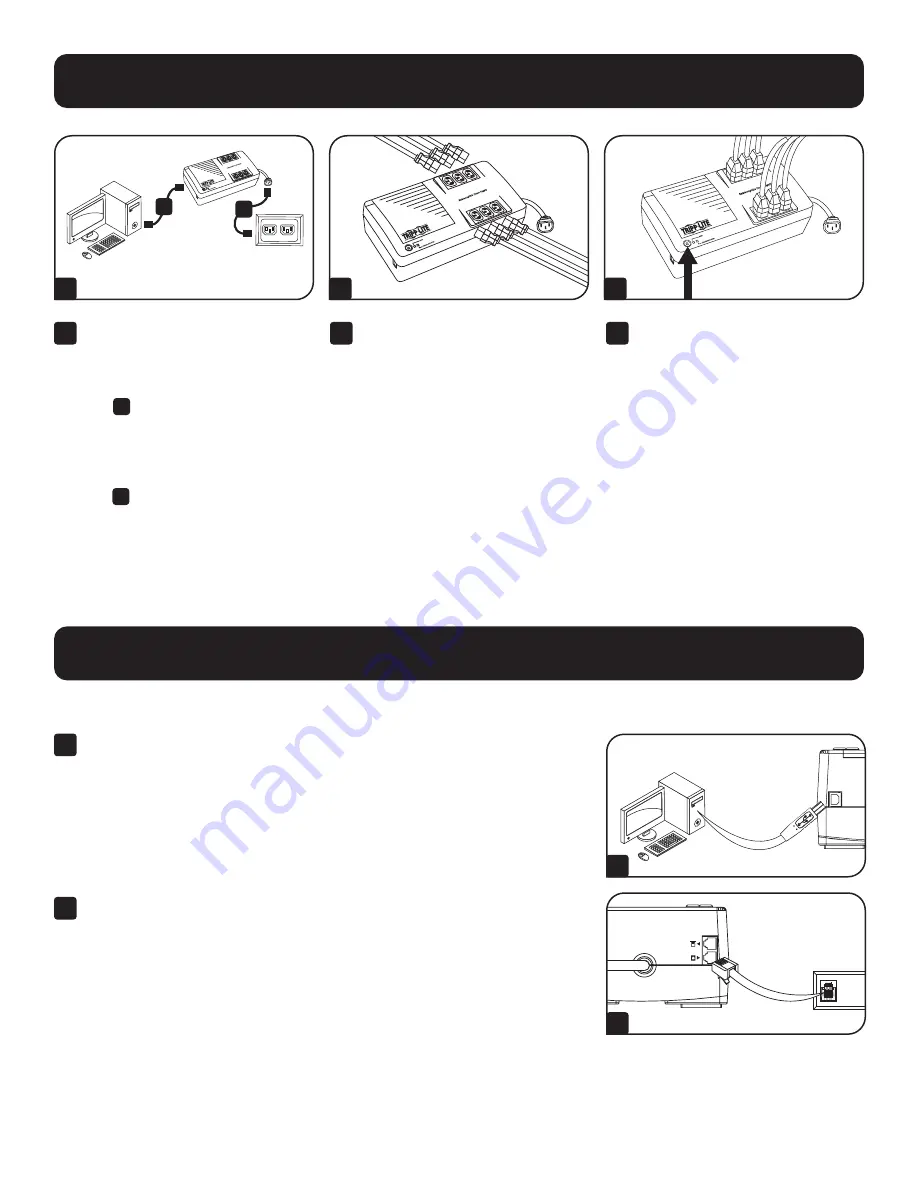
1
Unplug the computer’s power cord
from both your AC outlet and the
computer’s AC input. Insert the
female end (C13) of the computer’s
cord
A
into your UPS’s AC inlet
(C14). Insert the male plug of your
computer’s cord into your AC outlet.
Insert the female end (C13) of the
power cord that came with your
UPS
B
into the computer’s AC
input. Insert the power cord’s male
end (C14) into any of your UPS’s
battery backup outlets.
2
Plug remaining equipment into the
UPS.
3
Push the ON/OFF/TEST button for
one second to turn the UPS on (see
Features Section). Please Note! The
UPS will not turn on automatically
in the presence of live utility power.
Note:
UPS system will function properly
upon initial startup; however, maximum
runtime for the unit’s battery will only
be accessible after it has been charged
for 24 hours.
A
B
Optional Installation
These connections are optional. The UPS will function properly without these connections.
1
USB Communication Port:
This port can connect your UPS to any computer
for automatic file saves and unattended shutdown in the event of a power
failure. Use with Tripp Lite’s PowerAlert software, available as a FREE download
from tripplite.com/support, and the included USB cable to connect your UPS to
your computer.
Note:
This connection is optional. The UPS will work properly without this connection.
2
Telephone/DSL Protection Jacks:
Your UPS has jacks that protect against
surges over a telephone/DSL line. Using telephone data cables, connect your
wall jack to the UPS jack marked “IN.” Connect your equipment to the UPS
jack marked “OUT.” Make sure the equipment you connect to the UPS system’s
jacks is also protected against surges on the AC line.
1
2


