


VMS-1655M
LIT-12013297
19
4. Remove the cap from the sensor.
5. Adjust the hood sash so that the face velocity is at a normal operating value or higher than 60 fpm. Wait until the value stabilizes.
6. Use an external velocity measuring instrument, for example, Shortridge, Alnor or equivalent, to measure the velocity at the face.
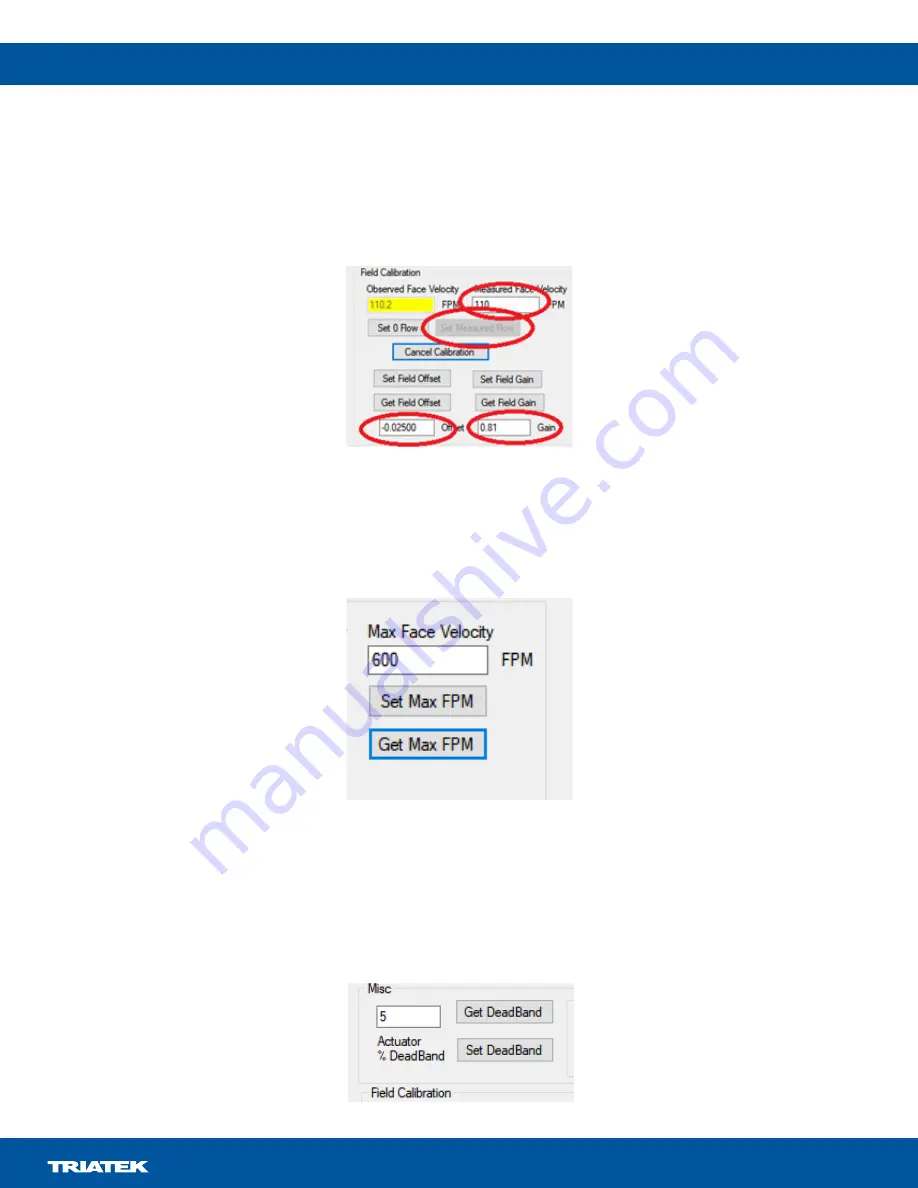
7. Enter the measured face velocity in the
Measured Face Velocity
field and click the
Set Measured Flow
button. The Offset and Gain fields
now update and the data is sent to the sensor. The sensor is now calibrated to local conditions.
Figure 22: Measured Face Velocity
8. At any point, if you need to stop the procedure, click the
Cancel Calibration
button.
Face velocity
As the exhaust is at a constant volume, the face velocity varies as the sash moves up and down. When the sash reaches the closing position,
the face velocity is very high. Use the
Max Face Velocity
setting to limit the internally used limit and the face velocity on display.
Figure 23: Max Face Velocity
Click the
Get Max FPM button
to obtain the current setting. To change the current setting, enter a new value in the text field and click
Set Max
FPM
.
To prevent the baffle actuator from continually adjusting with fluctuating face velocities, You can set a deadband on the motor operation.
The deadband is expressed as a percentage of motor movement. For example, a value of 5 indicates that the motor only moves if its
positional requirement changes more than +5% or -5% from the current position. View or set this value with the
Get
DeadBand
and
Set
DeadBand
fields.
Figure 24: DeadBand