


© Copyright 2012 TRENDnet. All Rights Reserved.
TRENDnet User’s Guide
TV-IP672P / TV-IP672PI
23
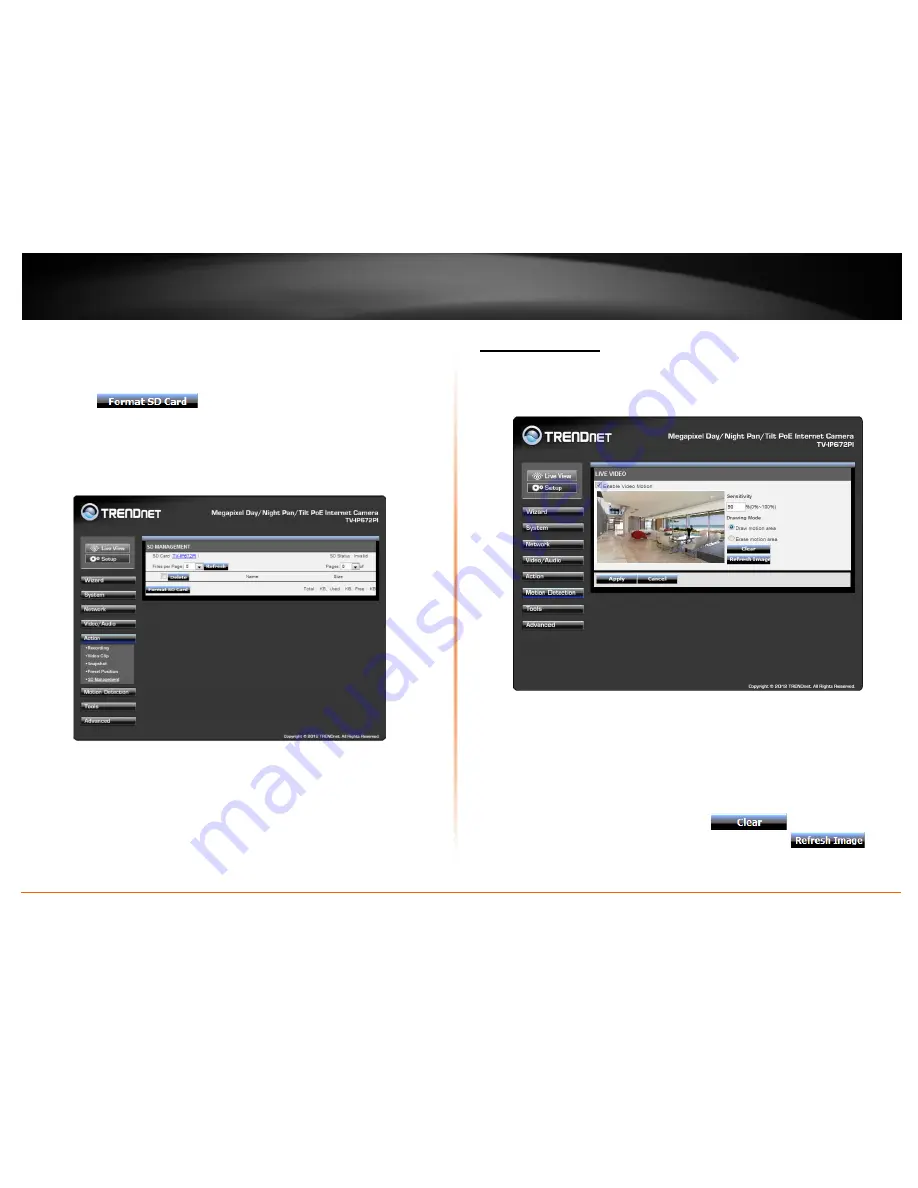
SD Management
These settings control the management of data on the SD card installed on the camera.
Set the files per page – 5-100 files. To delete a file, select the file and click the Delete
checkbox to delete the file. If you wish to format your SC card at any time, click the
Format SD Card
button.
Set Micro-SD card format toFAT32, it is recommended formatting the SD card to make
sure the SD card is compatible with the camera. (Please backup all data on the SD card
to other locations prior to this procedure)
Motion Detection
These settings control the motion detection settings on the camera. Motion detection
allows you to designate an area in the cameras viewing angle to capture motion within
that area. All other areas will not be recorded. This is useful if you want to limit your
recording to a particular size.
Click the
Enable Video Motion
checkbox to activate motion detection. There are two
main fields:
Sensitivity
and
Drawing Mode
.
Sensitivity
is based on the strength of the
motion in the designated area.
0%
means the strength is low and the system moves up
incrementally to
100%
full sensitive strength.
Drawing Mode
provides two options. Once you select
Draw motion area
, take your
mouse and draw a rectangular area where you want the camera to detect the motion. If
you want to remove the motion detection area select
Erase motion area
and the red
blocked area will disappear. If you click the
Clear
button too it will also
remove the motion detection area. If you click the
Refresh Image
button it will do as said. This is useful when the camera is out of focus and comes back
into focus at a later stage. Once you have set all setting options click
Apply
.
Summary of Contents for TV-IP672P
Page 1: ...TRENDnet User s Guide Cover Page...
Page 39: ......


