


© Copyright 2013 TRENDnet. All Rights Reserved.
TRENDnet User’s Guide
TEW750DAP
4
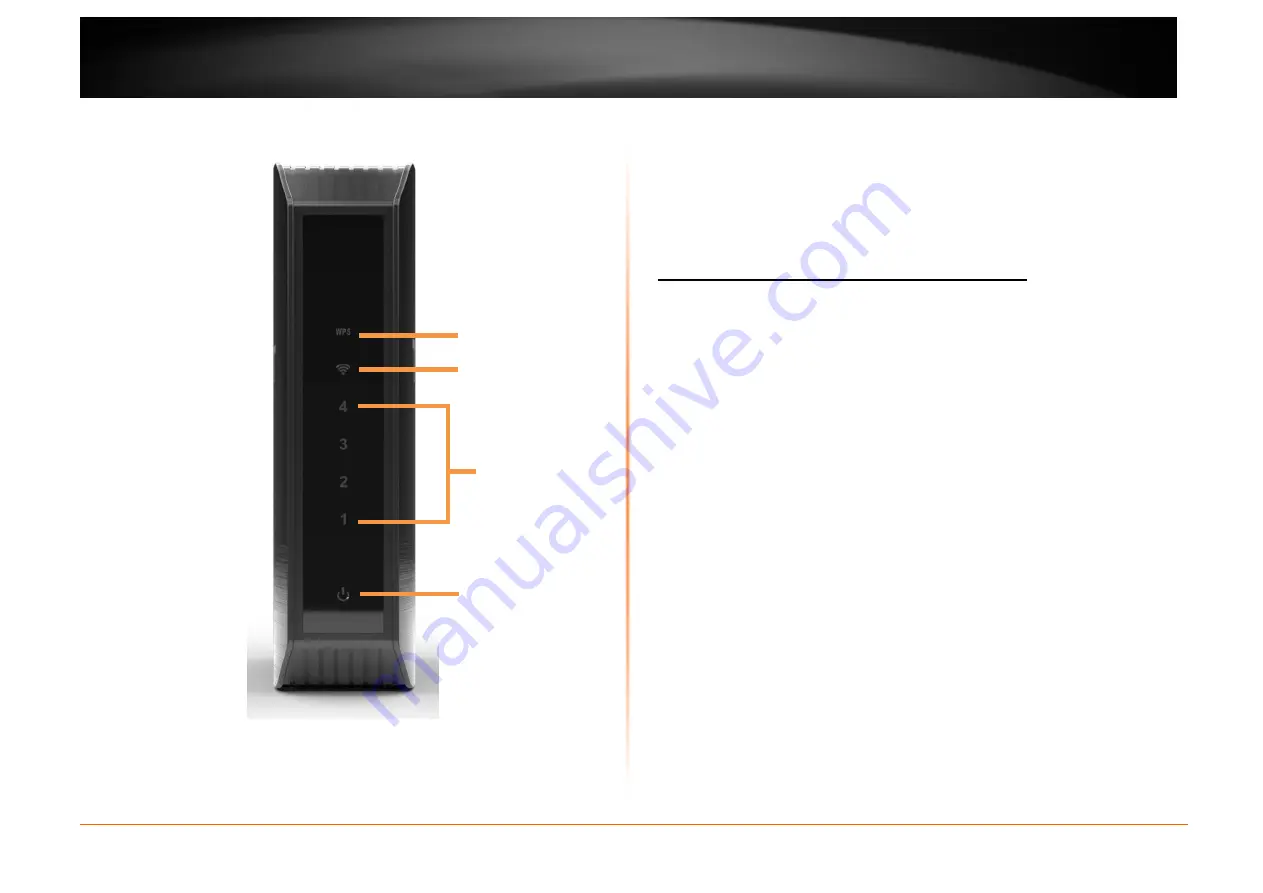
Front Panel View
•
WPS LED – This indicator is turned on and blinks when WPS is
activated. The LED will turn off automatically once WPS is completed.
•
Wireless LAN LED – This indicator lights on when the link is established.
The indicator blinks when there is data transmission.
•
LAN LEDs – This indicator lights when there is a connection on the port.
•
Power LED - This indicator lights on when the AP is powered on.
Installation
Placement of the AP is very important. Do not place the AP in an enclosed area
such as a closet, cabinet, or in the attic or garage.
Wireless Performance Considerations
The wireless AP allows you to access your network using a wireless connection
from virtually anywhere within the operating range of your wireless network.
However, the number, thickness and location of walls, ceilings, or other objects
that the wireless signals must pass through, may limit the range. Typical ranges
vary depending on the types of materials and background RF (radio frequency)
noise in your home or business. The key to maximizing wireless range is to
follow these basic guidelines:
1. Keep the number of walls and ceilings between the AP and other
network devices to a minimum - each wall or ceiling can reduce your
adapter’s range from 3-90 feet (1-30 meters.) Position your devices so
that the number of walls or ceilings is minimized.
2. Be aware of the direct line between network devices. A wall that is 1.5
feet thick (.5 meters), at a 45-degree angle appears to be almost 3 feet
(1 meter) thick. At a 2-degree angle it looks over 42 feet (14 meters)
thick! Position devices so that the signal will travel straight through a wall
or ceiling (instead of at an angle) for better reception.
3. Building Materials make a difference. A solid metal door or aluminum
studs may have a negative effect on range. Try to position access points,
wireless APs, and computers so that the signal passes through drywall
or open doorways. Materials and objects such as glass, steel, metal,
walls with insulation, water (fish tanks), mirrors, file cabinets, brick, and
concrete will degrade your wireless signal.
4. Keep your product away (at least 3-6 feet or 1-2 meters) from electrical
devices or appliances that generate RF noise.
5. If you are using 2.4GHz cordless phones or X-10 (wireless products such
as ceiling fans, lights, and home security systems), your wireless
connection may degrade dramatically or drop completely. Make sure
your 2.4GHz phone base is as far away from your wireless devices as
possible. The base transmits a signal even if the phone in not in use.
WPS LED
Wireless LAN LED
Power LED
LAN LEDs


