background image


© Copyright 2011 TRENDnet. All Rights Reserved. 


11


TRENDnet User’s Guide


TE100-MFP1 


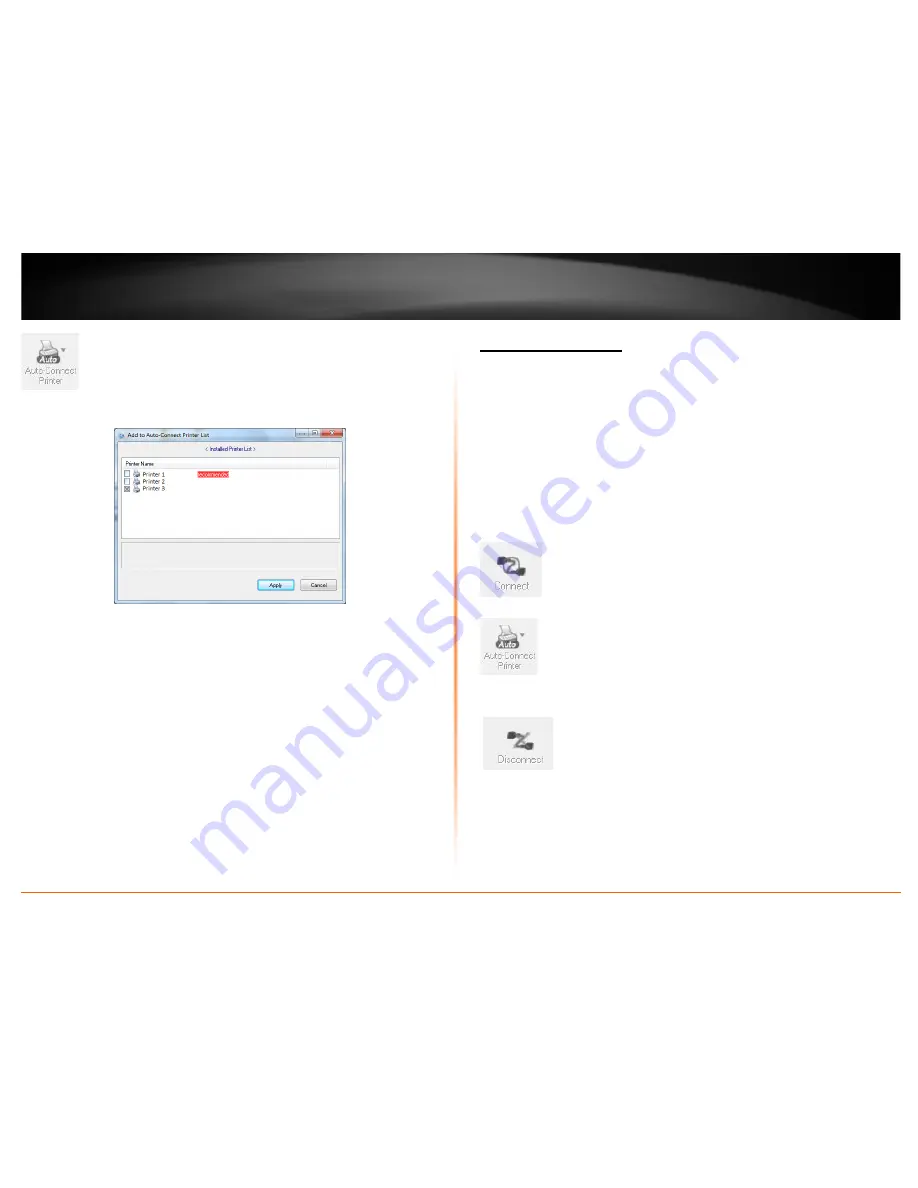
2.  Select the assigned printer to use as the auto connect printer by checking the box. 
3.  When you are finished, click 

Apply

.  


Connect to a Scanner 

Note: 

This function applies to stand-alone USB scanners or USB scanners included with 

multi-function printers. It is required that the scanner drivers are installed before your 

computer is able to scan. Please ensure the scanner drivers are installed. If the scanner 

drivers are not installed, please refer to your printer manufacturer website or 

documentation on where to download and how to install the scanner drivers. Before 

installing the scanner drivers, connect your computer to the printer using the USB utility 

first. Some scanners may require that the scanner is directly connected to the computer 

in order to complete the driver installation. 


1.


Select the scanner or multi-function printer with scanning capability listed in the 

utility. 

2.


Click 

Connect

 to connect your computer to the scanner. 


3.  Once your computer is connected, you can receive scanned files from the scanner. 


4.  After you have finished printing, click 

Disconnect

, to make the scanner available to 

other computers on your network that use the scanner. 


Summary of Contents for TE100-MFP1

Page 1: ...TRENDnet User s Guide Cover Page...

Page 2: ...n Window 6 Configure Server 7 Connect 8 Disconnect 8 Sending a Request to Connect 9 Connect to a Printer 10 Auto Connect Printer 10 Connect to a Scanner 11 Advance Configuration 12 Access the manageme...

Page 3: ...Scan fax and print functionality from any networked workstation Integrated Wireless N provides greater installation flexibility An Ethernet port facilitates optional wired networking Wi Fi Protected...

Page 4: ...y on your router ACT This LED indicators will be blinking green while data is transmitted or received through your router LAN port USB This LED indicator will be blinking green while data is transmitt...

Page 5: ...er On Left position or Off Outer position the device Reset Button Push and hold this button for 15 seconds and release to reset the device to its factory default setting Application Diagram The print...

Page 6: ...power switch to the On position 3 Verify the status LED indicators on the front of the printer server are fully functional Power is solid green and LAN port is solid green 4 Install TRENDnet USB Contr...

Page 7: ...For each computer that requires access to the print server insert the Utility CD ROM into your computer s CD ROM Drive 2 Open the CD contents and locate the TRENDnet USB Control Center Utility Install...

Page 8: ...utility or open the utility if it is already running If the utility is already running and you attempt to close the window it will continue to run in the background and you will find the icon in your...

Page 9: ...ll disable the utility from automatically starting when logging on o Auto Connect Printer List Provides a list of printers installed on your computer Select the printer you would like to assign to the...

Page 10: ...elect the USB device in the list then click the Disconnect button to disconnect your computer to the USB storage device or printer Note The utility will only allow one computer to connect to one USB d...

Page 11: ...r from the device and allow the requesting computer to connect to the USB device Reject Clicking this option will disregard the request and your computer will not be able to connect to the USB MAC OS...

Page 12: ...he utility 2 Click Connect to connect your computer to the printer 3 Once your computer is connected you can send print jobs to the printer 4 After you have finished printing click Disconnect to make...

Page 13: ...refer to your printer manufacturer website or documentation on where to download and how to install the scanner drivers Before installing the scanner drivers connect your computer to the printer usin...

Page 14: ...y find the TE100 MFP1 3 Select the TE100 MFP1 and press Configure Server 4 The user interface of the TE100 MFP1 will open Click on Config 5 Enter the User Name and Password and then click Login By def...

Page 15: ...1 Log into the management page see Access the management page on page 11 2 Click on General tab and scroll down to the UPnP section 3 Select Enable or Disable option 4 Click Apply to save settings Ch...

Page 16: ...3 Under User Name section enter the new login username you would you would like to assign to the user account 4 Under the password section enter the new login password you would you would like to assi...

Page 17: ...settings once the firmware upgrade process is completed 1 Log into the management page see Access the management page on page 11 2 Click on Maintenance tab 3 Click the Download New Firmware button thi...

Page 18: ...rmation can be used when troubleshooting your network Name Device name Access Mode Device mode set IP Address Current IP address assigned to the device Subnet Mask Current subnet mask assigned to the...

Page 19: ...o Administrator user name o Administrator Password User Account List o User account username o User account password o User account Permission Maintenance Restart Reset to Factory Default Download ne...

Page 20: ...g Based on IEEE 802 11n technology IEEE 802 3 10Base T IEEE 802 3u 100Base TX USB 1 1 2 0 LAN Port 1 x 10 100Mbps Auto MDIX Ethernet port USB Ports 1 x USB 2 0 Type A LED Indicators Power WLAN LAN USB...

Page 21: ...tility cannot find my print server What should I do Answer 1 Make sure your router and your network is properly working 2 Verify that your computer is properly connected to your network 2 Make sure th...

Page 22: ...ote If you are experiencing difficulties please contact your computer or operating system manufacturer for assistance How to configure your network settings to obtain an IP address automatically or us...

Page 23: ...click the Apply Now button In MAC 10 5 from the Configure drop down list select Using DHCP and click the Apply button In MAC 10 6 from the Configure drop down list select Using DHCP and click the App...

Page 24: ...duty tax and other fees WARRANTIES EXCLUSIVE IF THE TRENDNET PRODUCT DOES NOT OPERATE AS WARRANTED ABOVE THE CUSTOMER S SOLE REMEDY SHALL BE AT TRENDNET S OPTION REPAIR OR REPLACE THE FOREGOING WARRA...

Page 25: ......

Reviews: