background image

22 • X-MAXX

Once you become familiar with driving your model, you might need 
to make adjustments for better driving performance.

Adjusting Gear Mesh

Incorrect gear mesh is the most common cause of stripped spur 
gears. X-Maxx makes improper gear mesh virtually impossible. A 
pin system helps set the motor in the proper place according to the 
pinion and spur gear that are selected.

To access the pin system, remove the two 3x10mm screws that 
secure the gear cover and remove the gear cover. Next, remove the 
four motor mount screws from the bottom of the chassis and lift off 
the motor. This will expose the pins. Be sure not to lose the pins that 
go between the motor and the chassis. 

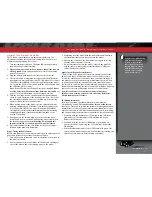
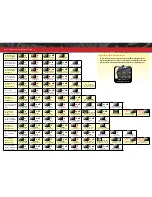
Select the desired gearing from the 
pin location chart. Replace the spur 
and pinion gears as needed. When 
installing the motor, install the pins 
into their proper locations based on 
the gearing that is chosen. The two 
pins on the bottom help to lock the 
motor into the proper place for correct 
gear mesh. Secure the motor in place 
with four screws inserted from the 
bottom of the chassis.

Note: 

Should you choose to do so, you can also set the gear mesh 

manually without the pins. With the pins removed, use the four 
4x16mm button-head cap screws on the bottom to set gear mesh. 
Loosen the four 4x16mm button-head cap screws. Cut a narrow strip 
of notebook paper and run it into the gear mesh. Slide the motor and 
pinion gear into the spur gear. Tighten the four 4x16mm button-
head cap screws, and then remove the strip of paper. You should  
be able to run a fresh strip of paper through the gears without 
binding them.


Adjusting the Slipper Clutch

The model is equipped with an 
adjustable slipper clutch that is 
built into the large spur gear. The 
purpose of the slipper clutch is to 
regulate the amount of power sent 
to the wheels to prevent tire spin. 
When it slips, the slipper clutch 
makes a high-pitch, whining noise.

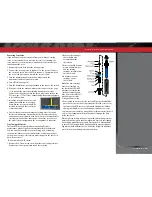
To access the slipper clutch 
assembly for adjustment or 
removal, loosen and remove the 
two 3x10mm cap screws from the 
gear cover. Remove the gear cover. 
Using the included wrench, make 
the necessary adjustment to the 
slipper clutch (B).

To remove the entire assembly, 
loosen and remove the two 
4x12mm button-head cap screws 
and the two 4x30mm button-head 
cap screws from the top shaft 
cover. Remove the cover. The 
entire slipper clutch assembly can 
now be lifted out of the truck for 
adjustment and inspection.

When removing the top shaft 
assembly, be sure to inspect the 
condition of the three bearings 
in the slipper clutch assembly. 
Ensure that they are spinning freely. 
Replace the bearings if they are 
showing signs of damage, wear, or 
are not spinning freely.

Inspect the main input and output 
gears for wear or debris in the 
driveline. Clean and/or replace as 
necessary. Occasionally inspect the 
bearings in the center driveline to 
ensure they are spinning freely. 
Simply remove the upper bulkheads for access.  
(Learn more about adjusting the slipper clutch in the sidebar.)

To achieve a good starting 
point for the slipper clutch 
in this model, remove the 
slipper gear assembly from 
your model (

see Adjusting the 

Slipper Clutch

) and tighten 

the slipper clutch adjusting 
nut clockwise until the 
slipper clutch adjusting 
spring fully collapses (do 
not over tighten), and then 
turn the slipper clutch nut 
counterclockwise 1/8 turn.

Do not run your model with 
the slipper clutch adjusting 
spring fully compressed. The 
minimum recommended 
slipper clutch setting is 1/8 
turn counterclockwise from 
fully compressed. 

BASIC TUNING ADJUSTMENTS

A

B

Slipper Clutch Assembly Removal

3x10mm 

CS

3x10mm 

CS

4x12mm 

BCS

4x30mm 

BCS

4x16mm

BCS

Summary of Contents for XMaxx 77076-4

Page 1: ...owner s manual MODEL 77076 4...

Page 2: ...and fast Be sure and read through the rest of the manual to learn about important safety maintenance and adjustment procedures Turn to page 8 to begin 3 BEFORE YOU PROCEED 4 SAFETY PRECAUTIONS 6 TOOL...

Page 3: ...cal assistance is also available at Traxxas com support You may also e mail customer support with your question at support Traxxas com Join thousands of registered members in our online community at T...

Page 4: ...chemical required to use their products By the act of operating using the product the user accepts all resulting liability and releases Traxxas and all Traxxas suppliers and component makers of any a...

Page 5: ...driver s responsibility to stop immediately to prevent the battery pack from being discharged below its safe minimum threshold Low Voltage Detection is just one part of a comprehensive plan for safe L...

Page 6: ...spacers 2 5mm L wrench Slipper clutch wrench 2 batteries with Traxxas High Current Connectors Traxxas Power Cell LiPo batteries recommended 4 AA alkaline batteries LiPo battery charger EZ Peak Dual p...

Page 7: ...Battery Compartment LED Light Pipe Battery Hold Down Receiver Box Front Bumper Toe Link Upper Suspension Arm Rear Shock Tower Traxxas High Current Connector Chassis Front Shock Tower Caster Block Stee...

Page 8: ...nce from outside sources 3 Install batteries in the transmitter See page 12 8 Detail your model See sidebar page 9 The transmitter requires 4 AA alkaline batteries sold separately Apply other decals i...

Page 9: ...ent with intelligent electronics that energize the electromagnetic windings in sequence to provide rotation Opposite of a brushed motor the brushless motor has its windings coils on the perimeter of t...

Page 10: ...steering instructions to your model Trim The fine tuning adjustment of the neutral position of the servos made by adjusting the throttle and steering trim knobs on the face of the transmitter Note The...

Page 11: ...f Button Traxxas High Current Connector Male to Battery TRANSMITTER AND RECEIVER Steering Trim Multi Function Knob Throttle Trigger Throttle Neutral Adjust Steering Wheel Channel 1 Steering Servo Veli...

Page 12: ...LiPo and stock gearing the top speed is 35 mph 2S LiPo performance will be much slower SELECTING A CHARGER FOR YOUR MODEL Make certain you choose the correct type of charger You MUST use a LiPo charg...

Page 13: ...he VXL 6s The Traxxas connector s gold plated terminals with large contact surfaces ensure positive current flow with the least amount of resistance Secure long lasting and easy to grip the Traxxas co...

Page 14: ...lashing flash red indicates a failure to link If you miss it simply turn off the transmitter and start over Always turn on the transmitter before plugging in the battery RADIO SYSTEM BASIC ADJUSTMENTS...

Page 15: ...Range Testing the Radio System Before each running session with your model you should range test your radio system to ensure that it operates properly 1 Turn on the radio system and check its operatio...

Page 16: ...n set up and installed from the factory The antenna is secured by a 3x4mm set screw To remove the antenna tube simply remove the set screw with the included 1 5mm wrench When reinstalling the antenna...

Page 17: ...Release the EZ Set button after the number of blinks for the mode you wish to select Note If you missed the mode you wanted keep the EZ Set button pressed down and the blink cycle will repeat 4 The LE...

Page 18: ...on light Low Voltage Detection is ACTIVATED LiPo setting Solid Red VXL 6s power on light Low Voltage Detection is DISABLED NiCad NiMH setting Never use LiPo batteries while Low Voltage Detection is di...

Page 19: ...ntrolled by radio it is subject to radio interference from many sources beyond your control Since radio interference can cause momentary losses of control allow a safety margin of space in all directi...

Page 20: ...cut in the tires Cut two small holes 3mm or 1 8 diameter in each tire Each hole should be near the tire center line 180 degrees apart 3 Confirm that the receiver box O ring and cover are installed co...

Page 21: ...he ability to maintain a watertight seal in the box The patent pending wire clamp feature gives you the ability to also install aftermarket radio systems and maintain the watertight features of the re...

Page 22: ...ge spur gear The purpose of the slipper clutch is to regulate the amount of power sent to the wheels to prevent tire spin When it slips the slipper clutch makes a high pitch whining noise To access th...

Page 23: ...X shocks greatly influence handling Periodic maintenance may be required to maintain optimal performance You can also tune your shocks to your driving style or running environment Whenever you rebuild...

Page 24: ...and any signs of stress or bending Replace components as needed Steering Over time you may notice increased looseness in the steering system The toe links may wear out from use Traxxas Part 7748 Repla...

Page 25: ...d into place Removing the rear suspension module 1 Disconnect the three motor wires 2 Carefully slide the motor temperature sensor wire out from under the motor s heat sink 3 Remove the two 3x20mm but...

Page 26: ...chart When using higher gear ratios it is important to monitor the temperatures of the battery motor and speed control If the battery is extremely hot 150 F and or the motor is too hot to touch 200 F...

Page 27: ...benefit from higher viscosity oil when climbing or racing on low traction surfaces Note Heavier oil will allow power to be transferred even with one or more tires off the ground This can make the veh...

Page 28: ...travel applied to steering Turning the Multi Function knob fully clockwise will deliver maximum steering throw turning the knob counterclockwise reduces steering throw Note Turning the dial counterclo...

Page 29: ...de with the Multi Function knob are overlaid on top of each other For example if you assign the Multi Function to adjust Steering Percentage and set it for 50 then reassign the knob to control Steerin...

Page 30: ...o select any model from a list of model memory entries The transmitter and receiver do it all for you automatically To activate Model Lock 1 Switch on the transmitter and receiver you wish to lock 2 P...

Page 31: ...shows how to navigate through the TQi transmitter s various settings and functions Press and hold MENU to enter the Menu Tree and use the following commands to navigate through the menu and select op...

Page 32: ...en LED blinks Press SET red LED blinks x3 Press MENU twice red LED blinks x3 Turn steering wheel to desired max left and right travel x8 Press SET to save each position Turn steering wheel to test set...

Page 33: ...averages Use the recording function to document your dashboard view with sound so that you can keep your eyes on your driving and not miss a single apex Manage up to 30 Models with Traxxas Link The TQ...

Page 34: ...6250 TRAXXAS WAY McKINNEY TEXAS 75070 1 888 TRAXXAS 151215 KC2365 R00 77076 4 OM EN owner s manual...

Reviews: