8
7
Installers must verify that the supporting surface will safely support the combined weight of
the equipment and all attached hardware and components.
WARNING
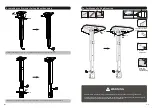
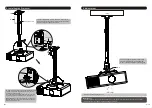
3b. For Solid Brick and Concrete Mounting
1
2
Drill four
pilot holes
Screw the
ceiling plate
onto the ceiling
60mm
(
2.4"
)
60mm
2.4"
(
)
60mm
(
2.4”
)
ø 10
m
m
(
ø 3/8"
)
Mark the exact
location of
mounting
holes
W-B
W-C
W-A
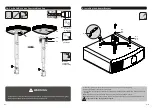
4. Installing the Adapter Bracket
Tighten all screws but do not over tighten.
•Place the projector bracket as close as possible to the projector’s center of gravity.
•Position the holes of arms over mounting holes.
• In case the mounting legs do not work for your projector model, please replace them with additional legs
provided.
Note:
If there are only three mounting holes using three arms of the adapter bracket.
Important:
If the projector does not have at least three mounting holes, do not use this adapter bracket.
M-C
M-D
M-E
M-F
M-G
M-H
M-M


