background image

Page 8 of 33 – S5 Wireless Microphone Installation Guide Rev 1.2

2. To change the selected Bank

Press and hold the “Jog-wheel” for approximately 3 seconds if the receiver is
not in `34as to enter the 

MAIN MENU

. You will enter the 

MAIN MENU

immediately if the receiver is in mute.

With 

FREQ SELECT

 underlined press

the “Jog Wheel”. This will give you the
next menu.

Rotate the “Jog Wheel” until 

BANK

 is

underlined and press to give you the
Bank selection screen below right.

Rotate the “Jog Wheel” to underline a
new bank, then press to select.

Press to select the frequency shown or
rotate to change to another frequency
within this bank.

Press again with 

ACCEPT 

underlined

to accept the new bank. (See the
attached frequency table).

Go to step 4 to program the transmitter
via the receiver infra-red port.

Summary of Contents for S5

Page 1: ...T T Tr r ra a an n nt t te e ec c c S S S5 5 5 W W Wi i ir r re e el l le e es s ss s s M M Mi i ic c cr r ro o op p ph h ho o on n ne e e S S Se e er r ri i ie e es s s Installation Guide ...

Page 2: ...ncy Selection 11 14 Miscellaneous Settings 15 16 Handheld Transmitter Set Up 17 18 Beltpack Transmitter Set Up 19 Operating Hints 20 Troubleshooting Guide 21 22 S5 System Part Numbers 23 24 Rack Mount Kit 25 Multi Channel Configuration with ADU 26 Antenna Head Amplifiers 27 28 Mini XLR Wiring Connections 29 30 Technical Specifications 31 Warranty 32 CE Declaration of Conformity WEEE Statement ...

Page 3: ... is a professional UHF wireless microphone system with features including 24 channel simultaneous operation S5 3 12 channel 10 preset banks including 1 custom user S5 3 9 Banks True dual receiver diversity to minimise drop outs Intuitive LCD and operating system on both receiver and transmitter Infra red programming for fast system set up Software transmitter function locks Headphone monitoring as...

Page 4: ...posing the electronics or modify the unit in any way Do not handle the mains lead with wet hands Never pull the cord of the AC adaptor always grasp the main body of the unit when connecting disconnecting to an AC power outlet Route the AC power lead in such a way that it is not likely to be stepped on or tripped over Do not use if the AC power lead becomes damaged A damaged AC lead may cause fire ...

Page 5: ...Page 4 of 33 S5 Wireless Microphone Installation Guide Rev 1 2 ...

Page 6: ...ing Started The S5 series is a high quality fully featured wireless microphone system with many features including an intuitive operating system To enable you to get started we recommend you initially set up the system as outlined in the next few pages Receiver Set Up ...

Page 7: ...l on off switch surround is illuminated red 3 Connect the rear panel audio output from either the jack or XLR to your mixing console or amplifier Note the XLR balanced output can be switched for either mic or line The system can be also monitored from the headphone socket using the Jog Wheel to adjust the volume level 4 Switch the On Off switch to the On position The switch surround will now be il...

Page 8: ...for approximately 3 seconds if the receiver is not in mute to enter the MAIN MENU You will enter the MAIN MENU immediately if the receiver is in mute With FREQ SELECT underlined press the Jog Wheel Rotate the Jog Wheel till BANK is underlined and press Press to select BANK1 Rotate the Jog wheel to change the channel Finally press to select the new frequency See the attached frequency table ...

Page 9: ...nderlined press the Jog Wheel This will give you the next menu Rotate the Jog Wheel until BANK is underlined and press to give you the Bank selection screen below right Rotate the Jog Wheel to underline a new bank then press to select Press to select the frequency shown or rotate to change to another frequency within this bank Press again with ACCEPT underlined to accept the new bank See the attac...

Page 10: ...art flashing Change the second part of the new frequency as above You can then change each letter of the user name in the same way All ASCII characters are available for the user name If you wish to exit this menu at any time press and hold the Jog Wheel Press the Jog Wheel for 1 second to exit then rotate till ACCEPT is underlined and press to select the new custom frequency and user name Go to t...

Page 11: ...the Jog Wheel Align the transmitter and receiver infra red windows with the transmitter no more than 15 cm from the receiver With SEND underlined press the Jog Wheel and wait a few seconds All frequencies in the bank selected will be transferred to the transmitter and its current frequency will be set to match the receiver s current frequency The receiver will return to its main display For S5 5 I...

Page 12: ...tween 1 and 10 then press A marker shows the current mute setting in relation to the RF A and B scales Please note high mute settings will decrease range and low mute settings increase the interference potential We recommend a setting of 4 to 6 The mute level changes in real time as the setting is varied Audio Processing S5 5 only Press the Jog Wheel to enter the MAIN MENU Rotate till RX SET is un...

Page 13: ...the main screen automatically if there is no user intervention for approximately 2 seconds Any change you have made will be saved Scanning The scanning feature can determine which frequencies are currently being used in the vicinity of your receiver From the main screen press the Jog Wheel to go to MAIN MENU rotate till FREQ SEL is underlined and push Then rotate till SCAN is underlined and push T...

Page 14: ...en Phantom Power DC added to the antenna inputs for powering head amplifiers The default factory setting is OFF Push the Jog Wheel to show the MAIN MENU Rotate the Jog Wheel to underline RX SETTINGS and push to show the next menu Rotate to underline PHANTOM and push Press to check the PHANTOM PWR box Rotate and then press to choose EXIT and return to the main screen LCD Contrast Push the Jog Wheel...

Page 15: ...e the Jog Wheel to underline TX SET and push to select this option Rotate the Jog Wheel till LOCK is underlined and push to select this Push the Jog Wheel to check the box for POWER if required or rotate to go to FREQ GAIN and push to check this box if required Rotate till EXIT is underlined and push You will then have the option to SEND the TX Locks you have selected to a transmitter or CANCEL If...

Page 16: ... cap is illuminated 4 Check For Received Signal Check that the display indicates the same channel as the receiver The receiver should now show a received signal on its RF bar graphs and after 20 seconds the transmitter battery status 5 Gain Adjustment Turn on the transmitter and wait for the flashing decimal point on the LCD to stop flashing Press the Up or Down buttons to increase or decrease the...

Page 17: ...of 33 S5 Wireless Microphone Installation Guide Rev 1 2 7 Mute Switch Incorporated in the handheld end cap is a Power On LED and Audio Mute switch To mute the audio flick the switch towards the LED Power On LED ...

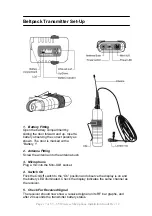
Page 18: ...d with a Battery 2 Antenna Fitting Screw the antenna into the antenna bush 3 Microphone Plug a mic into the Mini XLR socket 4 Switch On Flick the On Off switch to the On position and observe the display is on and the battery LED illuminated Check the display indicates the same channel as the receiver 5 Check For Received Signal The receiver should now show a received signal on its RF bar graphs an...

Page 19: ...hing Press the Up or Down buttons firmly to increase or decrease the AF gain There are 10 steps with 0 being minimum 7 Frequency Adjustment Turn the transmitter on and adjust the frequency while the decimal point is flashing approx 6 secs via the Up or Down buttons When the correct frequency is selected turn the transmitter off then on again to activate the newly selected channel ...

Page 20: ...smitter antenna directly against the body or the hand This will reduce the operating range Ensure the correct setting of the Mute for effective control of interference whilst the transmitter is turned off The default is normally 5 but may need to be increased with multi channel set ups Do not mix separate Banks in multi channel set ups Use the SCAN function to check for external interference Set t...

Page 21: ...k the receiver XLR mic line switch for a correct match to your Mixer Amplifier Reduce the gain of the transmitter if the VU meter shows over 6dB AF Signal low level with high background noise Adjust the transmitter gain so the VU bar graph shows 0dB with 6dB peaks External Head amplifiers not operating Check for shorts in the leads and ensure the receiver PHANTOM PWR is switched on via the RX SETT...

Page 22: ...le UK 830 865 MHz S5 5 HC D3U UHF Handheld System c w Condenser Capsule UK 830 865 MHz S5 5 L D3U UHF Lapel System c w Lavalier Microphone UK 830 865 MHz S5 5 LH D3U UHF Aerobic System c w Aerobic Headmic UK 830 865 MHz S5 5 RX D3U UHF Receiver UK 830 865 MHz S5 5 HDX D3W UHF Handheld Transmitter Dynamic Cardioid Capsule n a 830 865 MHz S5 5 HCX D3W UHF Handheld Transmitter Condenser Capsule n a 8...

Page 23: ... LH B1A UHF Aerobic System c w Aerobic Headmic AU 722 752 MHz S5 5 RX B1A UHF Receiver AU 722 752 MHz S5 5 HDX B1W UHF Handheld Transmitter Dynamic Cardioid Capsule n a 722 752 MHz S5 5 HCX B1W UHF Handheld Transmitter Condenser Capsule n a 722 752 MHz S5 5 LTX B1W UHF Beltpack Transmitter c w Lavalier Microphone n a 722 752 MHz S5 5 HD B1S UHF Handheld System c w Cardioid Dynamic Capsule US 722 7...

Page 24: ...site sides of each receiver case and fit the angled rack brackets using the supplied screws There are 3 of these supplied with each receiver 2 Remove the 2 plastic plugs from the top of the receiver lid and fit a metal joining strip 2 supplied per receiver in the slots at the side of each lid of the 2 receivers Carefully fit the M3x6 screws 1 supplied with each receiver coloured black 3 Fit 2 join...

Page 25: ...he small angled rack bracket using the supplied screws There are 3 of these supplied with each receiver 2 Unscrew 3 x lid retaining screws M3x6 from the front right side of the chassis and fit the supplied long angled bracket using the screws supplied 3 Fit the 2 supplied antenna extension cables into the front panel long bracket and tighten their TNC nuts Screw the TNC plugs of each into the ante...

Page 26: ... more channels the Trantec Antenna Distribution Unit ADU is used This allows the use of only one set of antennae to feed several receivers Each ADU is capable of driving 4 units simultaneously with separate outputs for additional ADU units The diagram below shows a typical 12 channel installation Each ADU comes complete with all necessary connecting leads for 4 channels A 19 rack tray is available...

Page 27: ...ble insert a head amplifier attenuation 830 MHz is approx 5 dB per 10 M 2 For cable runs of greater than 20 M and less than 40 M when using RG213 cable insert a head amplifier attenuation 830 MHz is approx 2 5 dB per 10 M 40 M is the recommended maximum length of cable run 3 Ensure that transmitters are always at least 3 M from the remote receiver antennae at any time 4 Always test the installatio...

Page 28: ...S5 Wireless Microphone Installation Guide Rev 1 2 Mini XLR Wiring Connections Beltpack Audio Mini XLR Connections 1 Ground 2 Bias 5 V 3 AF Hi Z 4 AF Load Resistor Solder connections for Mini XLR flying socket 1 3 2 4 ...

Page 29: ...und Pin 2 5 V Pin 3 AF Pin 4 Internal AF load resistor Link pins 3 and 4 as illustrated Hi Impedance Guitar Instrument Pin 1 Ground Pin 2 5 V Not connected Pin 3 AF Hi Z Pin 4 Not connected Connect screened cable to pin 1 ground and pin 3 AF Hi Z Lo Impedance Microphone No Phantom Pin 1 Ground Pin 2 5 V Not connected Pin 3 AF Hi Z Pin 4 Internal AF load resistor Link pins 3 and 4 and connect scree...

Page 30: ...t 9 dBm max Antenna Phantom 9 V 60 mA short circuit protected on each RF port Bank Specification 10 banks x 24 channels S5 5 6 banks Japanese version 9 banks x 12 channels S5 3 Infra Red Link Range 15 cm max Computer Interface Computer monitoring via rear panel USB interface Power Consumption 300 mA 12 Vdc nominal Transmitter Specification Power Supply Single Alkaline AA cell 1 5 V nom Power consu...

Page 31: ...edance 600 Ohms 30 at 1 kHz Lavalier Microphone Specification Directional Characteristics Omni Directional Frequency 50 Hz 18 kHz Element Back Electret Condenser Sensitivity 54 dB 3 dB Impedance 4 kOhms 30 at 1kHz Dimensions 10 5 x 24 7 mm Cable 1 3 M x 2 2 mm Connector 4 Pin Mini XLR Weight 20 5 g excl accessories Due to our continual policy of research and development we reserve the right to alt...

Page 32: ...vice at its discretion BBM offers no warranty whatsoever under the following circumstances mechanical damage incorrect operation incorrect voltage wear and tear and defects that were known at the time of purchase In addition the warranty will be null and void in the event of unauthorised repair or modification including removal of any of its covers E OE Due to our continual policy of research and ...

Page 33: ...Before using this wireless microphone system please observe the requirements of each country with respect to frequency allocations and individual licensing requirements WEEE Statement This symbol indicates that this piece of electrical electronic equipment must be disposed of separately from normal waste at the end of its operational life Please dispose of this product by taking it to your local r...

Reviews: