background image

 8


Installation (continued)

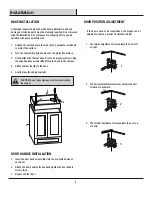
MOUNTING THE UTILITY SINK

SE

ALA

NT

1 .  Carefully place a bead of sealant all around the top of the 

cabinet .

2 .  Ease the sink onto the cabinet, and ensure it is placed 

evenly and centered on the cabinet . Wipe off any excess 
sealant . Use masking tape to hold the unit in place until the 
sealant dries .

PLACEMENT

Move the assembled unit to its final location . Final hook up of the supply lines and drain system can now be completed .

SUPPLY LINES (NOT INCLUDED)

The supply lines that attach the faucet to the household 
water system, are not supplied with this unit . They need to be 
purchased separately .

Follow the manufacturers instructions for proper installation of 
the supply lines .

Maintenance

CARTRIDGE REPLACEMENT

2

1

7

6

3

4

5

To replace the cartridge, please follow these steps:

1 .  Turn off the water supply to the faucet .

2 .  Remove water indicator (7) and screw (5) with an Allen key .

3 .  Remove the handle (6) .

4 .  Screw off the cartridge cover (4) .

5 .  Remove the gasket (3) .

6 .  Pull out the cartridge (2) by hand .

7 .  Click in the new cartridge .

8 .  Place the gasket (3) back in its original position .

9 .  Screw on the cartridge cover (4) . Do not over tighten .

10 .  Place the handle (6) over top and secure the screw (5) with 

an Allen key, replace the water indicator (7) .

Summary of Contents for QL044

Page 1: ...Owner s Manual Model No QL044 Utility Sink with faucet and storage cabinet...

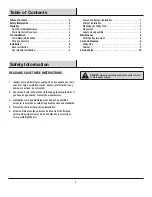
Page 2: ...D SAVE THESE INSTRUCTIONS 1 Inspect your unit before proceeding Once you unpack your unit check for chips scratches cracks dents or scuff marks If any damage is noticed do not install 2 Use this unit...

Page 3: ...t be held liable for inconvenience caused by loss of use of this product costs incurred for labour or materials removal and installation of replacement units or any other incidental or consequential d...

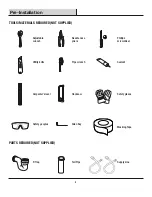
Page 4: ...D NOT SUPPLIED Adjustable wrench Needle nose pliers Phillips screwdriver Utility knife Pipe wrench Sealant Carpenter s level Hacksaw Safety gloves Safety googles Allen Key Masking Tape PARTS REQUIRED...

Page 5: ...tion continued PACKAGE CONTENTS AA A B C D E F H G K J BB FRONT Part Description Quantity A Door Handles 2 B Cabinet Feet 4 C Cabinet Base 1 D Utility Sink 1 E Cabinet 1 F Strainer Basket 1 G Strainer...

Page 6: ...tallation Do not dispose of packaging before you are satisfied with your new utility sink 1 Unpack the unit and place the sink D on a blanket or cardboard to protect the surface 2 Turn the cabinet E u...

Page 7: ...sing and up through the centre faucet mounting hole Connect the spray hose to the faucet and tighten with a wrench 3 Install the new faucet on sink with hot H to the left and cold C to the right From...

Page 8: ...ousehold water system are not supplied with this unit They need to be purchased separately Follow the manufacturers instructions for proper installation of the supply lines Maintenance CARTRIDGE REPLA...

Page 9: ...of stain Do not allow your acrylic surface to come into contact with products such as acetone nail polish remover nail polish dry cleaning solution lacquer thinners gasoline pine oil etc Use caution...

Page 10: ...day Identify the required part s and have the part number s ready H J AA BB A B C D E G F Part Description Code Quantity A Door Handles QHL132 2 B Cabinet Feet QHL107 4 C Strainer Basket QHS101 1 D St...

Page 11: ...KB COM Please contact customer service conglomkb com or 1 877 333 0098 for further assistance Imported by St Laurent Quebec H4S 2C3 1 877 333 0098 customer service conglomkb com www conglomkb com Made...

Reviews: